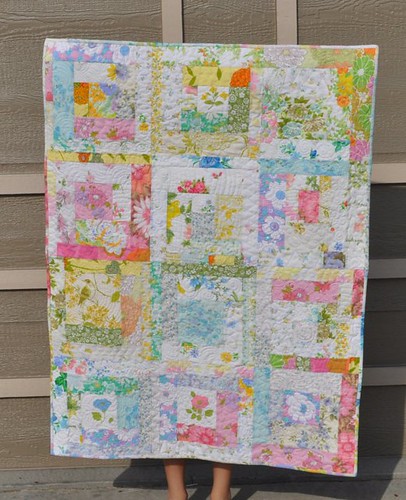
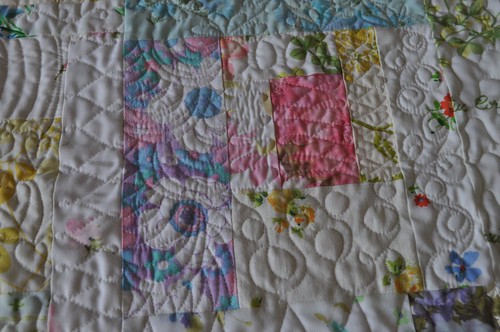
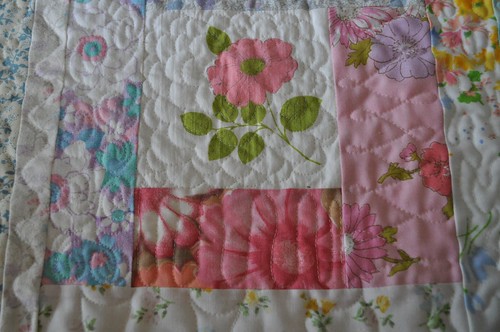
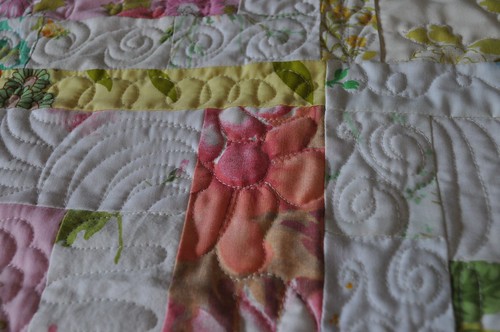
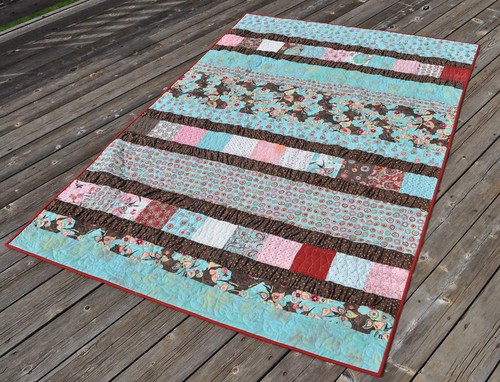
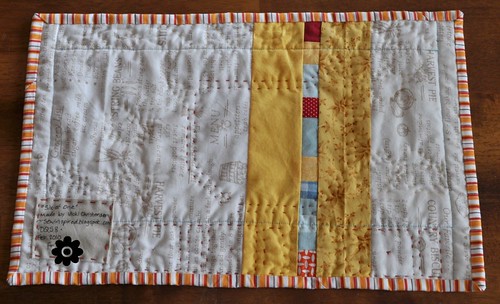
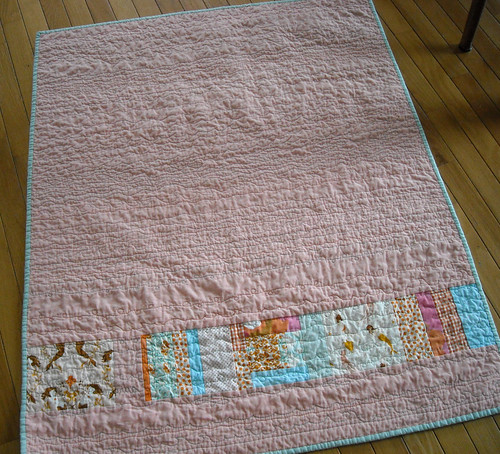
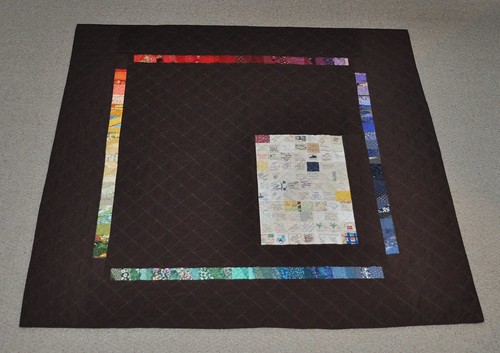
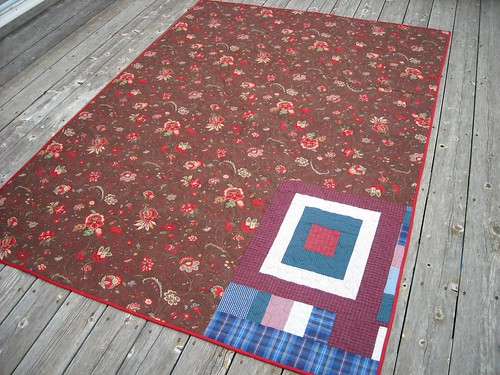
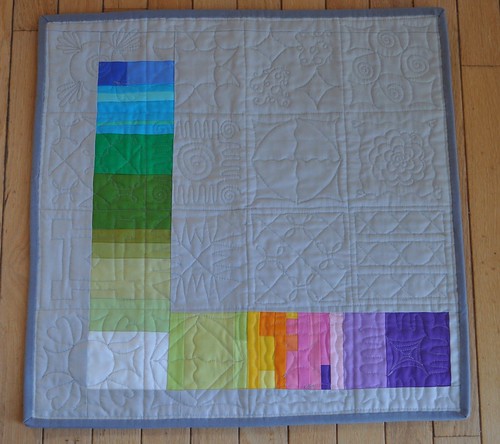
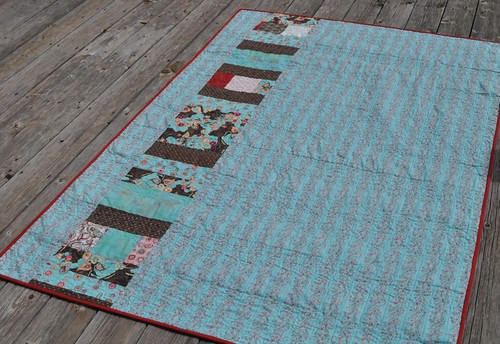
I finished up the binding on this quilt the other day, and this morning I saw a post about the Summer Fair Quilt Show, hosted by Gen X Quilts, so I decided to join in the show!
I made this quilt top last year, I think in March, just for fun. Did the quilting over a few days during the last couple weeks, and finished it yesterday. It's 36" x 48", and it's just going to hang around at our house for now.
Go visit the fair, and see all the cool quilts! There are recipes, too!
****
I've been working on some more Farmer's Wife quiltalong blocks, and blocks for my doll quilt swap too. I guess I'll do a quilt block post soon here.
****
It has been super hot here for days, no, weeks. (I don't watch the weather, but other people in this house do, and they are saying we've had something like over 30 days with a heat index over 100 so far this summer). My 11 year old just got out his 5th grade solar cooker and I think he's making hot dogs for dinner tonight.
Wednesday, July 27, 2011
Monday, July 25, 2011
Go! Baby Winner
Thanks so much to everyone who stopped by to enter the Go! Baby fabric cutter giveaway. I really wish I had more than one to give away, but I don't.
Anyway, I'm happy to announce that the winner was commenter #37, Sharon, who said, "I would use the strip cutter to make a jelly roll race quilt." Congratulations, Sharon!
Here are some burp cloths I made after I got my Go! Baby; the pic is a bit dark but I think they turned out pretty cute! The circles are just raw edge appliqued on, and the tumbler strip has the edges all turned under, with a couple ribbon loops for added cuteness. The burp cloths are double thickness of prewashed white flannel, 10" x 15", and they are turned and topstitched.
Thursday, July 21, 2011
Machine Quilting Sampler
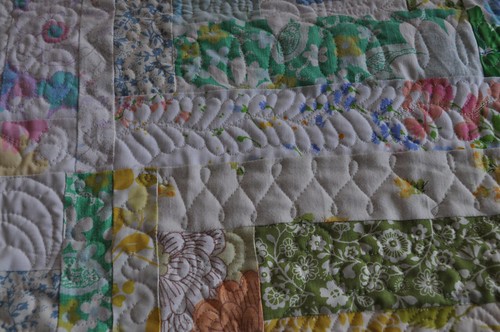
I finished up the quilting on this quilt today. I decided to have it be kind of a machine quilting sampler. There are 12 blocks, and within each block, each strip of fabric is quilted with a different design. I did repeat designs in different quilt blocks, though. I still need to bind it but wanted to show you some of the quilting:
Now I need to figure out what to do next. I will probably get going on some Farmer's Wife quilt blocks, and make the binding for this quilt. I have a baby quilt that I really ought to make soon as well. :) (My sister T is having her 2nd baby girl within the next month!)
p.s.... Don't forget to enter my giveaway for an Accuquilt Go, Baby! :)
I really like how that feather turned out. I quilted it after watching some Karen McTavish videos.
The loopy zigzag (right below the feather) is repeated in probably every block in this quilt.
This photo is a little more close up than the others, and you can see some less attractive quilting here too. That's ok... it's all part of the process. I learned a lot while quilting this quilt, my skills improved (you get better with every quilt you quilt, you know) and it was fun, too! I will probably do a sampler like this sometime again. The loopy zigzag (right below the feather) is repeated in probably every block in this quilt.
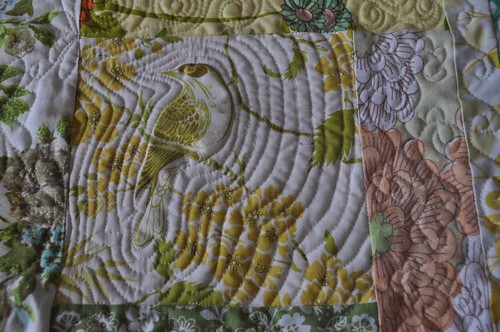
Echo quilting around a bird. It isn't perfect, but that's ok.
I am in love with this sort of fan quilting thing I did in the purple/pink strip above. I tried some loopy hearts up there too, should have done that one more than once.
I did a kind of carnation filler in the center square of this block.
Now I need to figure out what to do next. I will probably get going on some Farmer's Wife quilt blocks, and make the binding for this quilt. I have a baby quilt that I really ought to make soon as well. :) (My sister T is having her 2nd baby girl within the next month!)
p.s.... Don't forget to enter my giveaway for an Accuquilt Go, Baby! :)
Wednesday, July 20, 2011
Go! Baby Giveaway!
To enter, leave one comment on this blog post (one entry per person, please). Let me know something you'd like to make using the Go! Baby, if you win, ok? I will choose the winner on Monday, May 25 (oops, I meant July 25! The summer has gone by so fast!). Make sure I have a way to contact you; if you're a no-reply blogger, include your email address in your comment. I will email the winner
Here's a link to my zigzag mug rug tutorial, made with my Go! baby triangle die, and if you're new here, I wanted to let you know I have lots of other free tutorials as well, for quilting as well as clothing sewing projects and techniques.
Have a great day, and good luck!
Monday, July 18, 2011
Zigzag Mug Rug Tutorial!
Today I have a fun little project to share, but first I want to tell you about my new toy.... I got an Accuquilt Go! baby fabric cutter a few weeks ago (right before my vacation). I picked three dies, and I decided to go with ones that aren't necessarily very easy to do with a regular ruler and rotary cutter. I got a circle die that has three sizes of circles, an equilateral triangle die that also has three sizes, and the 3 1/2" tumbler die. The Go! baby is really easy to use, and my kids were pretty much fighting for turns at cranking the handle.
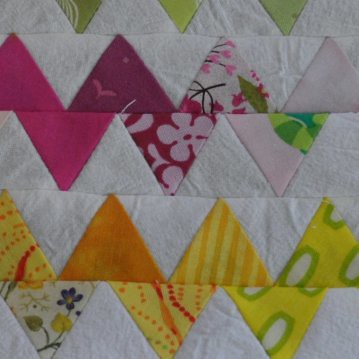
I opened my Go! baby as soon as it arrived and started cutting triangles. I've been wanting to make a zigzag quilt for a while and that was what I had in mind as I cut pink, green, yellow, and white triangles from my scrap bags. (I am pretty sure that the idea of making zigzags from these kind of triangles came from my friend Lorilee, and I think it turned out pretty well!) I used the medium triangles and they finish really small (about 1" on each side) but that's ok because this is a small project.
Step 1: Use the Go! baby to cut 14 medium triangles in each of 3 colors. Also, cut 45 white triangles. Sew the triangles into rows of 7 colored triangles alternating with white triangles, and make sure a white triangle is at each end of each row.
Step 2: Sew the rows together. I started by sewing the pairs of pink, green, and yellow rows together, making sure the triangles were offset to create the zigzag. Then I sewed the three sections together, this time making sure the white triangles were offset.
Step 3: Trim the sides of the mug rug top. Trim the longer edges too, if needed.
Step 4: Layer the top with batting and backing, and secure with a few pins. Choose thread for quilting.
Step 5: Quilt. I used my walking foot and matching thread to quilt down the middle of each zigzag row. Then I trimmed the excess batting and backing fabric.
Step 6: Bind. I found this single binding tutorial and changed it up a bit by machine sewing the binding first to the back and then machine sewing it down in the front. I think next time I use this technique I will go with a 1.5" binding strip instead of 1.25".
All done! (It finished up at 6 1/2" x 8" in case you were wondering.) Now I have a place to keep my big sweaty glass of ice water all summer long. You could use the larger triangle on this die to maybe make a mug rug with one zigzag stripe, or you could make a placemat or larger quilt easily with that larger triangle. If you make a project with this tutorial, please let me know--I'd love to see it! (Somebody needs to make a Charlie Brown placemat or mug rug...)
I will be giving away an Accuquilt Go! Baby along with the winner's choice of three dies to one of my readers very soon, stay tuned!
Friday, July 15, 2011
Featured at Amy's Creative Side
Hi everyone, how's your Friday going? It is super hot here. I spent a few minutes on the porch with my toddler earlier, painting on the concrete with water and paintbrushes. Other than that, I'm planning on staying in the rest of the day.
I wanted to let you know that today I'm featured over at Amy's Creative Side. Thanks so much for letting me share a bit about myself and my quilts, Amy!
Also, this was a couple weeks ago, but Penny at Sew Take a Hike posted about the cute chicken potholder she made using my pattern from 101 Patchwork Projects. I love it. I think I need to make some more of them.
And finally, you should know that I'm almost done with a new project and tutorial... using my new Accuquilt Go! Baby! fabric cutter. I will have a tutorial soon, and then I will get to give a Go! Baby away to one of my readers. Check back next week for that, but for now, here's a little sneak peek of my project:
Something a little zigzaggy....
Wednesday, July 13, 2011
peer pressure... I caved
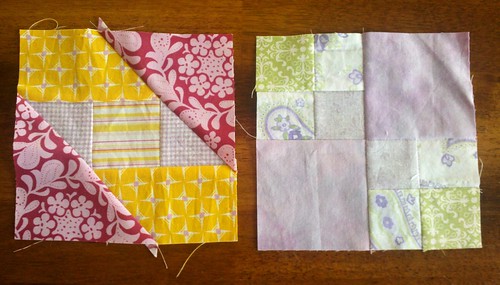
Here are my first two blocks from the Farmer's Wife Sampler book.
For now I am planning on trying to include purple in as many blocks as possible.
I couldn't get my printer to work yesterday, so I used my brain and math to make these blocks. Block 1 on the left isn't exactly perfect... but I did my best and got tired of re-sewing.
I couldn't get my printer to work yesterday, so I used my brain and math to make these blocks. Block 1 on the left isn't exactly perfect... but I did my best and got tired of re-sewing.
Labels:
farmer's wife quiltalong,
quilt blocks
Sunday, July 10, 2011
Back from vacation
Last night we got back from a week in Utah... back to the heat and humidity. We are under a heat advisory for the next couple of days at least, gotta keep the kids inside as much as possible and hydrated, too. We might need to go to the movies in the next couple days, and the library, and the pool too....
Here are some of the trip highlights--
*My flight out of KCI getting delayed and then being stuck in the Denver airport for over 6 hours, unsure if I would make it to my high school reunion. Living this day on 3 hours of sleep and with a 2-year-old, and her car seat, in tow.
*Flying standby for the first time, and making it to Utah in time (barely) to see my friends at the reunion. It was so much fun. And weird, but fun.
*Oh yeah, I would have had the privilege of flying into Provo if the standby thing hadn't worked out. Crazy, huh. (depends on how much you know about Provo, I guess.)
*Lots of family bonding.
*Reading Harry Potter and the Deathly Hallows for the second time. I had forgotten most of it. Ready to watch movie #7 (I think I'll buy the DVD) and maybe #8, soon.
*Meeting new friends from the quilt blog world. (This will be its own future blog post... but we had fun, and delicious cupcakes.)
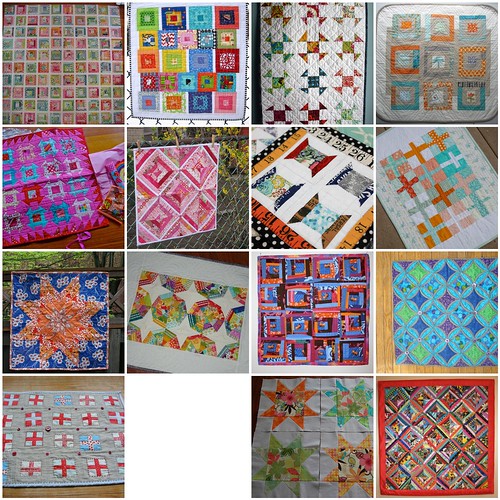
*Getting into Doll Quilt Swap #11, yay! I am excited about whoooo I am sewing for, this time. I have a couple of ideas for this person, maybe I'll make a sample block or two in the next couple days. I made a mosaic of quilts/ideas I like, in case the person sewing for me is curious:
The missing photo up there is a zigzag quilt. I was feeling too lazy to go back and edit my mosaic. And yes, some of these have been in previous DQS mosaics I've made.
Last week I did some machine quilting for my mom (it's super secret, well one person can't know about it, but it is really cool, and I used disposable cleaning gloves for my quilting gloves), and this morning I took in the elastic in my skirt waistband, but other than that, I haven't sewn for like a week and a half! I've missed it and have a bunch of things I want to work on this summer.
Last week I did some machine quilting for my mom (it's super secret, well one person can't know about it, but it is really cool, and I used disposable cleaning gloves for my quilting gloves), and this morning I took in the elastic in my skirt waistband, but other than that, I haven't sewn for like a week and a half! I've missed it and have a bunch of things I want to work on this summer.
Wednesday, June 29, 2011
what I've been working on (and a quilting dilemma)
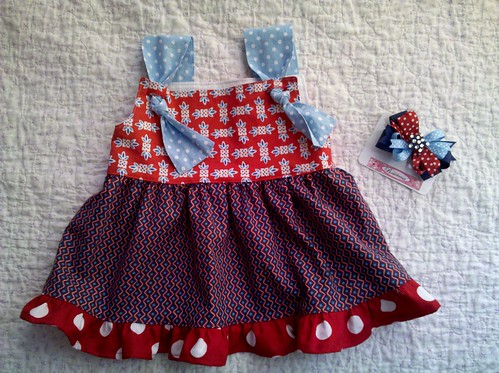
I finished something cute the other day:
This is the knotted top from Little Girls, Big Style in size 2. (affiliate link) I used a couple of the DS Quilts fabrics from JoAnn, and the dot fabrics were others I had on hand. (The big red/white polka dot is from JA too, and I love it. The light blue is a mystery. I bought it in Utah a couple years ago but I don't have any other information on it.) I like this pattern; it turned out really cute, and if I make it again I will definitely make the shoulder straps significantly more narrow, or else make a pleat in them where they are attached to the bodice back. With the straps this wide, the back of the top doesn't lay really smoothly when my girl is wearing it, and making the straps narrower will look better in terms of scale on the smaller sizes.
And, my friend Ceresa made the adorable bow this afternoon. She makes fabulous bows and sells them at her etsy shop, Bowreesa. The bow she made matches the top perfectly!
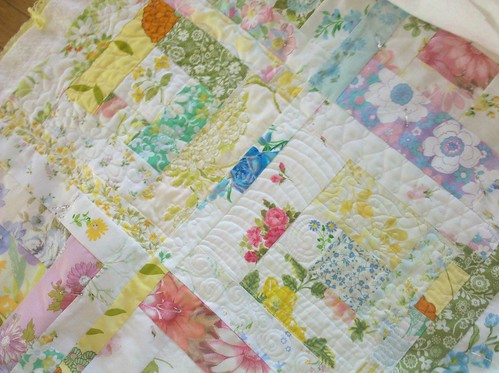
I got some new quilting thread yesterday and decided to start quilting my vintage sheet quilt.
And, my friend Ceresa made the adorable bow this afternoon. She makes fabulous bows and sells them at her etsy shop, Bowreesa. The bow she made matches the top perfectly!
I got some new quilting thread yesterday and decided to start quilting my vintage sheet quilt.
I am just going to do a little at a time (we have some busy weeks coming up here) and take a kind of sampler approach to the free motion quilting.
I am kind of bummed out... because for a long time I really wanted an extension table for quilting on my Janome, and I quilted with the extension table attached for the first time last night and this morning... and it's not working for me. The fabric seems to be sticking to the extension table (or at least not sliding very freely), and I know that can be corrected if I buy one of those slider things I've heard about, but the problem is that the extension table I got extends in front of the needle area of my machine and I have to hold my hands, arms, and shoulders higher in order to manipulate the quilt. And it hurts. So I need to figure out a solution to this somehow. Maybe see if there is an extension table that doesn't go in front of the machine, or at least not as far. Or find out about getting a higher chair (a lower table isn't really going to happen any time soon I'm afraid.)
I will probably do some more quilting tomorrow; we'll see if I can make any changes in my approach that will solve my problem!
Monday, June 27, 2011
Ruffle Crush Tester Quilts
Hope everyone's summer is going well! We are keeping busy here--my son had a birthday this last week and we had a fun but sort of basic birthday party for him. T-shirt decorating, pinata, presents, and homemade cookie cake. My sewing machine had to go to the shop for a little while but I actually got it back sooner than I expected and was able to do a little bit of sewing last week. It runs so nicely now and I found a new place that has the best sewing machine servicing prices in town!
Anyway I wanted to thank everyone for their support of my Ruffle Crush quilt pattern. I have some photos to share from my testers, in case you wanted to see more examples of what this quilt can look like.
Sharon made this lovely pink and brown version (I think these fabrics are from the Lily and Will line by Moda):
And Molly made this one from Fig Tree fabrics:
Molly blogs at Stitch-N-Thyme Designs and she blogged about this quilt for the Blogger's Quilt Festival back in May.
I really appreciate my testers, they had great suggestions for this pattern--thank you again! I'm hoping to share photos from my other 2 pattern testers soon. :)
Monday, June 20, 2011
Ruffle Crush--My First Quilt Pattern!
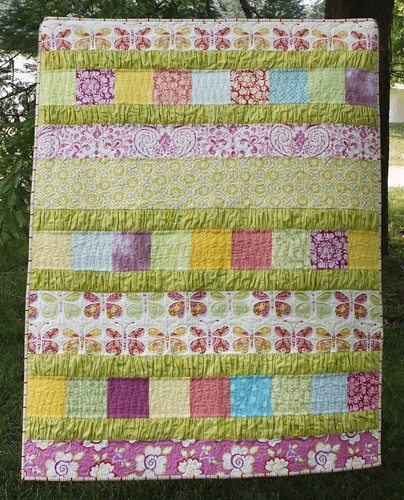
I'm so happy to finally be launching my Ruffle Crush quilt pattern! The PDF pattern is available to purchase at my Craftsy shop here. (There's also a link to the shop in my blog sidebar.) It is an instant download and will be emailed to buyers as soon as payment is finalized. Making this pattern has been a long process for me, and I want to share a little bit about the quilt--I made the first Ruffle Crush quilt last year for my sweet sister-in-law Amy T., using Moda's Blush fabrics by Basic Grey.
Here are some photos--front of the quilt:
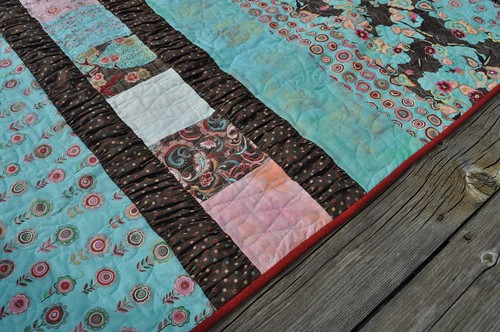
Here are some photos--front of the quilt:
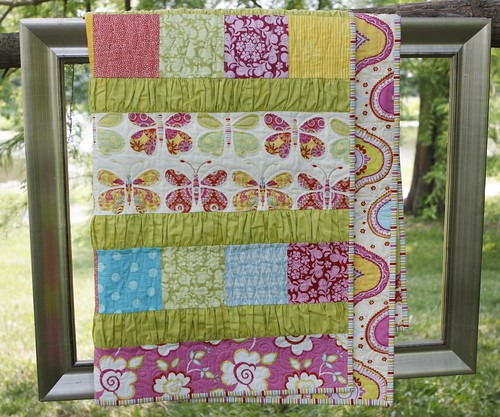
This quilt is about 50" x 70". Close-up of some of the gathered strips:

The back (directions for this pieced back are included in the pattern):

I did the first diagrams and fabric calculations for this one while I watched the very last episode of Lost on tv last spring. :)
I gave Amy the quilt for Christmas last year and after thinking about it for a while, I decided to submit it to some magazines for publication. I sent my submission to just one magazine... and they never emailed me back. Then I decided that actually I wanted to write up the pattern and sell it on my own. I got out the original drawings and figures and decided to make the pattern in two sizes. I drafted a baby quilt size and decided on a color scheme using mostly Kumari Garden fabrics by Dena Designs. Here's the finished quilt:
The ruffle strips in this quilt are Moda Grunge in the color "Decadent," and the charm squares came from my stash. All other fabrics are from the Kumari Garden line. This quilt is about 40" x 53".
Here are some details on the pattern:
*It's available in my shop and is on sale for $8.50 until June 27, 2011 (next Monday). After that the price will be $10.
*The pattern includes directions for two sizes—baby quilt (40” x 53”) and throw quilt (50” x 70”).
*This pattern is a 27-page PDF file that includes lots of photos, cutting and layout diagrams, and two suggested backing options for the larger quilt size.
*Three tutorials are included with the pattern—Detailed Gathering Instructions, Straightening Fabric Edges, and Matching Large Scale Prints.
The fabric requirements for both sizes of the quilt are available in the pattern description over at the shop.
Finally I'd like to thank Katrina Coleman, who took the photographs of the Kumari Garden Ruffle Crush quilt. She is a local friend who's just getting her photography business started and I will let you all know as soon as her website is ready!
Labels:
quilt pattern
Friday, June 17, 2011
Chef Swap
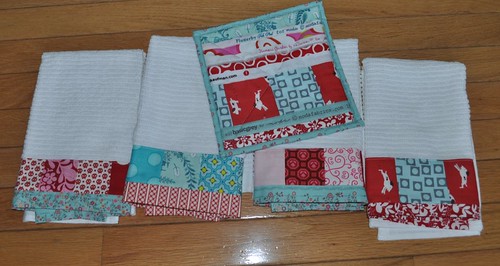
Last week I finally got to go to another KC Modern Quilt Guild meeting. It was so good to see everyone; I'd missed the last couple meetings due to kids' school events. One fun part of the meeting was the Chef Swap--a couple months ago, we brought fabrics of our own and then swapped, and then we had a couple months to make kitchen items for the person whose fabric we picked. Carla got my little fabric pack and here's what she made for me:
Finally, some fabric. Our meeting this month was sponsored by Tammy of Marmalade Fabrics. She had a lot of great fabrics but I just bought one thing.
A cute potholder and 4 kitchen towels with pieced fabric strips along one edge. I love it, and I can really use new kitchen towels!
The person I am giving to wasn't able to attend the meeting so I can't show her stuff off yet....:)
Also, Caitlyn brought me a zip pouch that I won on one of her blog giveaways:
I love this fabric and this is a great little bag!The person I am giving to wasn't able to attend the meeting so I can't show her stuff off yet....:)
Also, Caitlyn brought me a zip pouch that I won on one of her blog giveaways:
Finally, some fabric. Our meeting this month was sponsored by Tammy of Marmalade Fabrics. She had a lot of great fabrics but I just bought one thing.
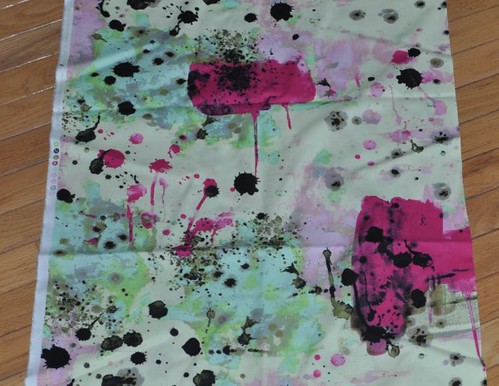
1 yard of the paint splatter fabric by Jay McCarroll. I am thinking a large tote bag... we'll see what I end up doing though. I had to take my sewing machine into the shop yesterday due to excessive squeaking and clunking noises, and my backup machine is broken too, so I have a bit of time to get organized and plan out what I want to make next when my sewing machine gets back. I might even do some hand sewing.
One more thing! I wanted to let you know that my Ruffle Crush quilt pattern is getting very close to completion and I hope to have it available for purchase in the next (deep breath) week! Stay tuned and I'll let you know as soon as it's ready. :)
One more thing! I wanted to let you know that my Ruffle Crush quilt pattern is getting very close to completion and I hope to have it available for purchase in the next (deep breath) week! Stay tuned and I'll let you know as soon as it's ready. :)
Saturday, June 11, 2011
Quilt Backs
Rebecca at Chasing Cottons has a new post up about creative, interesting quilt backs, and I decided to show and tell some of the backs of my quilts.
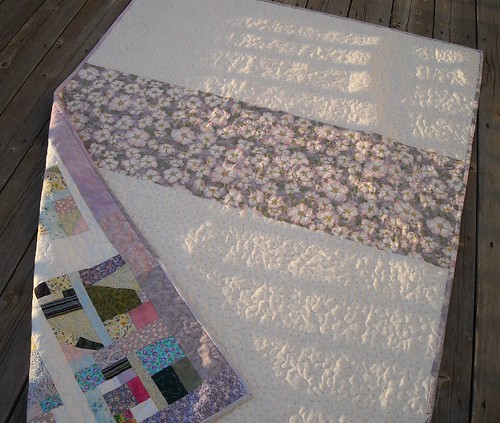
back of my lavender scrap quilt (not very exciting but I LOVE this quilt so much)
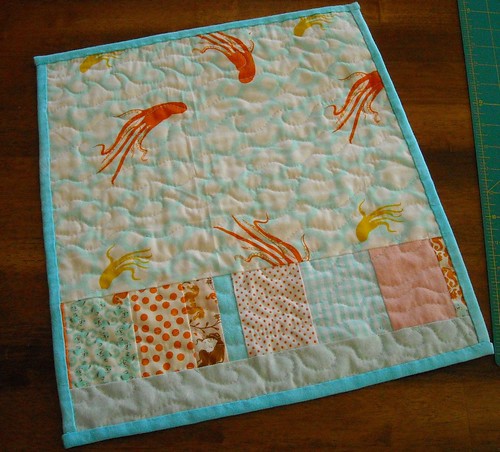
back of a Halloween mini-quilt I made
this was given away on the old blog, here
back of my SIL Krista's quilt (me in the shadow)
back of my figgy pudding Christmas quilt
back of my chicken quilt for dqs8
back of my daughter's mermaid strip quilt
back of my nephew L's quilt (hey it's almost his birthday again)
back of my Y2K10 insane quilt project quilt
back of shirt quilt, made for Grandma M with Grandpa's shirts after he passed away
back of my "no prints allowed" kona challenge dear jane quilt
Do you have any interesting quilt backs to share? There's a link-up at Chasing Cottons... I'm going to go check it out!
Thursday, June 09, 2011
Summer Mode
I have been so busy for the last month; I'm afraid I'm not going to have a lot of time for blog-writing (or reading) this summer! Here's a quick list of some of the things going on here:
*Pool time
*Late start but we got a little garden in
*Library with kids
*Sewing a secret project (needing to work on another one, too!)
*Working on keeping up a chore schedule for my kids
*Totally giving up on a bedtime routine for them, sigh.
I did want to share about the KCMQG pouch project; it is a difficult thing to write about but our guild has been making fetal demise pouches to be used at St. Luke's Hospital in Kansas City. That's where my preemie girl was born so of course I had to join in. I've made a couple and have a few more kits to make up today before our guild meeting. Do visit the Kansas City MQG blog to find out more about the project, ok?
Also I got this sweet book in the mail the other day; I was lucky to win it from Ayumi at Pink Penguin during giveaway week. Thanks Ayumi! I've just flipped through it so far but it has some interesting projects that I think I'll try for sure.

My boys want to help make a German pancake this morning, so yummy. I need to decide if I'm going to wake them up now or wait a little longer. Hope you have a great day!
Sunday, June 05, 2011
Piecing Batting by Machine Tutorial
Hi friends! Just wanted to let you know I have a quick little tutorial on how to machine piece batting into larger pieces... over at Chasing Cottons where Rebecca has been hosting Quilt Class 101 over the last several weeks. Thanks so much to Rebecca for letting me join in!
Labels:
tutorial
Saturday, June 04, 2011
king size quilt top, finished
A few notes: King size, 104" x 96", flea market fancy plus some others in the blocks, moda crossweave in gray for sashing and borders. 96" borders take a LONG time to make and attach. For the Naked Bed Challenge!
Some fabrics I used just about all the way up, besides my FMF, that I might try to replace: turquoise henna garden, pink grunge, that one pointy diamond fabric by H. Bailey in light blue, the turquoise scissors fabric.
This was my main project for just about 3 weeks and it was almost the only thing I sewed during that time. It was less stressful than my typical sewing MO which is a sort of project ADD, working a little bit on something and then switching to something else when I feel like it. All the while having several projects occupying my brain space and stressing me out. Working on one thing was so different (in a good way) for my stress levels--I'm going to try it more often!
Labels:
quilt top
Wednesday, June 01, 2011
Last 3 Blocks
Today, I finished up the last 3 blocks for my (this quilt needs a name!) king size quilt, for the naked bed challenge. I took some pictures along the way.
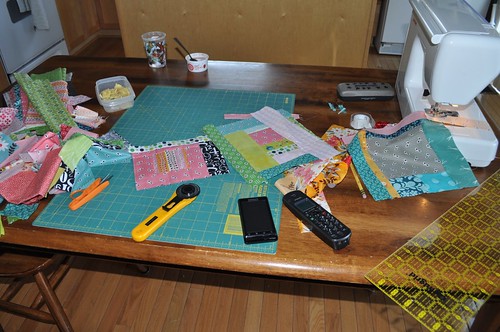
Here's what I had when I was getting started this morning:
In regular life news, we are starting off the summer busy! We went to the pool yesterday, and the library today. We have a ton of new books from the library and I plan to take the kids weekly. I also got the boys signed up for swimming lessons but I was too late to get them into the first session. Tomorrow we have an orthodontist get-measured appointment and I think Friday will be another pool day, if the weather cooperates!
Here's what I had when I was getting started this morning:
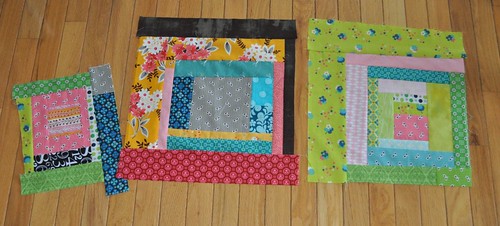
Making some progress:
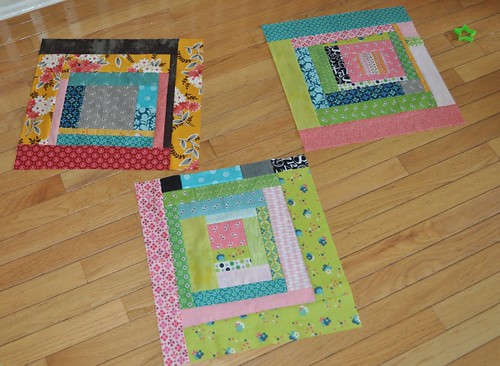
And, all finished!
I ended up taking apart a couple of my earliest blocks and redoing them; they didn't have the same feel/look as what I ended up doing later, and I do like them better after the second try.
The deadline for the challenge was extended until Monday, so I don't have to try to finish this thing by tomorrow. I did get started with the sashing though, and the first row is assembled. My leftover fabric and scraps are all straightened up, too.
The deadline for the challenge was extended until Monday, so I don't have to try to finish this thing by tomorrow. I did get started with the sashing though, and the first row is assembled. My leftover fabric and scraps are all straightened up, too.
In regular life news, we are starting off the summer busy! We went to the pool yesterday, and the library today. We have a ton of new books from the library and I plan to take the kids weekly. I also got the boys signed up for swimming lessons but I was too late to get them into the first session. Tomorrow we have an orthodontist get-measured appointment and I think Friday will be another pool day, if the weather cooperates!
Labels:
quilt blocks
Subscribe to:
Posts (Atom)

