Saturday, October 31, 2009

Happy Halloween!


Baby's costume was going to be my post for Sew-n-Tell Friday but I didn't have time to post yesterday.


Here they all are. We had tantrums and meltdowns from the 5 year old about not wanting to wear the vampire cape I made him. He did wear it to the school party though, and to Jan's house. I'll take a picture of it sometime next week.


I used the tutorial from Creative Kismet to make the skull bead, and my sweet neighbor Ceresa made the bow for me. Actually she made 2. Isn't it cute? Go check out her shop!

Monday, October 26, 2009

Mini Quilt Monday! -- Halloween Doll Quilt

Here's my quilt for the sewingmamas.com fall doll quilt swap. It is on its way to Crys. I already got my fall quilt from Kelli, isn't it great?

FYI, the witch pattern I used here is from the October 1998 issue of McCall's Quilting.

And, the back:

The ghosts hanging on the clothesline are from JoAnn's, 2 years ago. So are the skeletons.

The little square-in-a-square blocks are inspired by Sarah at House of Krom. She makes lots of awesome things!

Tuesday, October 20, 2009

crooked pumpkin quilt block tutorial


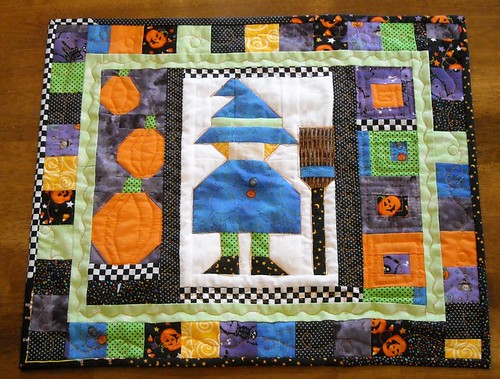
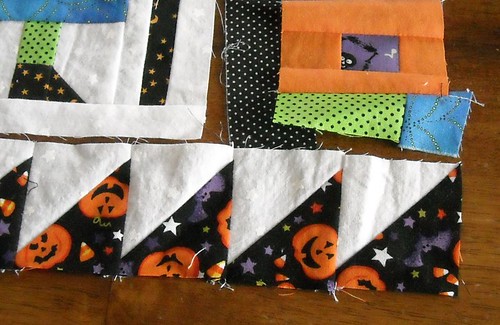
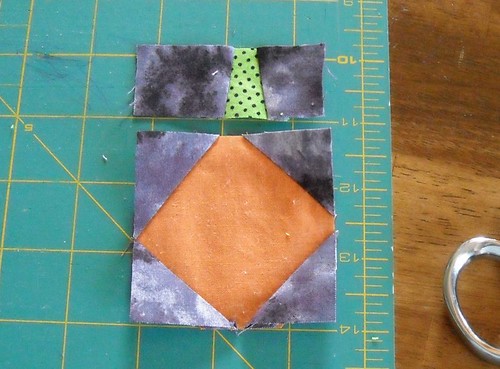
Here's a tutorial showing how to make a cute little crooked pumpkin quilt block. There are a lot of pictures here but it isn't difficult. These instructions are for the pumpkin in the middle in the picture above.
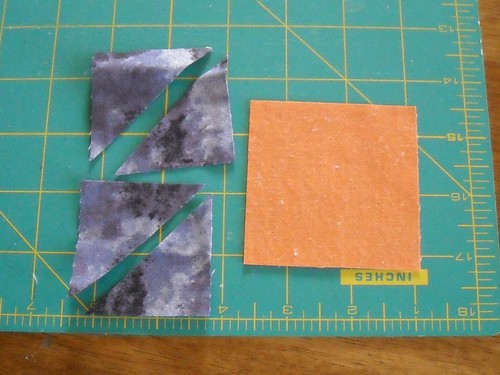
Step 1: Cut an orange square, mine is 2 3/4" here.Cut two background squares (I used purple), 2". Cut the squares in half diagonally.

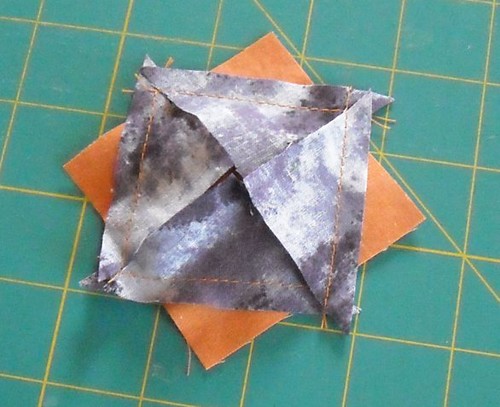
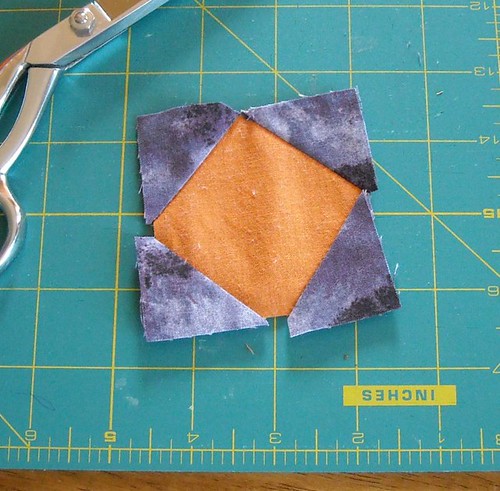
Step 2: Sew the background triangles on to each corner of the orange square. They don't need to be straight or matchy. Try to make sure these seams don't overlap each other or you might need to unpick a stitch or two when you open them up (like I did).

Step 3: Trim the corners that stick out past the orange square.

Step 4: Fold the corner pieces open and press.

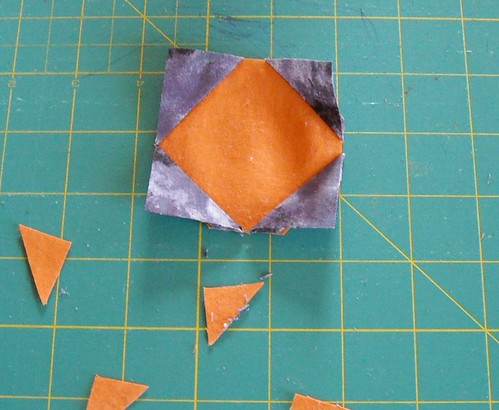
Step 5: Flip the block over and trim off all the background pieces that stick out beyond the orange square.

Step 6: Trim off all the orange corners that are under the background pieces. This will reduce bulk in your finished pumpkin.

Step 7: Cut a wedge or rectangle for your pumpkin stem, about 1" x 3/4". Mine was a little taller than that and I trimmed it. Also cut a rectangle of background fabric about 1" by 3 1/2".

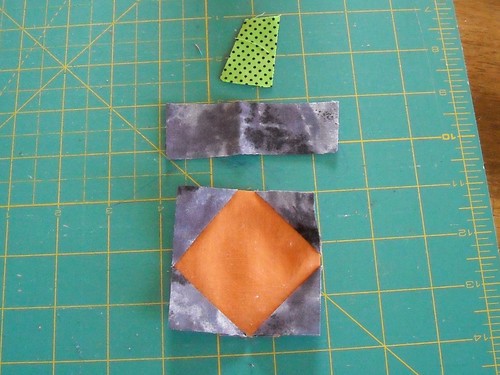
Step 8: Cut the rectangle for the stem background in half. If one side of your stem piece is angled, cut the background piece that will be sewn to the angled side, so it has a matching angle.

Step 9: Sew the background pieces onto the stem piece. Press.

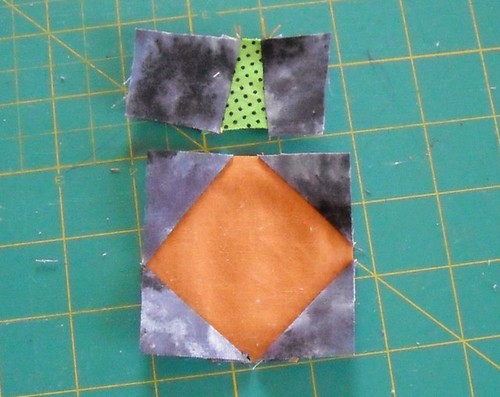
Step 10: Trim the top and bottom edges of the stem section so they are parallel. If your stem section is a little longer than the pumpkin section, trim it to match. Or wait and trim it after they are sewn together.

Step 11: Sew the stem section to the orange pumpkin section. My stem is kind of weird here, oh well.

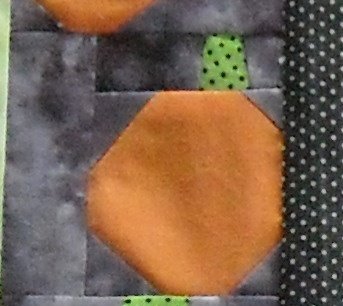
Finished view--here's what the pumpkin looks like when all sides were sewn into a little mini quilt. I can't show the whole thing quite yet, sorry. I like how it turned out!


You can change the measurements and make larger or smaller pumpkins, if you want.
I hope you like this, and I would love to see pictures if any of you make your own crooked pumpkin blocks! Please let me know if you find any mistakes or need clarification!

Thursday, October 15, 2009

Birthday Dress

Sometimes I don't want to work on what I "should" be sewing and I start another project. Oh yeah, actually I do that a lot. Last night and this morning I made my baby girl's first birthday dress:


I already had the Moda Eva charm pack, and after thinking about it for a while, I decided not to go with something super fancy/frilly/ruffly and to make another charm pack t-shirt dress for L's upcoming birthday. Yesterday I drove all over town looking for the right shirt to go with the Eva fabric, and I found a cute, simple one at Old Navy. I paid too much for it. Oh well.

Last night I got the skirt all pieced together and partially topstitched, and then this morning I finished the whole thing up. I made a headband from the bottom of the t-shirt that I cut off, and made a little yo yo with a button to go on it. Baby isn't very interested in wearing it though.


I'm planning on making a tutorial for this dress and headband, in 3 sizes, so be sure to check back soon!

Monday, October 12, 2009

Sew Inspired

This past weekend I went on a temple trip to Nauvoo, Illinois, with some friends from church. We had an eventful drive up there, including a car repair and an accidental detour, but everything ended up fine and we had a good time at the temple and good times spending time with friends, too. On Saturday part of our group had to head home quickly, but I was in the group that stayed behind to do a few touristy things before starting home. We went to a bakery and gift shop, and to a couple places in Old Nauvoo to learn about life in the mid-1800's. And. We went to the Sew Inspired quilt shop in Nauvoo. Isn't that cool? They have lots of great fabric there, fabric lines I have been wishing my local quilt shops would get in stock. I got a few fat quarters--Hushabye Owls in pink and green, and two Eva fat quarters as well.


When I was buying my fabric I talked to the owner and she mentioned that her store is online, and I had to tell her that I'm online too, and my blog is at sewinspired.blogspot.com. She told me about a couple other Sew Inspired quilt shops in the US as well.

I worked on my first English paper pieced hexagons on this trip:

Aren't they cute? I really like the pink and green, and I might add some aqua blue, too. I am planning on taking them on my cruise next month too. My grandpa is taking his married grandkids, and his wife's married grandkids, a total of around 70 people, on a Western Caribbean cruise next month. I get to bring my baby, even. We'll see how much time I can fit in for handsewing on the ship.

Here's a little sneak peek of something else I've been working on, just for fun.

What are you working on this week?

Friday, October 09, 2009

Turtle Quilt

I'm excited to join in the second Blogger's Quilt Festival, hosted by Amy at Park City Girl. Head on over to her blog and check out all the quilts!

I'm pretty sure my turtle quilt is the second quilt I ever made (including my "ugly" polyester quilt my Grandma Taylor helped me make when I was in 8th grade.) My husband's mom and dad gave me a very generous gift of money when I graduated with my MS degree and I used that money to buy my first rotary cutter and mat, and the fabrics for this quilt. It was made in Provo, Utah, in 1997, and measures 19"x26".

A couple of things I learned while making this quilt: first, needle-turned hand applique is time consuming! And best done in small doses, in my opinion. Second, value, or the lightness/darkness of your fabrics, is just as important as color. A few of my blocks in this quilt have virtually no contrast (and the appliques/ninepatches are difficult to see) because I used fabrics that were too close together in value. Overall, I do really love this quilt, and some of the fabrics in it are still some of my favorites!

Tuesday, October 06, 2009

6 tips for sewing with little kids around

Sewing when your kids are babies or toddlers can be frustrating at times--my 11 month old has developed a habit of crawling under the table and playing with the foot pedal while I'm sewing. She can also--just barely--reach up and grab things off the table now, too. I've come up with some ideas to ease the frustration and get a sense of accomplishment with your sewing when you have a little one.

1. Focus. Staying focused on one project until it is done can lead to finishing projects more often! I'm not saying I never start a new project when I already have several started, but when I start to feel like I never get anything finished, sometimes I will pick a project to stick with and do my best to avoid distractions until it is done.

2. Lower your expectations. If you're caring for small people, you usually can't get as much sewing/quilting/crafting done as you might have been able to at previous stages in your life. It's probably a good thing to accept this and know that as kids get older they will become less demanding and eventually you'll be able to have more time for sewing again.

3. Go with the flow. (Shout out to my 9-year-old who used this as a slogan on his student council campaign posters the other week.) Do what you can, and don't forget to enjoy your kids.

4. Just do a little. Break projects up into small steps and focus on completing each step. For example, you could trace several patterns, then cut out a few outfits, and then focus on the sewing.

5. Handwork. Figure out some hand sewing or other portable projects that you can do while hanging out with the kiddos. I've been sewing on quilt binding by hand quite a bit lately, and I can do that while watching The Princess Bride with my kindergartner or watching my baby play with her toys. I just found this site the other day and printed off some hexagons to start some Grandmother's Flower Garden quilt blocks. (Yes, this seems to contradict #1, but I am also going to take this handsewing project on a couple trips I have coming up!)

Finished bindings on 3 Project Improv quilts!

6. Use naptime. When I had only one kid, I had a rule that I never did housework during naptime, but it was time for me. Now sometimes I do feel like I really need to do housework during naptime, but I try to work on my sewing projects or take some other kind of break for myself during naptime on a regular basis.

I'd love to hear your tips or secrets for working on sewing or quilts with babies or toddlers underfoot!