I'm sharing this quilt as my entry to Blogger's Quilt Festival. As always, many thanks to Amy for hosting the festival! Please stop by Amy's Creative Side and look at all the quilts!
My first rhino quilt was finished in early 2014 and given to my brother. By the time I finished it, I was sad to see it go, so much so that I decided to make another one to keep.
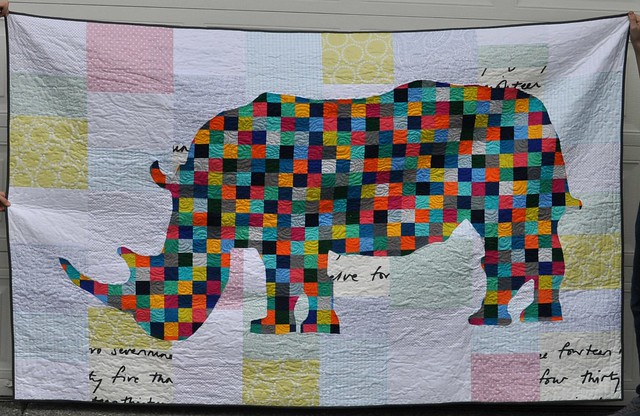
This time I made the rhino from squares cut from a Kona Summer 2013 rollup (minus 2 colors I didn't care for), and the background is mostly a cooler white/light (except for the pink and yellow bits) where the first rhino had an off-white background.
(My quilt holders are not equal heights. This was taken in a hurry in a little bit of rain.)
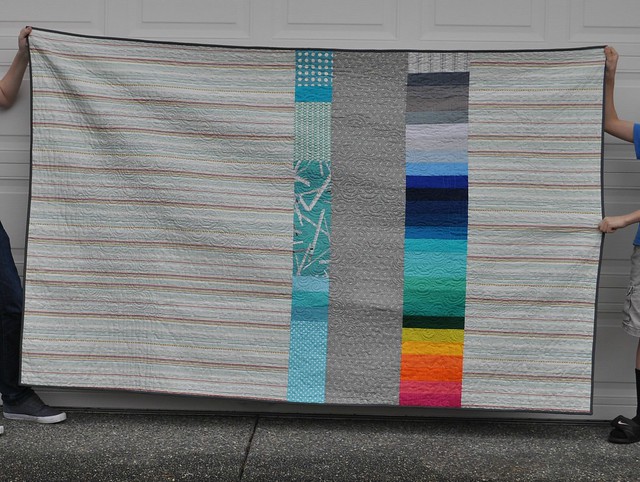
The back has a strip with the leftover pieces of the rollup, a scrappy turquoise strip, some gray flea market fancy seeds, and a stripe fabric from the Basic Grey PB&J line.
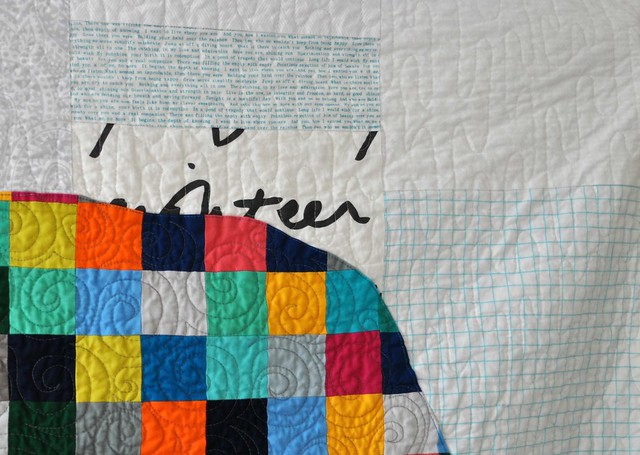
The machine quilting on this quilt was similar to how I quilted the first rhino quilt. I quilted swirls in the rhino again:

And this time I quilted the background in a sort of vertical finger-like stipple. Does anyone know if this has a name?
I was asked how I made the rhino on my last rhino quilt post, and I didn't ever get around to answering, until now. There are a lot of steps and this is not a real tutorial but I wrote up the process I went through to make my two rhino quilts. Let me know if you are using this technique and need any clarification of these instructions.
To begin with, the main idea is to enlarge a shape onto fabric: when I was a kid, my mom had some pattern books that had small versions of a pattern overlaid with a grid; you were supposed to enlarge the pattern manually by drawing the image onto a larger grid following the line in one square at a time. See the image on this blog post for an example. Here is how I got my small grid image and enlarged it onto fabric.
1. I had my smart teenager remove the background of a rhino image in photoshop.
2. I uploaded the photo into EQ7 and started the process for a photo quilt, and then copied a screenshot of the rhino image with a grid overlay before clicking the preview button to make the image go pixelated for a photo quilt. (If you don't have EQ then you need to figure out a way to get a grid overlay on your image.) Carefully consider the size of your finished applique and the size of squares you want to use. I used 2.5" squares (2" finished) for my rhino quilts.
3. I printed out the screenshot image and then used it to draw the outline of the rhino for my project on graph paper.
4. I used the graph paper drawing to determine how to piece the rhino. I pieced it in 5-square-wide columns, then sewed the columns together. I pressed seams open (normally I don't but it was helpful in this project.) I learned the hard way that anywhere there is a tiny fraction of a square included in the rhino shape, that square needed to be sewn onto the big rhino.
5. After the whole rhino was sewn together, I used the graph paper drawing as a reference and drew the rhino edges on the right side of the fabric with regular pencil.
6. I trimmed the whole rhino edge about 3/8" from the pencil line.
7. I clipped inner curves and hand basted the edge under.
8. I arranged the rhino on the prepared background, and hand basted it to the background. It was a little challenging to make sure the rhino was straight.
9. I carefully machine appliqued the rhino to the background, sewing a scant 1/8" from the edge of the rhino.
10. I removed both sets of basting stitches.
11. Then I asked for some expert opinions and was told I should remove the background fabric from behind the applique. So I did, carefully cutting the backing away, about 1/2" from the stitching line.
12. My quilt top was ready for basting, quilting, and binding!
I hope this helps anyone who wants to make a quilt like this! Please let me know if you decide to make your own large format applique quilt with this technique. :)