Friday, October 26, 2012

Know Thy Machine Blog Hop!


Hi everyone! I'm happy to be participating in Shruti's Know Thy Machine blog hop and sharing a bit about my sewing machine. Hopefully with all the participants (I think it's going for over a month) this blog hop will be a good resource for people shopping for sewing machines.

1. What machine(s) do you have? 
My main sewing machine is a Janome 4900 Quilter's Companion. (I also have a serger, a coverstitcher, and a small Hello Kitty Janome machine.)
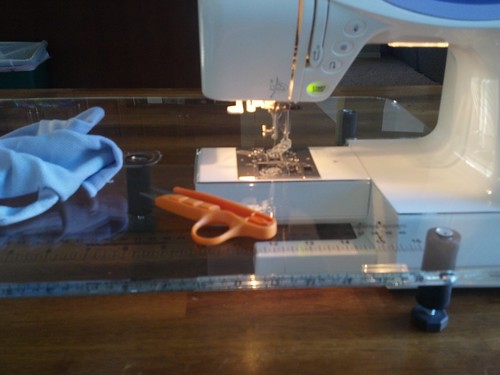
sewing machine ready to quilt
This is my machine set up with the extension table, my (dull) clippers, and my $2.50 gardening/machine quilting gloves. Ready to machine quilt!

2. When and where did you buy it? What were the reasons for selecting this particular model?
I've had it for almost 3 years now; I got it in December 2009. This model wasn't my first choice; when I bought it I had decided on another Janome model and then when I went to the sewing machine store they were no longer selling that model. (Looking back now, I think it was when they were first getting ready to sell the Janome Horizon.) I went back online to do more research and decided on the 4800. Turns out that the place I bought the machine from no longer had the 4800 in stock so they sent me the 4900 instead. I bought it online from a sew/vac place that I think was in Texas. I can't remember for sure.  

3. What do you like about your machine? Have you named it? Have you made a cover for it? 
I like my sewing machine a lot. It is pretty sturdy and I haven't really had any problems with it at all. It is good at basic sewing, great at machine quilting (I just have to adjust the top tension to about 6 for the best results) and does fine with heavy duty sewing although I don't do a lot of that type of sewing these days. I have not made a cover for my machine yet. Someday I will, though.

4. Does your machine give you any problems? Could you tell us a few?
Nope, no problems really.


5. What do you sew on it mainly? Quilts, Clothes, Bags etc. How much time do you spend sewing on it? What are the features of the machine that help you improve your work? 
My sewing consists of mostly working on quilts, household items, and the occasional clothing item (or Halloween costume.) I sew probably between 5-8 hours each week, but I don't really keep track. My sewing machine came with a walking foot and a free-motion quilting foot and those are both really helpful with my quilting. Otherwise I really appreciate that it's a good reliable machine that can handle whatever I want it to do. It has a bunch of specialty stitches and I don't use those very often but I appreciate them when I need them. I also like the speed adjustment for when my kids want to have a turn sewing. I can set it so the machine doesn't go too fast and my boys feel more comfortable sewing that way. A couple other features I like a lot are the needle-down feature (although I wish I didn't have to set it every time I want to use it) and the adjustable presser foot pressure dial, which makes straight line quilting work out a lot better.

6. What advice would you give others when deciding about which machine to buy? 
Go on PatternReview.com and check out reviews there. Most people include the price they paid for their machine so you can get a basic idea of cost, since sewing machine manufacturers don't typically include prices on their websites.


7. Will you share with us a special memory associated with your machine?
I don't really have any specific memories of this machine but I do have fond memories of sewing at the kitchen table in my old house in Kansas in the sunny (and usually warm) kitchen. I do a lot of my machine quilting at the kitchen table here, but it's not quite as sunny!

8. If you had unlimited resources in the world, which machine would you choose to buy and why?
I'm pretty happy with my sewing machine and not planning on buying a new one any time soon. If I had to decide on another domestic (table top) sewing machine I would probably get a Janome Horizon or some kind of Bernina. I have recently started thinking about getting a longarm quilting machine; that's something I feel like I need to research a lot though before I commit to actually going through with it.


Thanks for reading! You can read about more people's experiences with their sewing machines (and enter to win prizes!) on Shruti's blog, 13 Woodhouse Road.

Blogger's Quilt Festival

Amy's Creative Side

Hi everyone! Welcome to Sew Inspired. If you haven't visited before I hope you take a minute to look around, or come back later on to check out my tutorials and recent projects if you're busy looking at quilts right now.
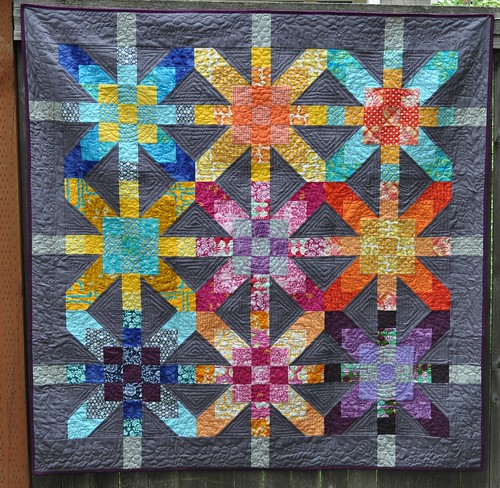
For Blogger's Quilt Festival I decided to share my supernova quilt again. I made this quilt for my parents' 40th wedding anniversary which was this past May.

finished supernova quilt
It is one of my favorite quilts I've ever made. I love how the colors turned out, and the quilting, and the back.
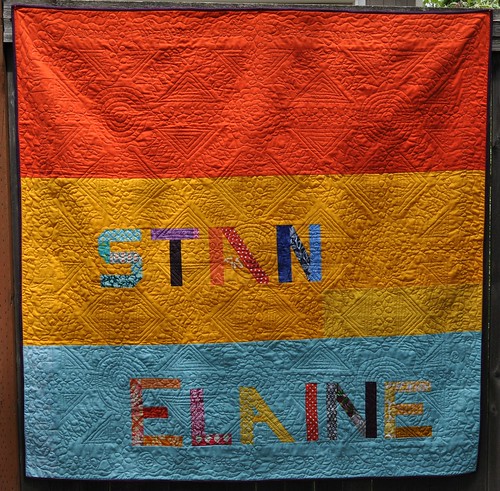
supernova quilt back
(That's my dad's and mom's names.) One day I want to make another one to keep.


The quilt was made using the quiltalong information at Freshly Pieced, and my colors were originally based on her color scheme but they ended up a bit different.


If you're interested (and want to see a close-up of the quilting), you can read previous blog posts about this quilt here and here.

Quilt Stats for Blogger's Quilt Festival:
Finished quilt measures about 60" x 60" (I think! I don't have the quilt anymore.)
Pieced and quilted by me
Best category: home machine quilting, throw quilt


Thanks again for stopping by, and thanks so much to Amy for hosting the quilt festival!

Wednesday, October 24, 2012

Evergreen State Quilt + New Pattern

Hi! I'm excited to show you my new quilt pattern, "Evergreen State." It's available as an instant PDF download in my shop at Craftsy.
I came up with the beginnings of this design earlier this year when someone on a blog was giving away Christmas fabric but you had to describe what you would make if you won the giveaway. I didn't get picked for that giveaway but decided to go ahead with the quilt anyway. I thought about this quilt a lot when I first broke my finger this past summer and couldn't do much of anything at all. I love this fabric line--it's Blitzen by Basic Grey. Their fabrics always make such beautiful quilts.
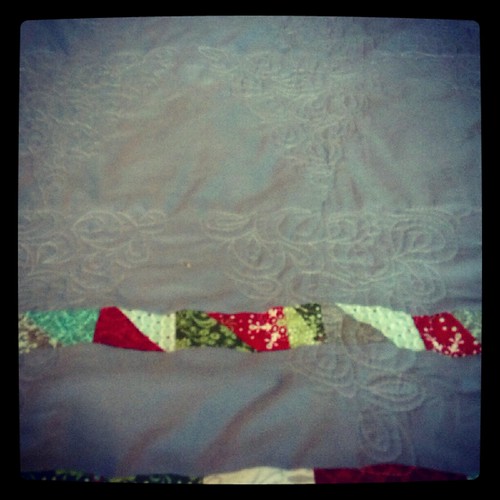
I went with a gray backing and included some funky scrap strips in the back too. I used almost all the trimmings from the pieced triangle blocks in those three skinny strips. Sometimes I get a little crazy with my scraps. (The pattern only includes instructions for a plain back. If there's interest maybe I can do a pieced quilt back tutorial here on the blog some day.)
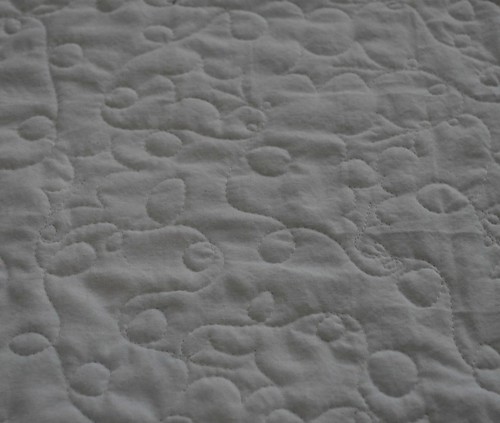
I really enjoyed doing the free motion quilting, too! It took a while, as usual, but I am so happy with the results. The teardrop-shaped design is new to me and I don't feel like I can change directions easily while quilting it (most of my shapes go one way) but it was fun to do something new with my quilting.

I did a few different designs in the pieced triangle/tree blocks too. The quilting shows up much better on the quilt back.

A few details:
*The pattern is a PDF download and the cost is $8.50. It's available here.
*Fabric requirements are listed here.
*The quilt is throw-size, 52" x 73"
*The pattern includes photos, diagrams, and printable templates along with instructions for making the quilt. If you want, a 45 degree triangle quilting ruler is useful, but it's not required.

Monday, October 22, 2012

Giveaway winner + stars

I'm finally back to announce the giveaway winner. #103, Kelie, is the winner of a copy of Natalia's book, Beginner's Guide to Free-Motion Quilting. Congrats Kelie and thanks to everyone for your comments!

******

I also wanted to show these star blocks I made over the weekend.

star blocks 10inch

I went to the Seattle MQG sew-in on Friday and got them started. It was fun to meet and talk to new people; everyone was so nice. These blocks are 10" square; the previous ones I've made for this project are just 8". I'm not sure how I'm going to put it all together but there will be a few different sizes of stars. Eventually.

Wednesday, October 17, 2012

Scrap block progress

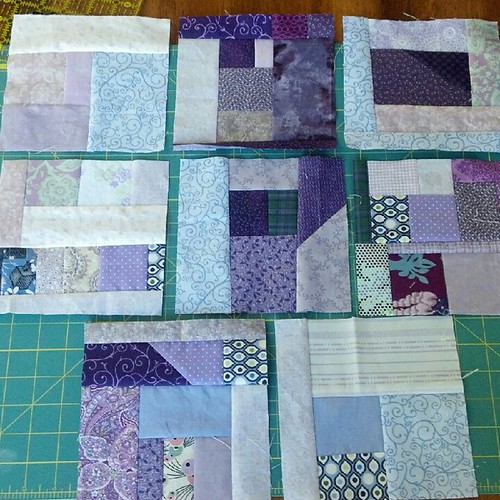
One of my sewing goals this week was to make 7 quilt blocks. I finished up 8 purple scrap blocks, so I went above and beyond.

8 purple scrap blocks 
I like the blocks with smaller pieces better... but they take more work and thinking. 

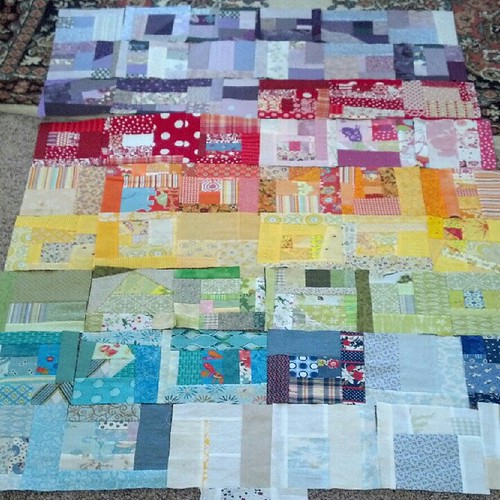
Then I decided to lay out all 55 of my completed scrap blocks. Here's the rainbow so far:
These blocks are 6.5" square. I'm planning on making at least 25 more. I need to focus on pink and turquoise next, I think.

Tuesday, October 16, 2012

Finished Hexagon Pillow

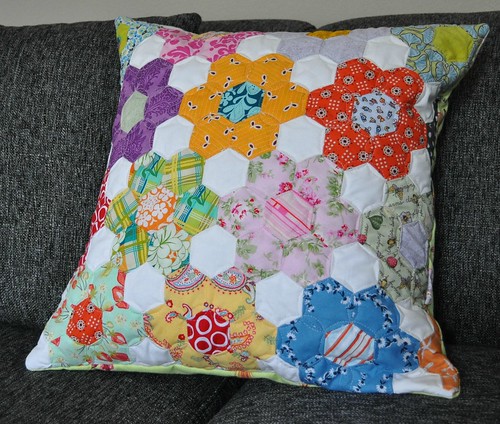
It feels great to finish a year-old UFO!

finished hexagon pillow
I started this hand sewing project last year when we were living in corporate housing for almost 2 months. It sat unfinished for a long time, only needing a few more hexagons. I finished it up the other day, machine quilted it yesterday, and made it into a pillow this morning. The continuous curve quilting was inspired by Frankenquilt by Krista Withers (scroll down a bit).

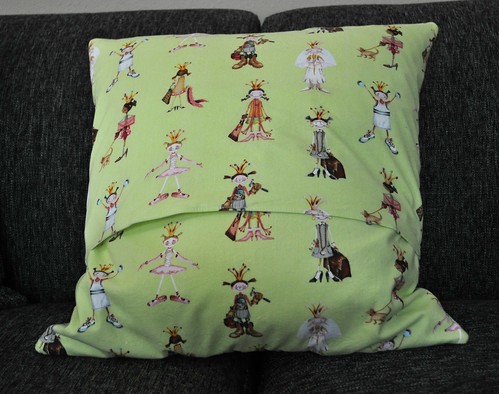
The pillow back is this weird but cool princess/dress up fabric I got from the remnant bin a few months ago.
hexagon pillow back
It's a little overstuffed or in other words, too small for the pillow form. I had a hard time getting those bottom corners filled up correctly. My daughter thinks it needs to go in her room because of the princess fabric. I want to keep it downstairs, for a while at least.

Thursday, October 11, 2012

Beginner's Guide to Free-Motion Quilting Blog Tour + Giveaway

Beginner's Guide to Free-Motion Quilting 
Hi everyone! I'm excited to take my turn on the blog tour for Natalia's new book, Beginner's Guide to Free Motion Quilting. Natalia is a very talented quilter who blogs at Piece N Quilt where she shares a lot of her quilting along with tutorials and patterns too.

Natalia's theme for this blog tour is "It's a Family Affair" and I'd like to share a bit about my family's influence on my sewing and quilting. My mom learned to sew from her grandma, and she taught me to sew clothes and toys starting when I was really little. My Grandma Taylor also taught me and helped me with my sewing, including helping me make my very first quilt when I was 13 years old.

I started quilting 'for real" the year I got married and now my husband and I have been married 15 years and have 3 kids. I've enjoyed making baby quilts for my kids and nieces and nephews and bigger quilts for family members as well. My mom started quilting a few years ago and my kids have done some sewing too. My oldest boy is working on a Minecraft pillow, and just the other day, my nearly 4-year-old daughter started her first hand sewing project. She still needs a lot of help but she's doing a really good job so far!

Now for my thoughts on the book. I think Natalia did a fantastic job with this book. Beginner's Guide to Free Motion Quilting has a good introductory section explaining the tools you need to get started with machine quilting and basic instructions for basting your quilt. Then the main part of the book is full of various free motion quilting designs, complete with step-by-step diagrams and photos showing how to stitch each design. I'm looking forward to working some more on my free motion quilted feathers with this book as my guide.

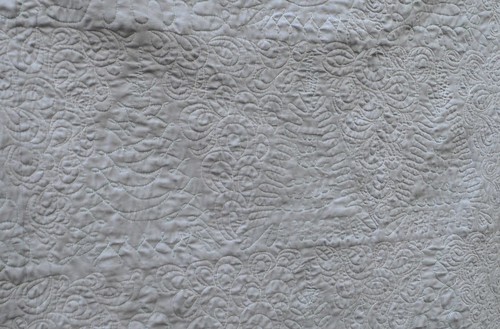
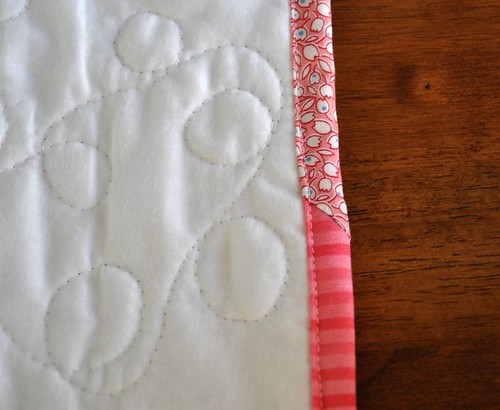
I did try something new with my quilting after reading Natalia's book. In the center of this photo you can see the quilting I did based on the "clams" design. (This is the back of a quilt I'll be sharing here soon.) I had tried to do something similar to this after just seeing a couple of photos and couldn't figure it out. The diagrams in the book really helped me get it, and I even made my own variations/additions to the design in a few places.
evergreen quilting detail2


Finally, I have to mention the project section of the book; Natalia has included the patterns and quilting suggestions for 6 quilts. The cool part about this for me is... I helped make one of the quilts in the book. :)
Beginner's Guide to Free-Motion Quilting

Natalia does a lot of applique in her quilt designs and I helped make this applique quilt top. (I would have made the whole quilt top but my sewing machine ended up needing to be serviced half way through the project.) I love the quilting Natalia did and someday soon I'm going to try out that swirly quilting she did in the negative space.

All right, time for the giveaway. If you'd like to win a copy of Beginner's Guide to Free Motion Quilting, just leave a comment on this blog post. I'd love to hear about a current project you're working on... or tell me something you want to make. If the winner is not a U.S. resident, they will receive the e-book version of the book. Winners will be chosen on October 18.


Check out the other stops on the tour!

Amy Webb - October 6th
Melissa Corry - October 7th
Melissa Mortensen  - October 8th
Stash Books - October 9th
Amy Ellis - October 10th
Kimberly Jolly - October 11th
Vicki Christensen - October 12th
Candy Glendening - October 13th
Angela Yosten - October 14th
Gen Q Magazine - October 15th
Tracey Jacobsen - October 16th
Vickie Eapen - October 17th
Allison Harris – October 18th


Tuesday, October 02, 2012

Fall's here

How's everyone doing? Things are good here, we are settled into a good routine now that school has been in session for about a month (I'm loving our new "no TV before homework is done" rule!) and I'm working on a few projects.
hex project again
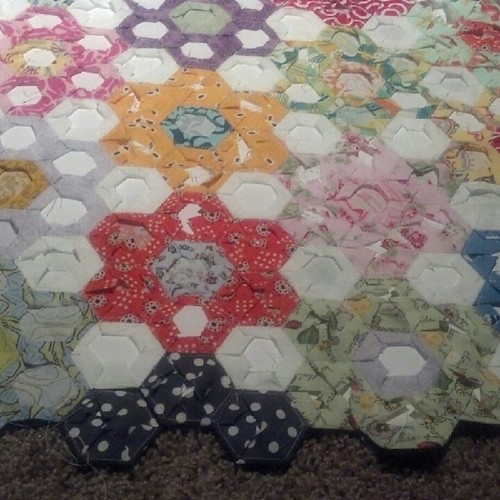
I started this little hexagon patchwork future pillow last year when we first moved to Washington and it has been sitting almost done for a long time. I decided I'm going to work on it a little bit each day until it's finished. I'm not sure what to do with the edges on a hexagon project; I guess part of the hexes on the edges will get cut off. I guess I'll see when I get there.
back of Christmas quilt
And I've been plugging away on the machine quilting for my new Christmas quilt. I have tried some new things and made some mistakes, there's always something to learn right? I'm looking forward to having this done soon!

I also got all the things I need to make a Pirate Fairy Princess costume for my little girl. We have wings and striped leggings, she will get a tiara for her birthday, and I'll be making a pirate skirt and peasant top. I think it will be really cute.

I wanted to let you know about the Color Wheel Swap hosted by Megan of City Stitches. If you're needing to stash build or just like to swap, it looks like it will be a good one. All you have to do is send in 2 yards of one color of fabric (she'll assign colors) and you'll get back a rainbow of fat quarters.Signups are open until the 10th, so check it out!

p.s. I'm on instagram; my username is VickiDJL. You can see some of my pics there if you want... even a sneak peek of the front of my Christmas quilt.


Friday, September 21, 2012

Beginning quilting group

I'm going to be teaching beginning quilting to some friends from church and we're going to start with a quilted plus pillow. I made up and quilted my sample over the last couple days:

plus pillow top
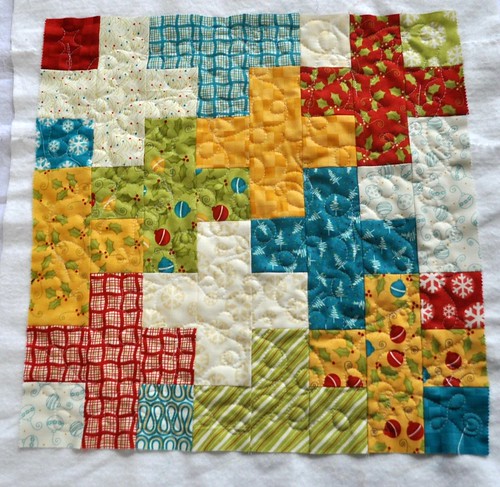
It's 16" square, and I still need to make it into a pillow. I quilted swirls and a few holly leaves inspired by the fabric. Here's a shot of the back so you can see the quilting a bit better:

holly leaf quilting


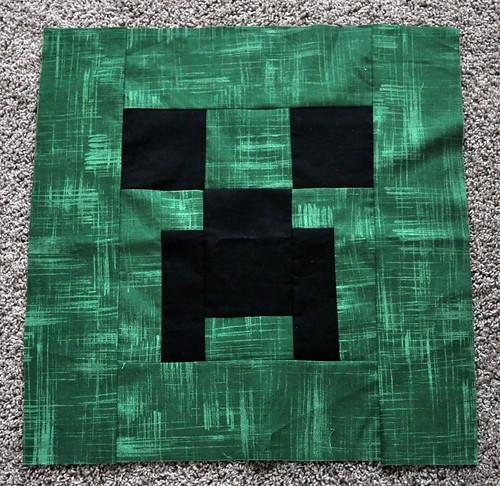
Speaking of pillows, my 12 year old boy made this creeper a couple weeks ago:

creeper
He's going to quilt it and make it into a pillow. It will be 20" finished (ok maybe a little smaller.) The creeper is from the game Minecraft, by the way. :)

Friday, September 14, 2012

Fall notes and giveaway winner

Thanks everyone for your birthday wishes! The giveaway winner was Karen O.; I'll be sending her a rainbow of scraps/charms. :) We went out to dinner as a family on my birthday and my husband is taking just me out to eat tonight; we're sort of stretching out the celebration. I also got a fun surprise package on Saturday from my friend in Kansas; she made me this adorable ruffled tote bag.
I've taken it twice on walks to the library this week; thanks Lorilee!

We've been getting into the swing of things now that the boys have been back in school for 2 weeks. We've had to adjust the routine and rules a little bit, but I think we've got a good system now as long as I can stick with it.

I have been faithfully working on my hand exercises, hoping I'll get most of the mobility back in the finger that I broke. I go to a hand therapist weekly and heat it up and do exercises 4-6 times a day. The bone is healed now and I'm so glad to be past that painful time. I have been given the ok to even use hand weights now and am working on getting the strength back in that hand.


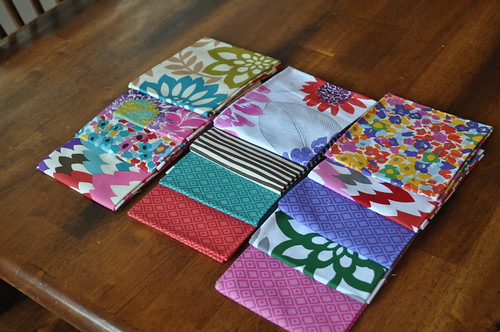
A couple weeks ago I was the lucky winner of a giveaway from Beyond the Reef and wanted to give them a shout-out and thanks! I got this collection of fat quarters... I love the rich colors.
dear stella fqs
I'm not totally sure what I'll make with them yet, but I've had the Curlicue Crush pattern by Bec at Chasing Cottons (scroll down a bit to see it) in mind for a while, and I think it would be a good pattern for some of these larger prints.

Looking forward to the weekend--hope you have a good one!

Tuesday, September 11, 2012

Another way to finish up a quilt binding


binding1.1 
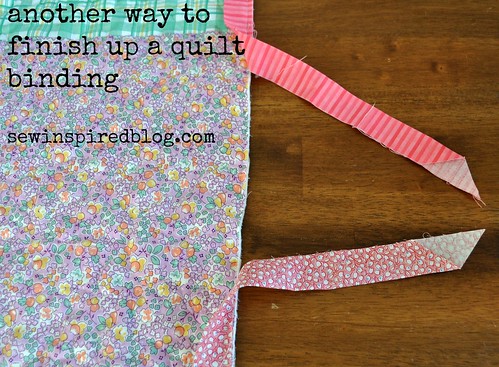
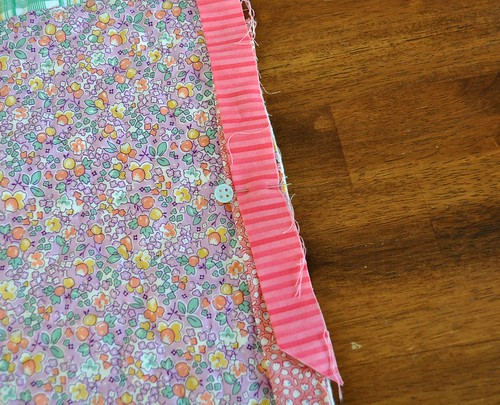
Hello! I've been wanting to do a couple of additions to my original quilt binding tutorial for a while, and I was finally able to take some photos when I bound my last quilt. This is a tutorial for finishing up the ends of a quilt binding with a diagonal seam. Instructions on getting your quilt binding to this point are here, but you will not sew down a "pocket" of binding at the beginning as shown in that post.

Step 1: Apply your quilt binding to the quilt, leaving about 6-8 inches of binding unsewn at both ends. Make sure the two ends of the binding overlap by at least 3-4 inches. (see photo above)

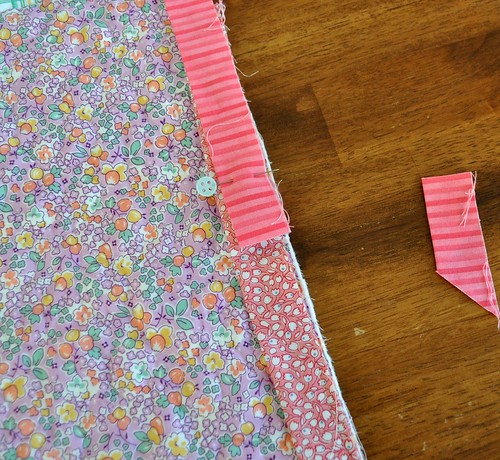
Step 2: Lay both ends of the binding fabric along the edge of the quilt, overlapping them. Mark the center of the overlap with a pin or a water soluble marker.
binding 2 

Step 3: Cut off the top binding strip about 1.5 inches from the pin. 
binding 3

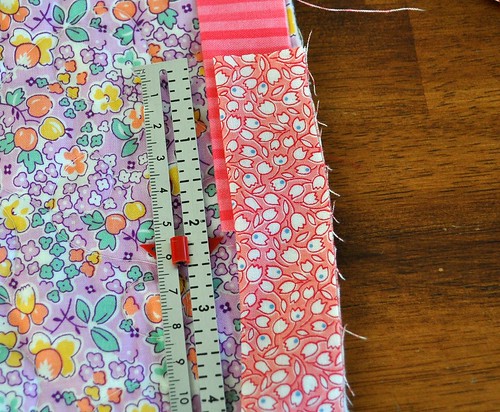
Step 4: Rearrange the binding strips so the one you just cut is on the bottom. Now you will cut the top strip. You'll need to measure the other binding strip before you cut it. The measurement needs to be the same as the width of your binding before you folded it, minus about 1/16". For example, I usually do a 2.25" binding, so I will cut my binding pieces so they overlap just a little bit less than 2.25". I used my trusty seam gauge from 8th grade sewing class to show the measurement here (see photo below). If your quilt binding is 2.5" then cut your strips so they overlap slightly less than 2.5". 

The reason for making the overlap slightly smaller is that the binding strips will probably stretch a little when you sew them down to the quilt, and the sewing machine will also ease the lower quilt layer so it fits the slightly shorter binding section. In the past, when I would sew this last section of quilt binding down without making it slightly shorter I would almost always end up with too much binding and it would either end up puckered or I would have to redo it to make it look right. Making the binding slightly shorter eliminates that problem.
binding 4 

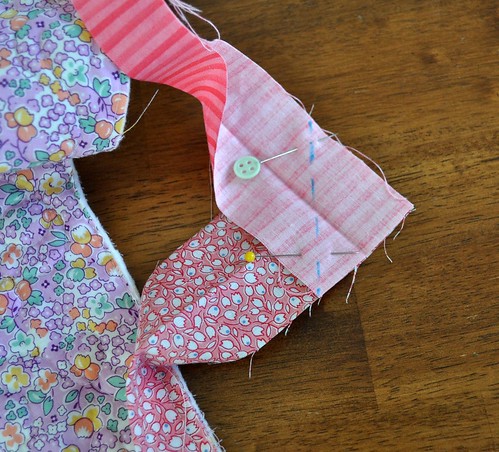
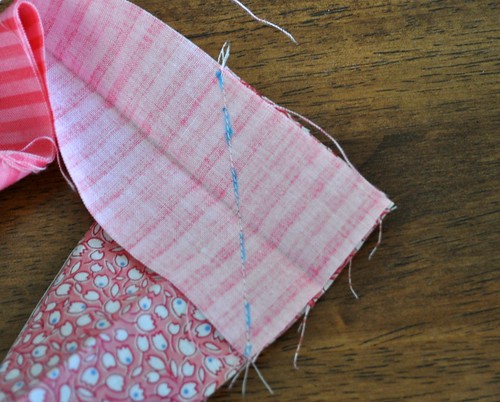
Step 5: Fold the bulk of the quilt out of the way, unfold your binding strips, and arrange them with right sides together and at a right angle, as shown in the photo below. Pin them together and draw a diagonal line from corner to corner. 
binding 5 

Step 6: Sew the binding strips together on the line you just drew. Backstitch at the beginning and end of the seam.
binding 6 

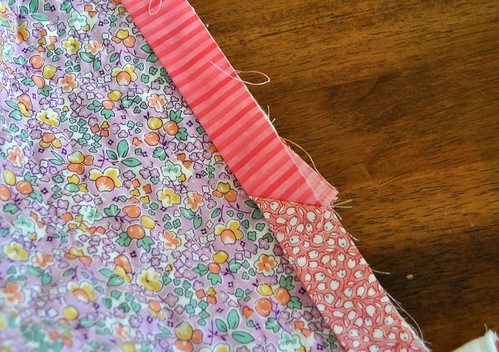
Step 7: Unfold the binding and stretch it out along the edge of the quilt to make sure it will fit. 
binding 7 

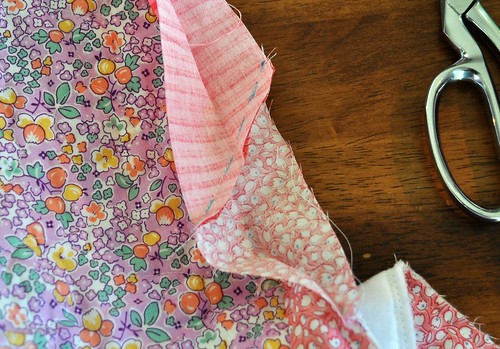
Step 8: If it fits right then trim the seam allowance to 1/4". If it seems too long then you can undo your seam and remeasure your binding pieces. If it is too short then... oh dear. You will probably need to undo your stitching several inches and add another, longer binding strip, and then start over. This shouldn't be a problem though if you measure carefully before you cut!
binding 8 

Step 9: Sew the binding down to the quilt.
binding 9 

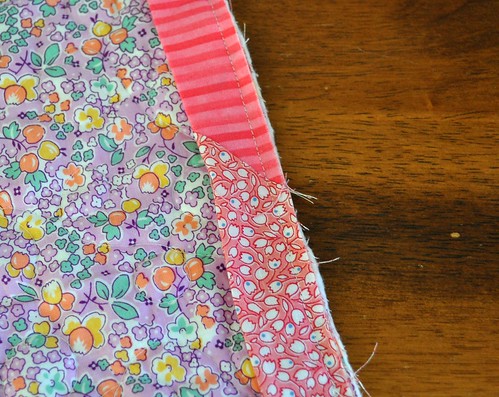
Step 10: Finish the binding the way you choose. I machine stitched the binding down this time; sometimes I do it by hand.
binding 10
You're finished! I hope this is helpful. Happy binding!

Friday, September 07, 2012

Finished granny square quilt

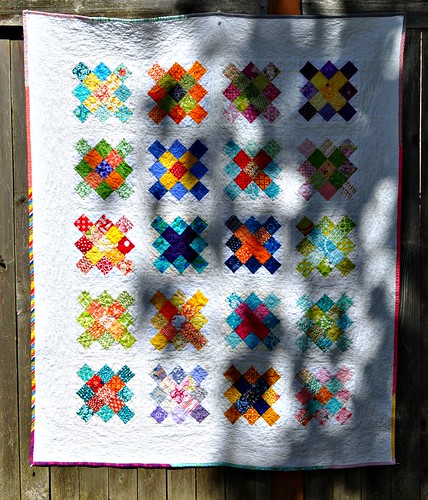
I finished this up yesterday.

finished granny quilt 
I machine quilted it with meandering loops and machine bound it. I used binding scraps that I've been saving and only had to add a small piece to make the binding long enough. I still have a bunch of brown binding pieces.

Here it is with the light behind it:
finished granny quilt 2 
My girl was helping pin it to the fence. 

This quilt was a group effort--blocks were made by members of the Believe circle of the do Good Stitches charity bee. I need to get a label from my circle leader and then I will send it to our charity, My Very Own Blanket.

If you want to make a quilt like this, the block tutorial is here. I used the instructions here to make my blocks with setting triangles around the edges.  

I'm glad to finish this up and am 12 blocks into the next project already! 

One more thing. Today's my birthday and I want to do a small-ish giveaway. I'll send a rainbow or your-favorite-color-scheme scrap pack to a reader. Just leave a comment if you're interested (tell me what colors you like!) and I'll pick someone randomly in a few days. Comments closed now, thanks!

Friday, August 31, 2012

Bee blocks--August and September

I finished up my blocks for the Believe circle of Do Good Stitches this week for August and September. Just because I'm in charge in September again and had to get them done at the beginning of the month.

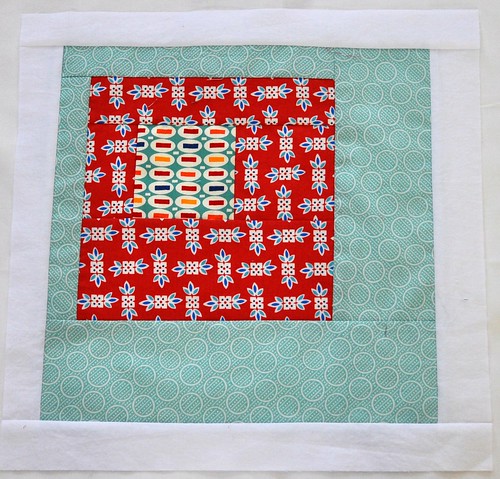
Here are the asterisk blocks I made for August:
August bee block 2

These were pretty fun to make and I will probably try them again sometime.

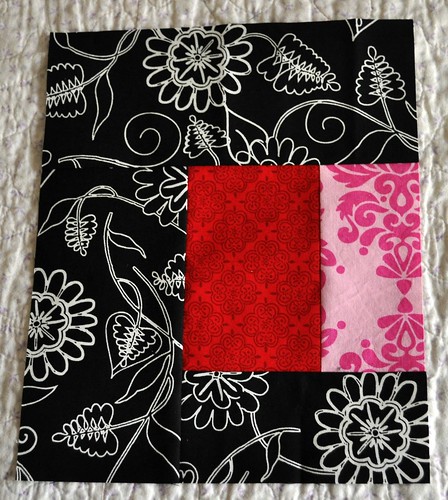
For September I decided to go with a minimal log cabin block in black/gray/pink/red/and/or white. Definitely inspired by Jacquie's work, specifically her Scandia Crush quilt. I admire Jacquie's modern quilting sensibilities (and her hard work ethic and she's just a great person overall) and am looking forward to seeing the blocks our group members will make. Here are the two I made:

September bee block 2
September bee block 1
This is our last weekend before school starts and I'm looking forward to spending most of it at home. I went with my 3rd grader to meet his teacher this morning and got the email notifying me where my middle schooler needs to go to get his schedule on Tuesday morning. We tried to start getting up earlier in the morning this week, but that didn't go so well. 6:20 a.m. is going to be awfully early on Tuesday....

Wednesday, August 29, 2012

Granny Square Quilt Top

granny quilt top 
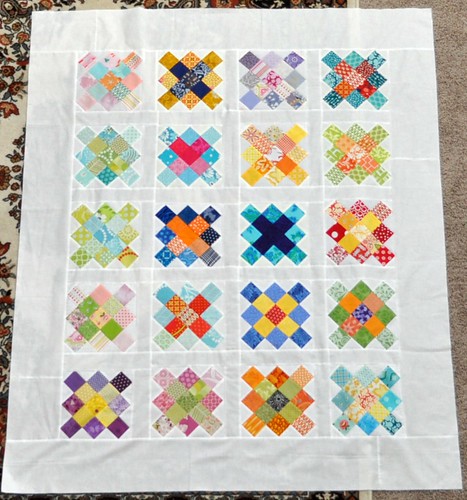
I finished up the granny square quilt top for the Believe circle of do good stitches. This photo is upside down compared to how I had the blocks laid out originally and that pastel chunk in the left column really sticks out to me in this view. I think it looks good though for not having any restrictions on the colors people used in their blocks. 

I have the fabrics gathered together for the back of this quilt, and need to straighten edges and sew them together. I'm planning on this being the first quilt I machine quilt after breaking my finger. I'm getting a little excited about it. My finger is much better but really stiff in that top joint. I am faithfully doing my hand exercises 4-6 times a day and not complaining about it. 

Also, I have plans for a new Christmas quilt.
blitzen fabric 
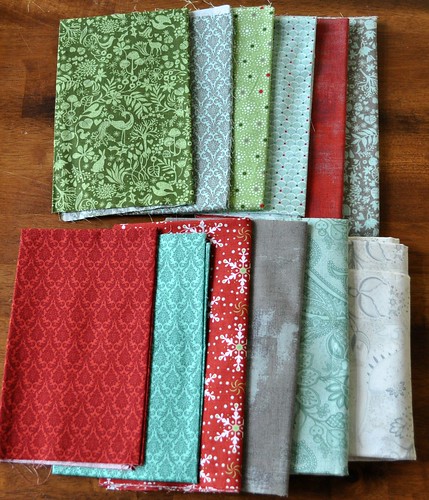
I really like the new Blitzen fabric line by basic grey/moda and came up with an idea for another Christmas quilt. I think I need a couple more darks added to the mix first though. I'm hoping to be able to have the quilt done and the pattern finished and for sale by the end of September. 

My boys will finally be back in school next week--it's our first year ever starting this late and I think we are ready. We've crammed a lot of summer into the last few weekends since I was down for a while in July after my accident. I'm ready to get back on a good schedule, start exercising again, and see if I can get some good chunks of sewing time in.

Friday, August 24, 2012

Granny charity quilt

granny quilt rows
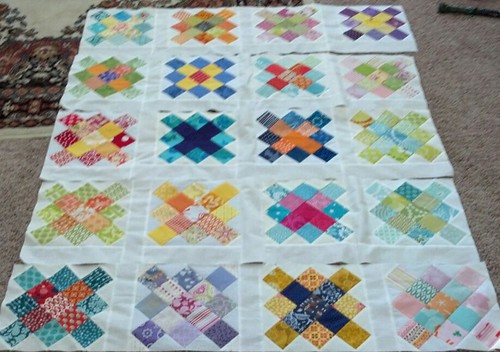
I got the rows sewn together for this quilt for the Believe circle of do.good stitches. Progress is good. Still need to put the rows together and add borders.

Wednesday, August 15, 2012

More quilt blocks

Sewing has been slow with my injured hand. It is getting better though and I'm looking forward to getting the splint off soon so I can get my finger and my whole hand exercising and back to normal function. Eventually.

Here are the quilt blocks I've made since my last blog post:

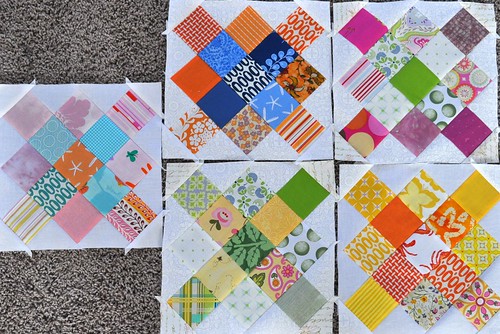
Five more granny square blocks. 
 
5 grannies 
I have 4 more to make and I haven't used any purple yet! I'm planning on cutting purple squares today. 

And three more star blocks: 
star blocks 4-6 
I decided to just make the opposites of the first three blocks. So this quilt may end up less scrappy looking than some of my others but that's ok. I'm looking forward to making more of these blocks, but planning on finishing my granny square top first.

Saturday, July 21, 2012

star blocks. etc.

I had the surgery on my broken finger last week and checked in with my doctor the other day and everything is looking good. Well, as long as it is covered up by a bandage.... He said it should be fully healed in 6 months and the only questionable thing is what the new fingernail will look like when it grows in. I have some pins in there holding the bone in place and they will be removed in 4 weeks. In the meantime I'll be getting a permanent, yet removable splint next week and find out what kinds of physical therapy I will need to do.

I have been able to do a little bit of sewing, which is good. I don't think I'll be able to machine quilt for a few weeks but I can rotary cut and piece just fine so I will focus on that for now. I finished up a few quilt blocks this week:

square block 2 square block 1 
These two blocks (above) are for the Believe circle of the do good stitches bee. I didn't think I'd be able to sew at all right after my accident so I'm happy these are done.
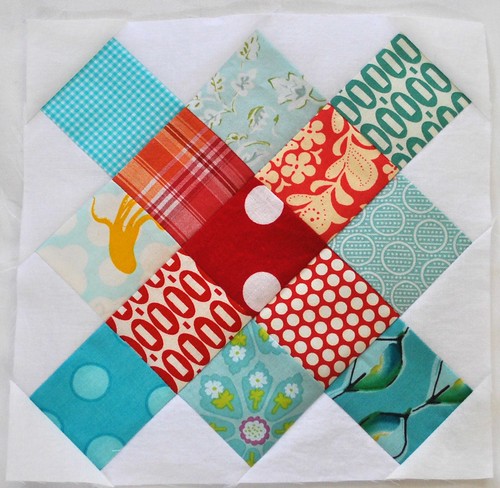
granny 11 
And I sewed up block #11 for my own personal granny square quilt. I think I will add some blacks in next time I'm ready to cut more squares for this project.

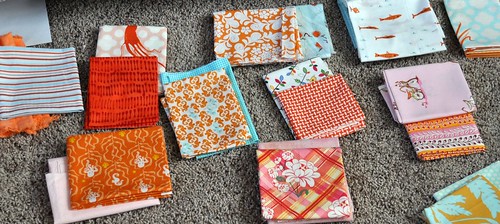
I started something new, too. I couldn't help it. There were a few nights when I couldn't sleep this last week, and I pulled these fabric pairs out one night.
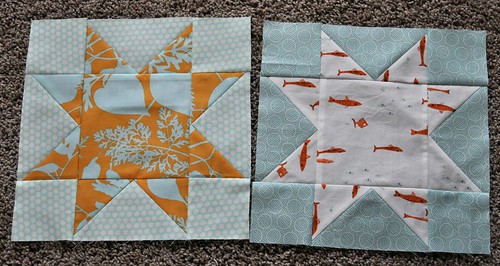
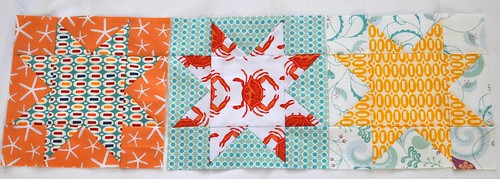
I have 3 blocks done so far. I've cut out two blocks worth of pieces for each fabric pair and am not sure if I should just do the opposite block (compared to the ones already sewn) or mix it up. What do you think?
3 star blocks 
I really love the crab one.