Wednesday, November 11, 2009

Tutorial: Charm Pack Dress

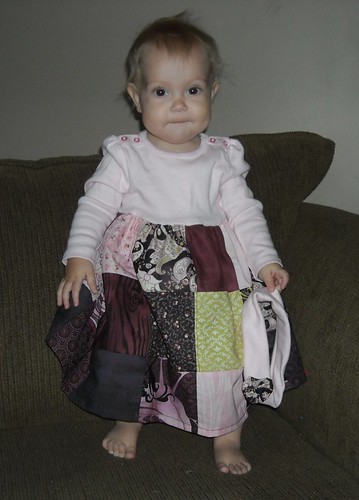
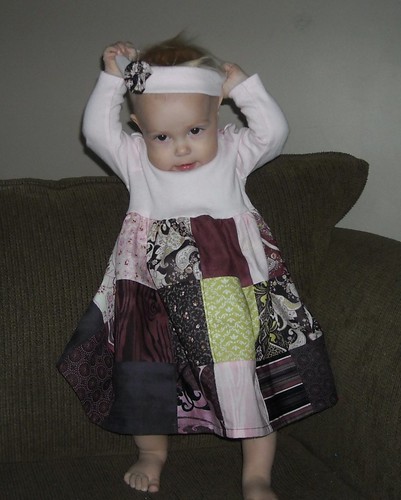
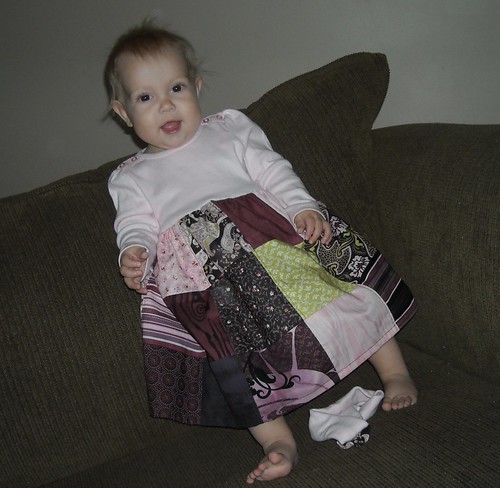
Here are instructions to make a charm pack dress for sizes 6-9 months, 12 months, and 2T.

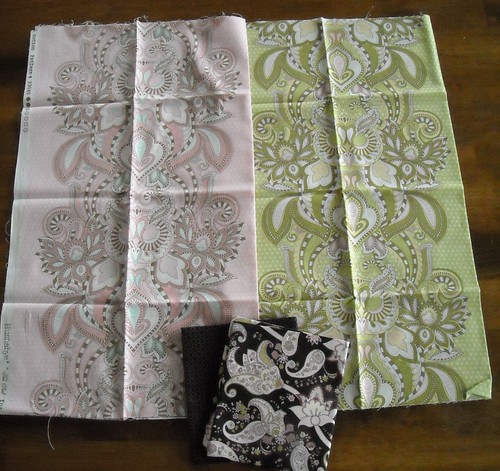
What you need to get started: purchased t-shirt, charm pack, matching thread, one fat quarter or other matching scraps (for size 2T only), universal and ballpoint sewing machine needles.
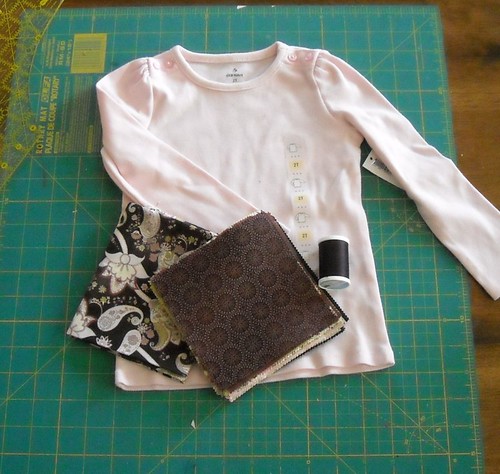


Step 1: For size 2T, cut out some 5" squares from your fat quarter. You will need a total of 44 squares for the skirt. I cut out 4 squares from my fat quarter but only ended up using 3. I am still going to make a matching yo-yo hair clippie from the last square I cut out.
For size 12 months, pick out your 30 favorite squares from the charm pack.
For size 6-9 months, pick out your 20 favorite squares from the charm pack.
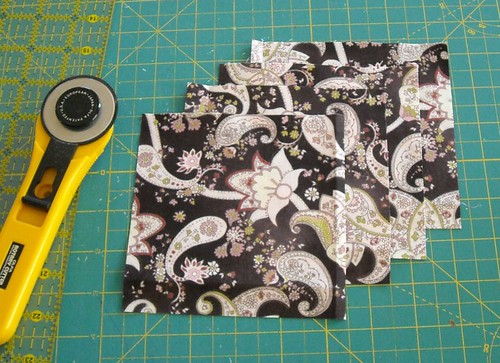

Step 2:
Start sewing the squares into pairs. You can spend time arranging the squares before doing any sewing, and I did that the first two times I made this style of dress, but for the size 2 dress I sort of randomly sewed pairs of squares that I thought looked good together. Then I spent time arranging the pairs into rows. For a size 2 dress, pictured here, you will need 4 rows of 11 squares. So make sure you sew 20 pairs together, and then lay the rows out, adding another single square at the end of each row.

For size 12 months, you need 3 rows of 10 squares, and for size 6-9 months, 2 rows of 10 squares.
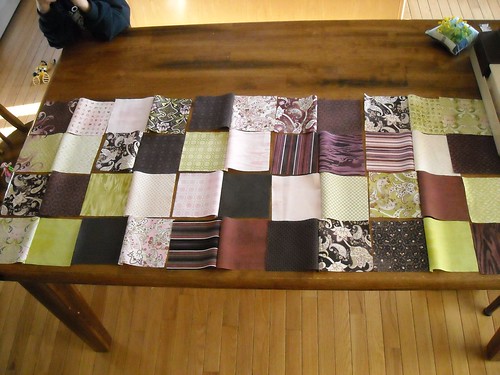

Step 3: Sew your squares into their rows. I used a 1/4" seam allowance for all the seams in this project.
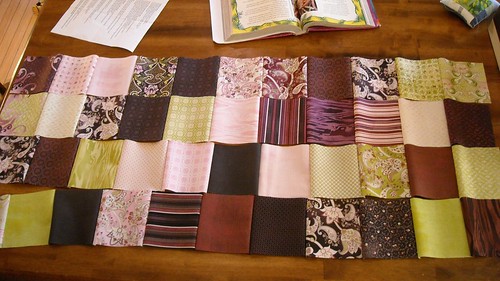

Step 4: Finish the seams. I am a major stickler about not leaving unfinished seams in pretty much anything besides quilts. These squares are pinked (except the ones I cut myself) and might do just fine without being zigzagged but my mom's lessons and my years of 4-H make it so I just can not leave these seams unfinished. I could have serged these seams but it was easier to just switch the sewing machine knob to zigzag so that's what I did.
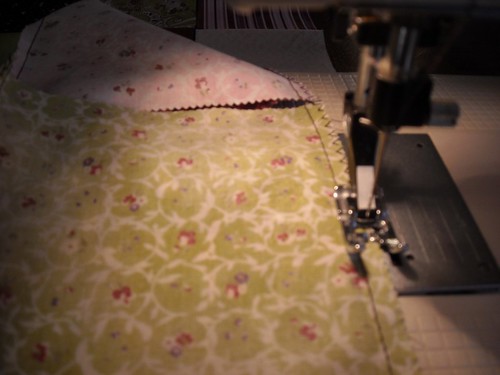

Step 5: Press the seams. Press all the seams on each row the same direction, and then for the next row, press them all the other direction. This step is really important and I'm afraid if you don't press these seams well you will end up with a "home made looking" and not in a good way garment. Thank you.
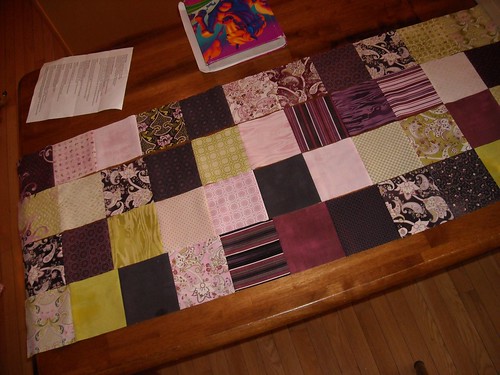

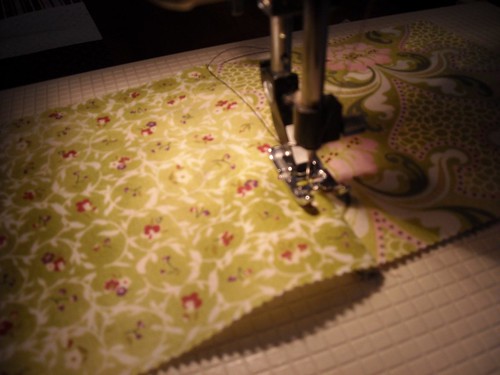
Step 6: Topstitch. This is another step that makes the patchwork skirt look really good. I topstitched these seams a bit less than 1/8" away from the seam.

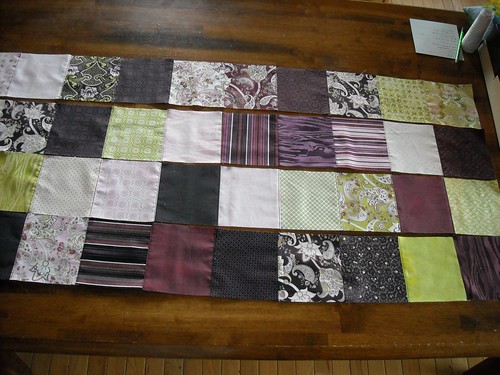
Step 7: Lay your rows out and admire them. This isn't really that hard, is it?

Step 8: Sew your rows together.
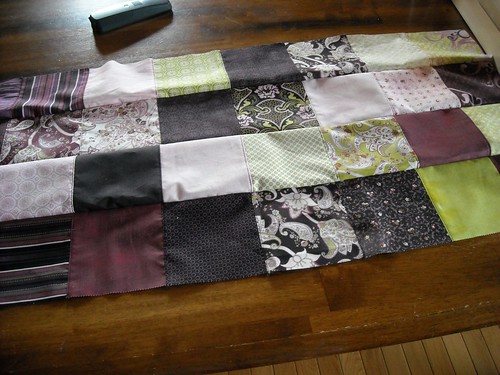

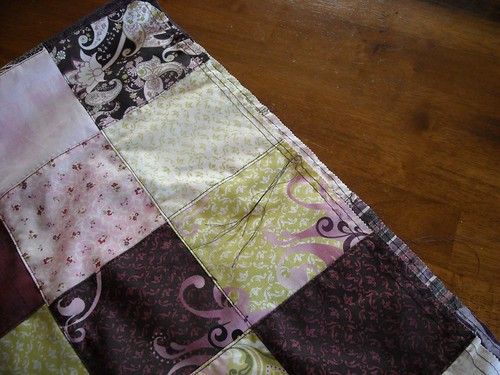
Step 9: Zigzag your seam allowances, press your seams all in one direction, and topstitch. Looks good!
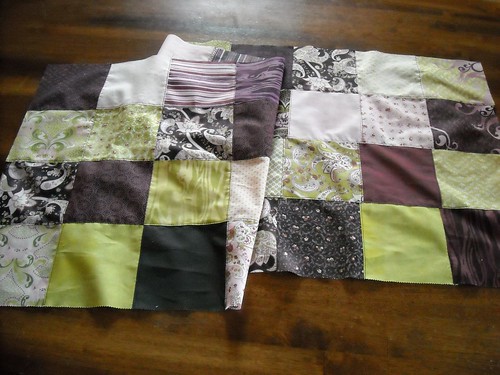

Step 10: If you need to, straighten out your edges before sewing the skirt into a circle. (That is a sad broken ruler.)
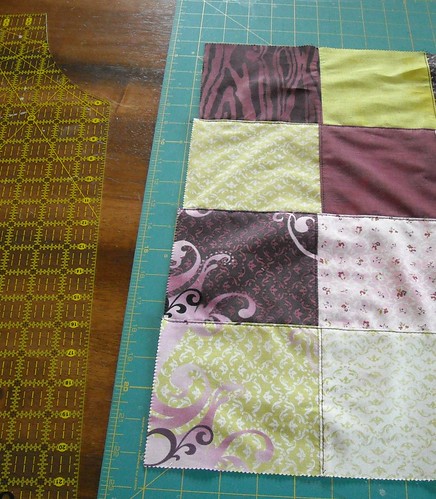

Much better.
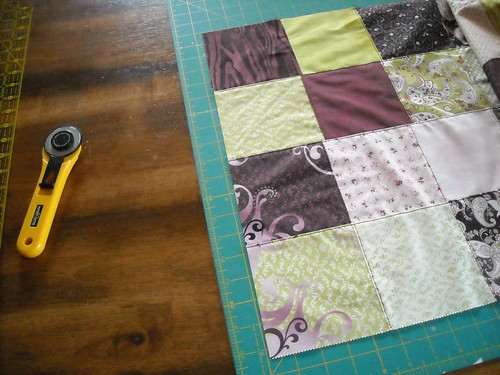

Step 11: Sew the skirt into a circle, zigzag your seam, press it, and topstitch it. Then turn the skirt around different ways until you find the side you want to be the front. Lay it flat and mark the side edges, at the very top, with pins.
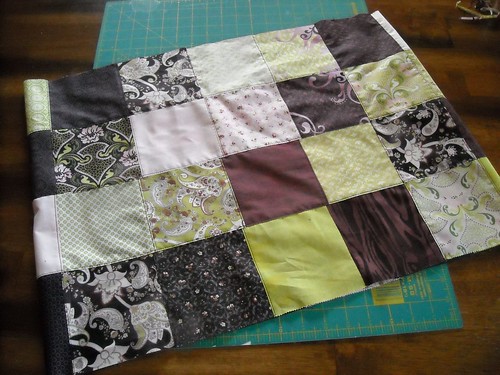

Step 12: Sew gathering stitches. Adjust your sewing machine stitch length to the longest possible length. Start at one pin and sew 1/4" from the edge to the other pin. Stop sewing and cut the threads, leaving 4-6" thread tails. Start sewing again close to where you stopped and stitch around to your first pin. Leave 4-6" thread tails on all the ends of these gathering threads. Sew a second row of gathering stitches 1/4" in from your first row, starting and stopping at the same places and leaving thread tails again.

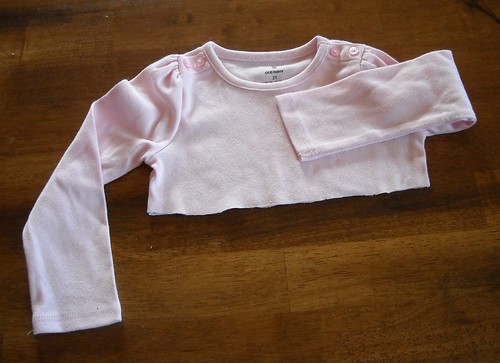
Step 13: Cut off your shirt. I cut this 2T shirt off 2" below the bottom join of the sleeve to the shirt. For the 12 month dress, I also cut off the shirt about 2" below the armpit intersection of the sleeve and shirt. For the 6-9 month dress, I cut the shirt off about 3.5" below the sleeve/shirt intersection. You can experiment with different t-shirt and skirt lengths and figure out what works for you.

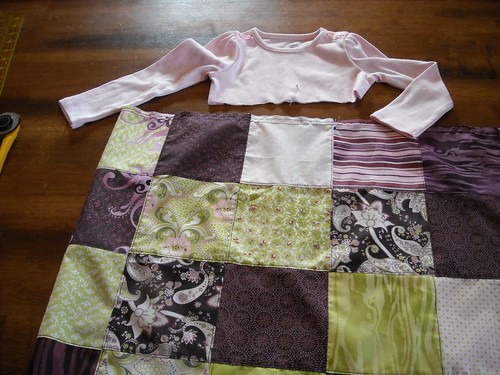
Step 14: Use pins to mark the center fronts and backs of the shirt and skirt.

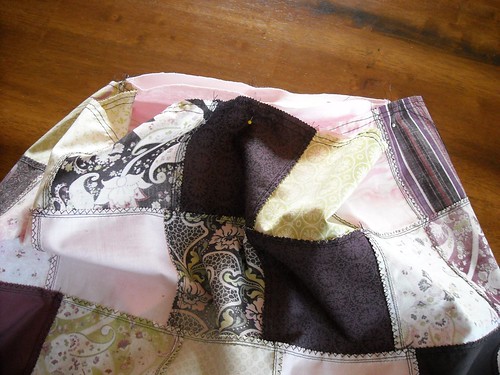
Step 15: Turn the skirt inside out and pin the shirt and skirt together, matching the center fronts and backs, and matching the side seams of the shirt with the places where you started and stopped your gathering stitches.

Step 16: Gathering. Hold onto the two threads from the side of the skirt facing you. Pull the threads while at the same time using your other hand to gather the skirt fabric. Pull the threads until the gathered skirt edge is the same length as the section of shirt you will be sewing it to. Gather from one side seam to the center front or back, and then repeat this from each side seam, until your skirt is all gathered up.
Once the gathered edge is the right length, I take the two threads and wrap them around my pin a few times to keep the gathers from falling out. Next, evenly spread out your gathers and pin a few times in between your center and side seam pins.
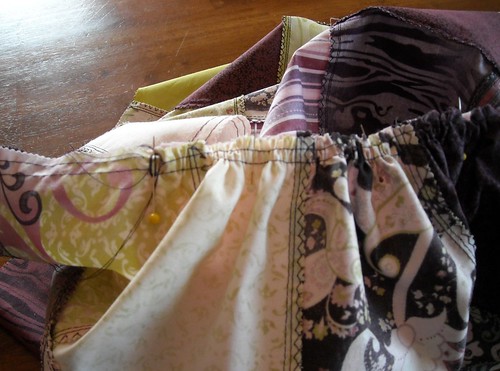

Step 17: Sewing skirt and shirt together. Change your sewing machine needle to a new ballpoint needle. You don't want a woven needle to put holes in your t-shirt fabric after all the work you've done! I chose a stitch with some stretch in it, stitch "F" on my machine. I worry that if I used a straight stitch that the seam would pop too easily since the t-shirt is meant to be stretchy and the dress is put on over the head. You could use a narrow zigzag stitch, or even serge the skirt and shirt together.
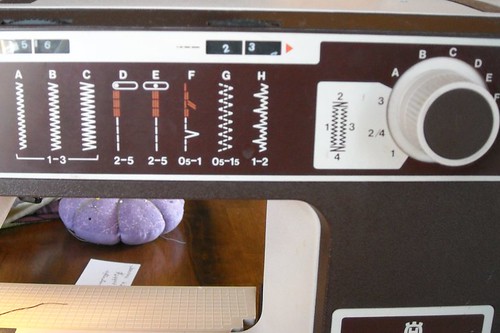

Sew the seam in between your two rows of gathering stitches.
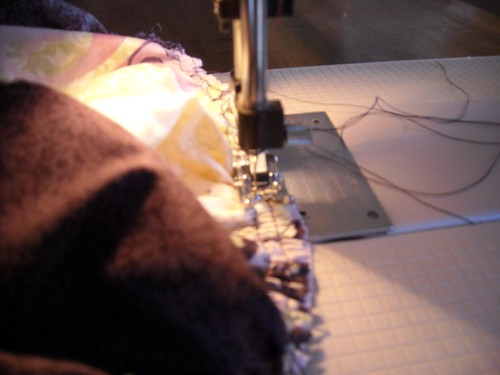

Step 18: Take a look at how cute the dress is. Look closely at the bodice/skirt seam and make sure there aren't any unwanted folds or tucks in the t-shirt fabric. If there are, unpick them and fix them before you go further. Once the seam is good, go ahead and pull out all your gathering stitches.
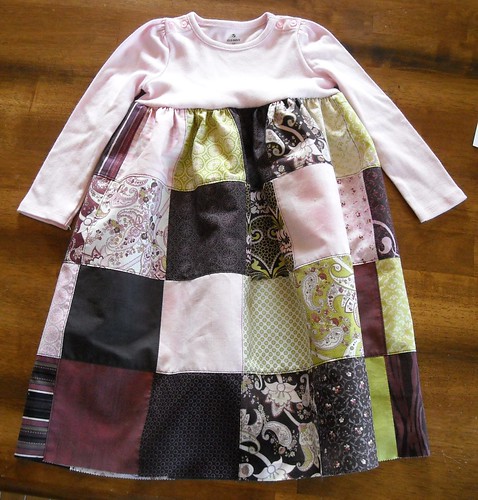

Step 19: Zigzag the edges of this seam.
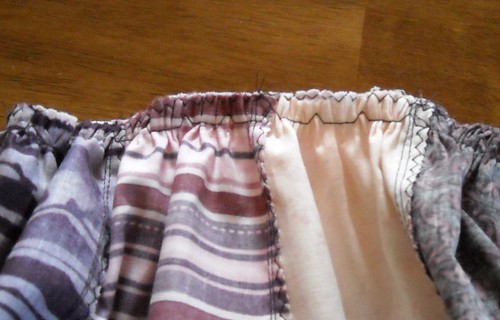

Step 20: Hem the bottom of the dress by folding the raw edge under twice and stitching near the folded edge.
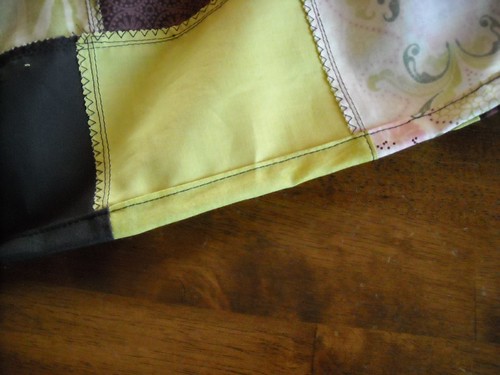

Step 21: Press the hem. You're done!


So, there you go. I hope everything is explained clearly enough here, please let me know if you have questions or need clarification on anything.

I would love to see pictures if you make a dress using this tutorial.

Also, if you modify this tutorial for a larger size, please let me know so I can either link to you or include your modifications here, if you prefer.

Tuesday, November 10, 2009

cool links ~2~

I checked out the "coming soon" fabric category at Fat Quarter Shop the other day and guess what? Christmas paper dolls fabric, available next summer. So cute!

Coming a little sooner is the Meadowsweet line by Sandi Henderson. I absolutely love the strawberry fabric!

Aren't these photo gift tags cool? I might start dressing up my Christmas gifts a little better this year. This technique could be done with fabric scraps, too.

One of my favorite new-to-me podcasts since I've actually been on iTunes is Tranquility du Jour. Kimberly Wilson interviews all kinds of inspirational folks. She throws in a video podcast every once in a while, too.

Another great podcast is Tara Stiles Living. She has a 4 week free weight loss yoga series that feels good!

Monday, November 09, 2009

bookmaking

I've been interested in handmade books for a long time. My friend DL took a class in college that involved writing and binding a book. I can't remember how I talked myself out of taking that class, but I kind of wish I had taken it, now. She's made me a few really cool books over the years.

I found out about the Bind It All maybe a year or so ago and I think I'm ready to get one, soon. I recently made a few recycled notebooks by sewing paper and cardboard covers together (with the sewing machine), and my Annie's Arthur Mac n Cheese sewing project notebook, while super cute, isn't holding up very well; it's kind of coming apart at the seam. I think I would have a lot of fun making simple books with the Bind it All.

I think books, and other art-y things, made from shipping tags are cool.

I love the idea of making these tiny art pieces.

I want to learn more traditional, hand sewn bookbinding too. I think I need to get this mini-zine about codex bookbinding by Kristin from Craft Leftovers. For a start.

Sunday, November 08, 2009

improv pincushion

I sewed the binding on some of the Project Improv quilts for Jacquie, and I had a whole bunch of pins I needed to give back to her. I looked in my scraps and found a little square I started back when I was making my quilt block for the project. Here's the quick little pincushion I made from it:
It's stuffed with polyfil and has a few spoonfuls of dry rice in the bottom to give it some weight.
I think I might need to make some more of these.

Saturday, November 07, 2009

jaybird quilts giveaway


Julie at jaybird quilts is giving away some spring fever goodies, including a charm pack, quilt kit for a very cute and bright strip quilt, and cute Moda bag.

Head on over there and check out all the ways to enter! This giveaway is open until November 10.

Friday, November 06, 2009

Top 11 Essential Tools for Beginning Quilters

Here are some of my favorite tools that I use for quilting. This list covers the basic tools that a beginning quilter needs to get started making beautiful quilts.

1. Scissors. Good scissors make such a big difference. I'm left handed and have a pair of Ginghers true left handed 8" shears. I've had these over 10 years now and they are wonderful. If you're left handed, you've got to try true left handed scissors. You can actually use scissors without hurting yourself!

2. Clippers. The little thread clippers I have right now are small orange Fiskars ones. I need to replace them because they're dull and getting duller. Anyone have any favorites to recommend?

3. Pins. Get some pins and a pincushion. You probably won't need to pin every seam in every quilt, but sometimes pinning is very important!

4. Rotary cutter. I use a 45 mm Olfa rotary cutter.

5. Self healing mat. I have 2 mats--the first one I bought is 12x18 inches and my big mat is 18x24 inches. Sometimes it's nice to use my smaller mat for small projects, but if you could only have one, I would get the larger size. These go on sale often at JoAnn's; don't pay full price!

6. Ruler. You need a good, sturdy acrylic ruler to use for cutting straight lines while rotary cutting. My first ruler for quilting was 3x18 inches. It's been broken for a while. I also have a 1x6 inch ruler which is useful for trimming very small quilt block pieces and great for other craft projects too. My main ruler nowadays is 6x24 inches and I think this is the best size.

7. Iron and ironing board. Get a good iron with steam. Frequent pressing is important while piecing quilts!

8. Curved safety pins. These are great for pin basting the quilt sandwich--I baste mine on the floor with the backing smoothed out and taped down.

9. Kwik Klip. This tool helps close the safety pins used for quilt basting quickly and without breaking fingernails or hurting fingertips.

10. Quilting gloves. These make it easy to grip and move the quilt sandwich while free motion quilting.

11. Computer/internet. Where else would I get all kinds of great information about quilting, from news about upcoming amazing fabric lines, to inspirational quilts and project tutorials on blogs? I also used the internet to get information about a certain basic quilt block I wanted to make earlier this year.

That's it! Did I forget something? What quilting tools can't you live without?

Thursday, November 05, 2009

hand sewing for my vacation


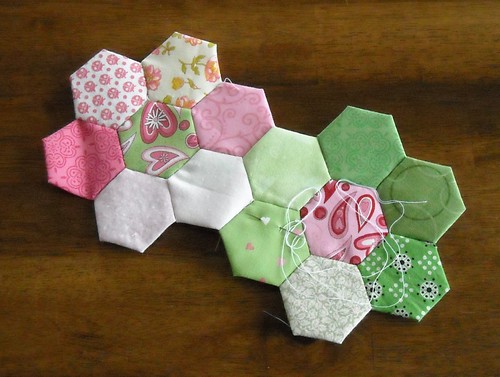
Getting some hexagons ready to take with me on my trip. I just need to print out and cut more paper hexagons and then I'll be all set.

Wednesday, November 04, 2009

block party quiltalong and giveaway!

The quilting bloggers of Block Party are kicking off a quarterly quilt along with an awesome giveaway! They have two fat quarter packs they are giving away to someone lucky.
Orange and blue:

Or pink and brown:

They will be posting tutorials for different styles of quilt blocks each quarter, and hosting a flickr group for anyone to share photos of their block party quilt blocks, and hosting a discussion thread where people can start or join virtual quilting bees. Maybe 2010 will be my year for that kind of project.... anyone want to swap quilt blocks with me?

Tuesday, November 03, 2009

cool links

Here are a few cool things I've seen and heard lately:
Are any of you fans of the Cast On podcast? It's a knitting podcast, but you don't have to knit (much) to enjoy it. There is a new episode available now, the podcast was on hiatus over most of the summer.

Audrie has been working on some beautiful projects lately. I love her new tablerunner.

Craft Hope is collecting quilts made of squares for homeless children in Grand Rapids, Michigan.

Jennifer from CraftSanity has an awesome interview podcast and is selling wooden potholder looms--I love these!

And, not quilt or craft related, but check out this cool little laundry post at Blog Segullah. I might need to print it out for my laundry room, too. And count my blessins.

Monday, November 02, 2009

Joy in the New Year--UFO Challenge


Jacquie's got another UFO challenge started, and this time you have until the end of the year to finish all those unfinished projects. There are going to be prizes! I've been thinking about my UFOs--I have several, and I have a couple that are embarrassingly old, too. I started this Christmas Doves wallhanging back in Provo. I've lived in Kansas for 6.5 years now. I just got it out of the bottom of my bottom fabric bin, and it only needs a small amount of hand quilting in the lower right hand corner, maybe some hand quilting in the border, and then binding. I think it is about time to get it finished so we can enjoy it (and I can stop feeling guilty about it). I'll let you know when I get this one done, and I'll be showing some of my other UFOs as I work on them throughout the next few weeks. Some of them I won't show until after Christmas though, sorry!

Do you have any UFO's? Go join the challenge! I'm donating a prize this time! (It's the first time I've ever done that. I hope whoever wins it, likes it.)

Sunday, November 01, 2009

daily blogging, every day in November!


A couple years ago I tried to do National Novel Writing Month, in which you are supposed to write a 50,000 word novel in November. I got 16,000 words or so done. I really do want to write that novel, but I'll be on a cruise ship for part of November this year, and I think it's probably a good idea to wait until 2010 to give 50K words another shot. But. I think, even with being gone for a few days, I can write 30 blog posts this month. So I signed up as an official NaBloPoMo participant and you can look forward to hearing from me every day in November!

So, here are some of my sewing goals for the month:
*mainly, don't get stressed out by sewing!
*work on charity dolls for Diane from church
*finish a number of secret projects
*do a couple of sewing jobs for friends
*finish up my Figgy Pudding quilt top
*piece quilt back for my watercolor quilt
*make some more 9-patches
*make something totally spontaneous and unplanned

I have some other things I want and need to get done this month! I hope to make 2 or 3 tutorials to share. I am planning on sharing fun links with you every week or two also.

What are your goals for November?
See you tomorrow!

Saturday, October 31, 2009

Happy Halloween!


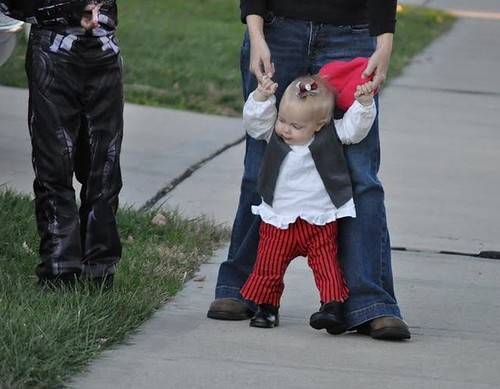
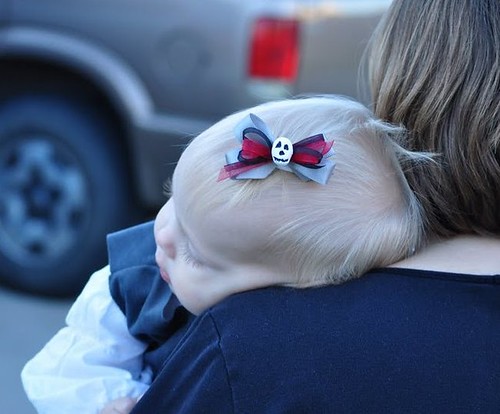
Baby's costume was going to be my post for Sew-n-Tell Friday but I didn't have time to post yesterday.


Here they all are. We had tantrums and meltdowns from the 5 year old about not wanting to wear the vampire cape I made him. He did wear it to the school party though, and to Jan's house. I'll take a picture of it sometime next week.


I used the tutorial from Creative Kismet to make the skull bead, and my sweet neighbor Ceresa made the bow for me. Actually she made 2. Isn't it cute? Go check out her shop!

Monday, October 26, 2009

Mini Quilt Monday! -- Halloween Doll Quilt

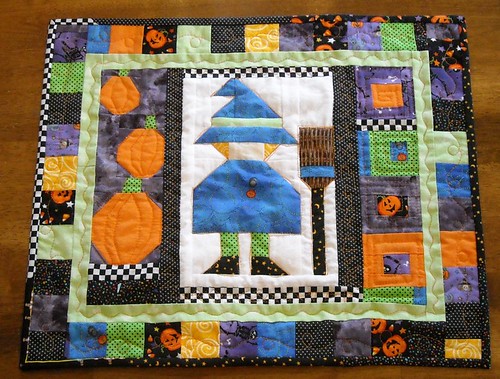
Here's my quilt for the sewingmamas.com fall doll quilt swap. It is on its way to Crys. I already got my fall quilt from Kelli, isn't it great?

FYI, the witch pattern I used here is from the October 1998 issue of McCall's Quilting.

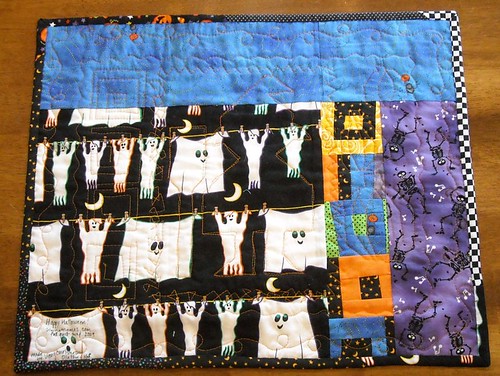
And, the back:

The ghosts hanging on the clothesline are from JoAnn's, 2 years ago. So are the skeletons.

The little square-in-a-square blocks are inspired by Sarah at House of Krom. She makes lots of awesome things!

Tuesday, October 20, 2009

crooked pumpkin quilt block tutorial


Here's a tutorial showing how to make a cute little crooked pumpkin quilt block. There are a lot of pictures here but it isn't difficult. These instructions are for the pumpkin in the middle in the picture above.
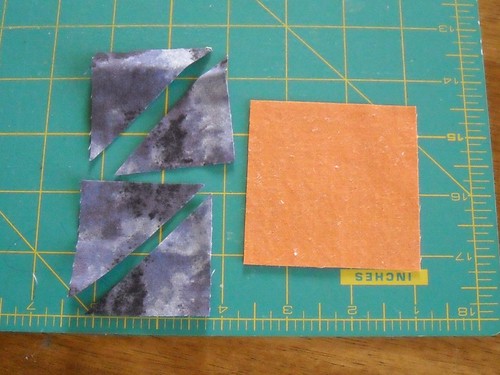
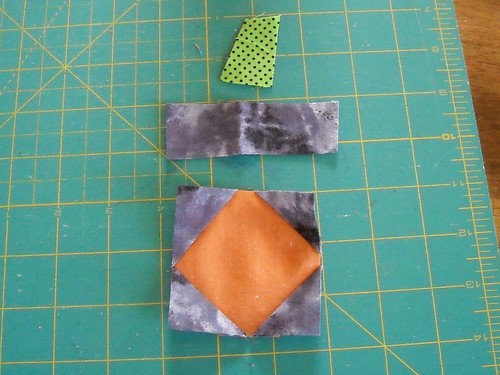
Step 1: Cut an orange square, mine is 2 3/4" here.Cut two background squares (I used purple), 2". Cut the squares in half diagonally.

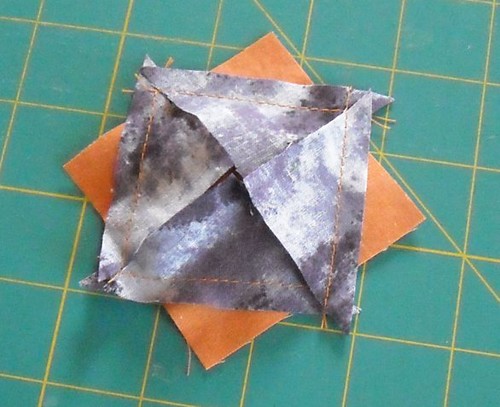
Step 2: Sew the background triangles on to each corner of the orange square. They don't need to be straight or matchy. Try to make sure these seams don't overlap each other or you might need to unpick a stitch or two when you open them up (like I did).

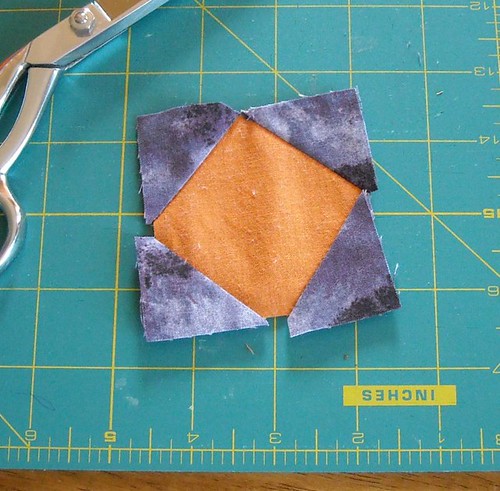
Step 3: Trim the corners that stick out past the orange square.

Step 4: Fold the corner pieces open and press.

Step 5: Flip the block over and trim off all the background pieces that stick out beyond the orange square.

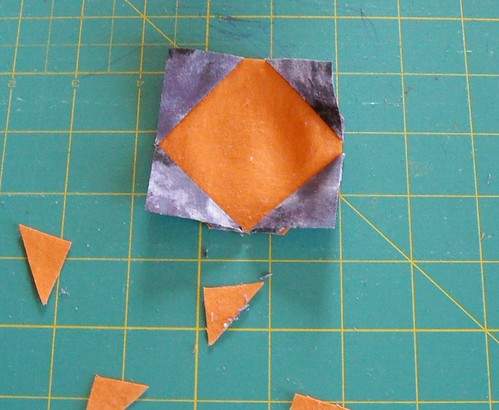
Step 6: Trim off all the orange corners that are under the background pieces. This will reduce bulk in your finished pumpkin.

Step 7: Cut a wedge or rectangle for your pumpkin stem, about 1" x 3/4". Mine was a little taller than that and I trimmed it. Also cut a rectangle of background fabric about 1" by 3 1/2".

Step 8: Cut the rectangle for the stem background in half. If one side of your stem piece is angled, cut the background piece that will be sewn to the angled side, so it has a matching angle.

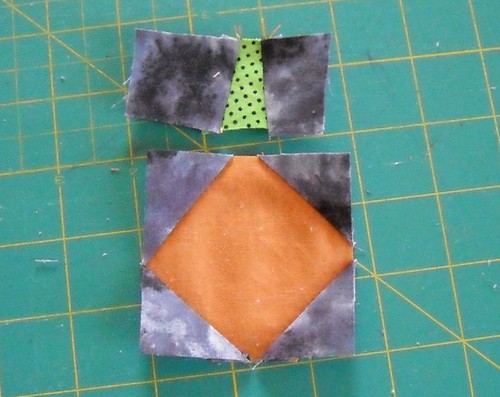
Step 9: Sew the background pieces onto the stem piece. Press.

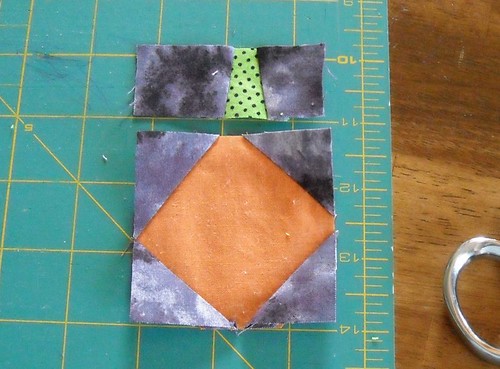
Step 10: Trim the top and bottom edges of the stem section so they are parallel. If your stem section is a little longer than the pumpkin section, trim it to match. Or wait and trim it after they are sewn together.

Step 11: Sew the stem section to the orange pumpkin section. My stem is kind of weird here, oh well.

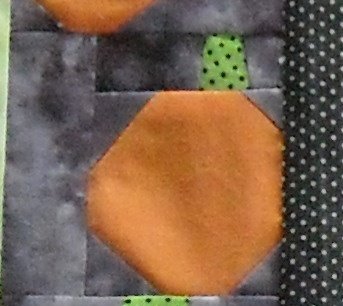
Finished view--here's what the pumpkin looks like when all sides were sewn into a little mini quilt. I can't show the whole thing quite yet, sorry. I like how it turned out!


You can change the measurements and make larger or smaller pumpkins, if you want.
I hope you like this, and I would love to see pictures if any of you make your own crooked pumpkin blocks! Please let me know if you find any mistakes or need clarification!

Thursday, October 15, 2009

Birthday Dress

Sometimes I don't want to work on what I "should" be sewing and I start another project. Oh yeah, actually I do that a lot. Last night and this morning I made my baby girl's first birthday dress:


I already had the Moda Eva charm pack, and after thinking about it for a while, I decided not to go with something super fancy/frilly/ruffly and to make another charm pack t-shirt dress for L's upcoming birthday. Yesterday I drove all over town looking for the right shirt to go with the Eva fabric, and I found a cute, simple one at Old Navy. I paid too much for it. Oh well.

Last night I got the skirt all pieced together and partially topstitched, and then this morning I finished the whole thing up. I made a headband from the bottom of the t-shirt that I cut off, and made a little yo yo with a button to go on it. Baby isn't very interested in wearing it though.


I'm planning on making a tutorial for this dress and headband, in 3 sizes, so be sure to check back soon!

Monday, October 12, 2009

Sew Inspired

This past weekend I went on a temple trip to Nauvoo, Illinois, with some friends from church. We had an eventful drive up there, including a car repair and an accidental detour, but everything ended up fine and we had a good time at the temple and good times spending time with friends, too. On Saturday part of our group had to head home quickly, but I was in the group that stayed behind to do a few touristy things before starting home. We went to a bakery and gift shop, and to a couple places in Old Nauvoo to learn about life in the mid-1800's. And. We went to the Sew Inspired quilt shop in Nauvoo. Isn't that cool? They have lots of great fabric there, fabric lines I have been wishing my local quilt shops would get in stock. I got a few fat quarters--Hushabye Owls in pink and green, and two Eva fat quarters as well.


When I was buying my fabric I talked to the owner and she mentioned that her store is online, and I had to tell her that I'm online too, and my blog is at sewinspired.blogspot.com. She told me about a couple other Sew Inspired quilt shops in the US as well.

I worked on my first English paper pieced hexagons on this trip:

Aren't they cute? I really like the pink and green, and I might add some aqua blue, too. I am planning on taking them on my cruise next month too. My grandpa is taking his married grandkids, and his wife's married grandkids, a total of around 70 people, on a Western Caribbean cruise next month. I get to bring my baby, even. We'll see how much time I can fit in for handsewing on the ship.

Here's a little sneak peek of something else I've been working on, just for fun.

What are you working on this week?

Friday, October 09, 2009

Turtle Quilt

I'm excited to join in the second Blogger's Quilt Festival, hosted by Amy at Park City Girl. Head on over to her blog and check out all the quilts!

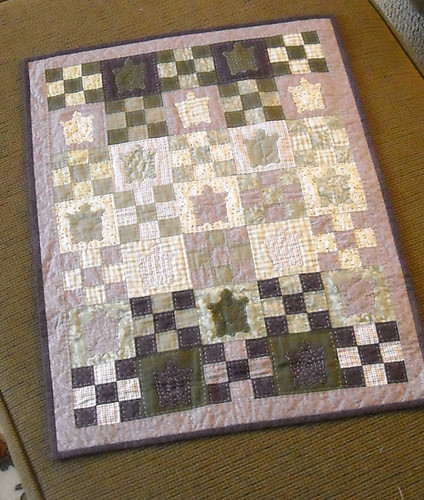
I'm pretty sure my turtle quilt is the second quilt I ever made (including my "ugly" polyester quilt my Grandma Taylor helped me make when I was in 8th grade.) My husband's mom and dad gave me a very generous gift of money when I graduated with my MS degree and I used that money to buy my first rotary cutter and mat, and the fabrics for this quilt. It was made in Provo, Utah, in 1997, and measures 19"x26".

A couple of things I learned while making this quilt: first, needle-turned hand applique is time consuming! And best done in small doses, in my opinion. Second, value, or the lightness/darkness of your fabrics, is just as important as color. A few of my blocks in this quilt have virtually no contrast (and the appliques/ninepatches are difficult to see) because I used fabrics that were too close together in value. Overall, I do really love this quilt, and some of the fabrics in it are still some of my favorites!

Tuesday, October 06, 2009

6 tips for sewing with little kids around

Sewing when your kids are babies or toddlers can be frustrating at times--my 11 month old has developed a habit of crawling under the table and playing with the foot pedal while I'm sewing. She can also--just barely--reach up and grab things off the table now, too. I've come up with some ideas to ease the frustration and get a sense of accomplishment with your sewing when you have a little one.

1. Focus. Staying focused on one project until it is done can lead to finishing projects more often! I'm not saying I never start a new project when I already have several started, but when I start to feel like I never get anything finished, sometimes I will pick a project to stick with and do my best to avoid distractions until it is done.

2. Lower your expectations. If you're caring for small people, you usually can't get as much sewing/quilting/crafting done as you might have been able to at previous stages in your life. It's probably a good thing to accept this and know that as kids get older they will become less demanding and eventually you'll be able to have more time for sewing again.

3. Go with the flow. (Shout out to my 9-year-old who used this as a slogan on his student council campaign posters the other week.) Do what you can, and don't forget to enjoy your kids.

4. Just do a little. Break projects up into small steps and focus on completing each step. For example, you could trace several patterns, then cut out a few outfits, and then focus on the sewing.

5. Handwork. Figure out some hand sewing or other portable projects that you can do while hanging out with the kiddos. I've been sewing on quilt binding by hand quite a bit lately, and I can do that while watching The Princess Bride with my kindergartner or watching my baby play with her toys. I just found this site the other day and printed off some hexagons to start some Grandmother's Flower Garden quilt blocks. (Yes, this seems to contradict #1, but I am also going to take this handsewing project on a couple trips I have coming up!)

Finished bindings on 3 Project Improv quilts!

6. Use naptime. When I had only one kid, I had a rule that I never did housework during naptime, but it was time for me. Now sometimes I do feel like I really need to do housework during naptime, but I try to work on my sewing projects or take some other kind of break for myself during naptime on a regular basis.

I'd love to hear your tips or secrets for working on sewing or quilts with babies or toddlers underfoot!

Monday, September 28, 2009

my monkey

I made a monkey for Craft Hope's 4th project. I was a little too close to the deadline, but I hope my monkey got there in time to go to the preschooler's burn camp. Here she is:

and a close-up of her face:

I also made a few 9-patches last week:

Isn't the "unmentionables" fabric cute? Sorry to be shocking if you're reading here and you're my father-in-law. :D

This week I am going to finish up two baby dresses and two Project Improv quilt bindings. And some other stuff, too. I have the backing fabric for my watercolor quilt! I have baby pirate costume fabric, also!