
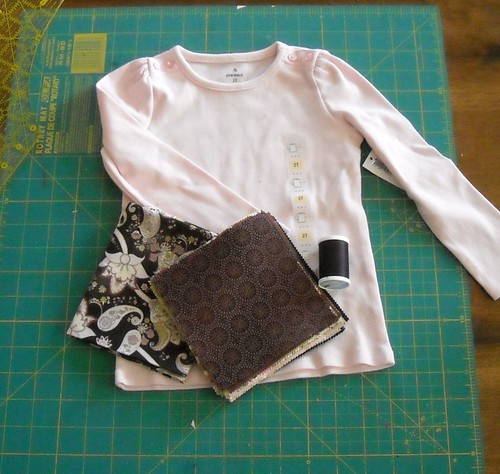
What you need to get started: purchased t-shirt, charm pack, matching thread, one fat quarter or other matching scraps (for size 2T only), universal and ballpoint sewing machine needles.
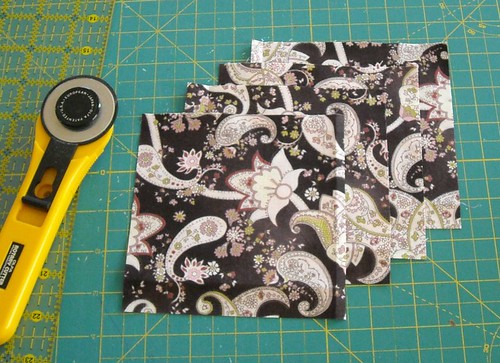
Step 1: For size 2T, cut out some 5" squares from your fat quarter. You will need a total of 44 squares for the skirt. I cut out 4 squares from my fat quarter but only ended up using 3. I am still going to make a matching yo-yo hair clippie from the last square I cut out.
For size 12 months, pick out your 30 favorite squares from the charm pack.
For size 6-9 months, pick out your 20 favorite squares from the charm pack.
Step 2:
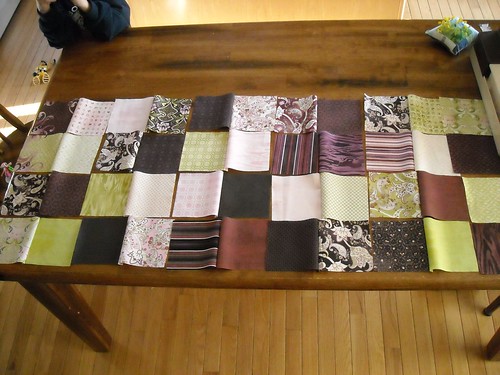
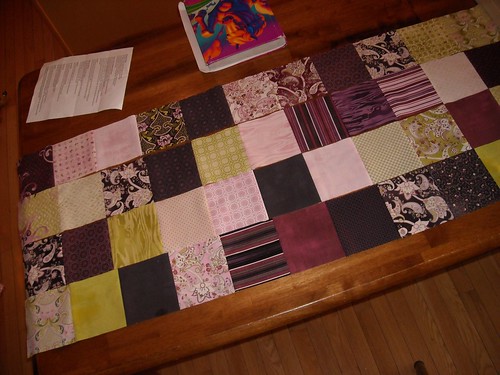
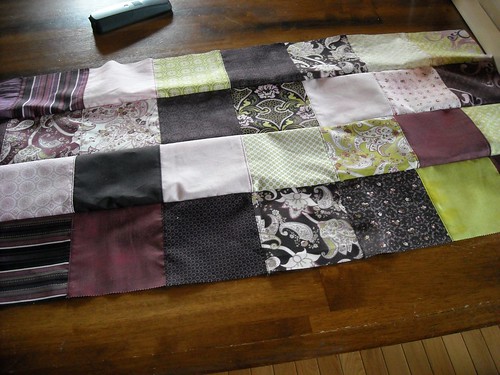
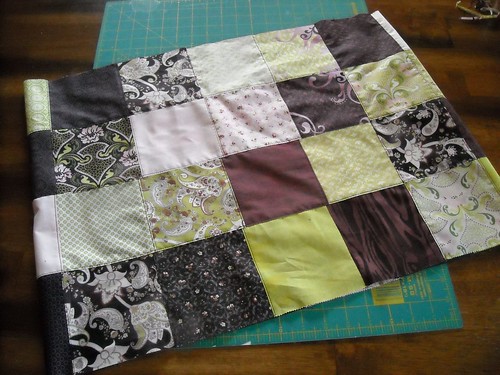
Start sewing the squares into pairs. You can spend time arranging the squares before doing any sewing, and I did that the first two times I made this style of dress, but for the size 2 dress I sort of randomly sewed pairs of squares that I thought looked good together. Then I spent time arranging the pairs into rows. For a size 2 dress, pictured here, you will need 4 rows of 11 squares. So make sure you sew 20 pairs together, and then lay the rows out, adding another single square at the end of each row.
For size 12 months, you need 3 rows of 10 squares, and for size 6-9 months, 2 rows of 10 squares.
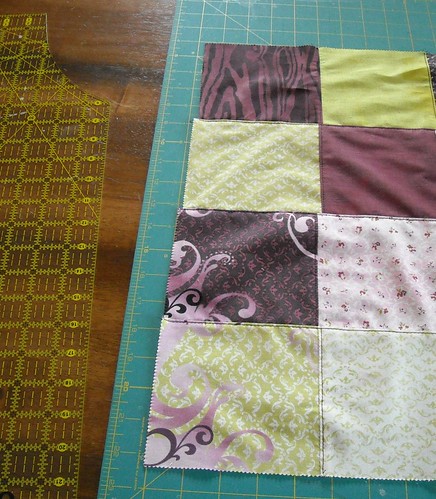
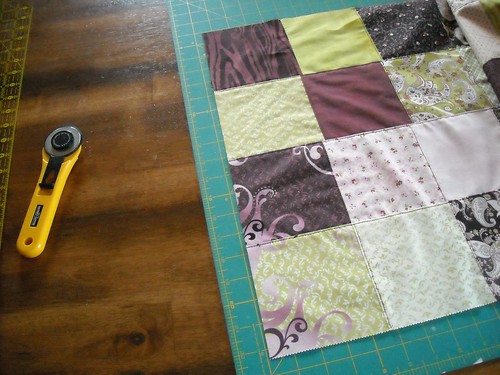
Step 3: Sew your squares into their rows. I used a 1/4" seam allowance for all the seams in this project.
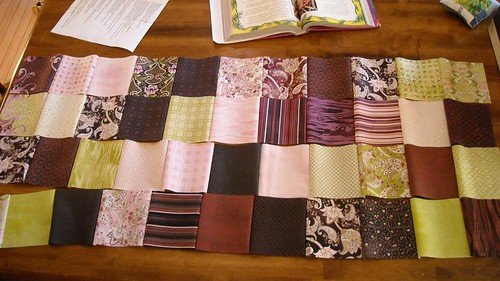
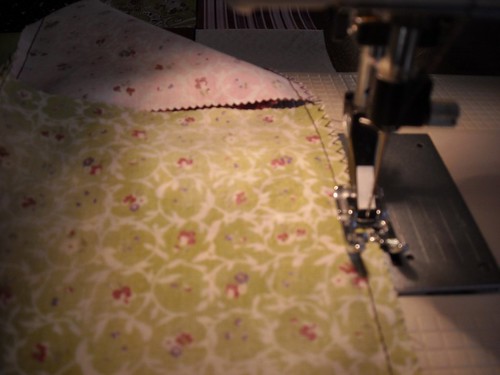
Step 4: Finish the seams. I am a major stickler about not leaving unfinished seams in pretty much anything besides quilts. These squares are pinked (except the ones I cut myself) and might do just fine without being zigzagged but my mom's lessons and my years of 4-H make it so I just can not leave these seams unfinished. I could have serged these seams but it was easier to just switch the sewing machine knob to zigzag so that's what I did.
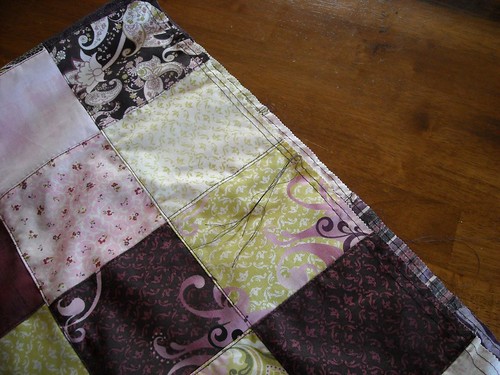
Step 5: Press the seams. Press all the seams on each row the same direction, and then for the next row, press them all the other direction. This step is really important and I'm afraid if you don't press these seams well you will end up with a "home made looking" and not in a good way garment. Thank you.
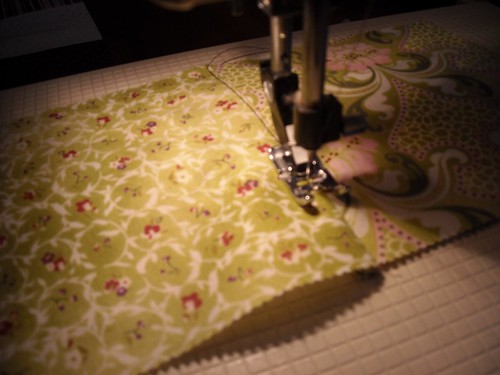
Step 6: Topstitch. This is another step that makes the patchwork skirt look really good. I topstitched these seams a bit less than 1/8" away from the seam.
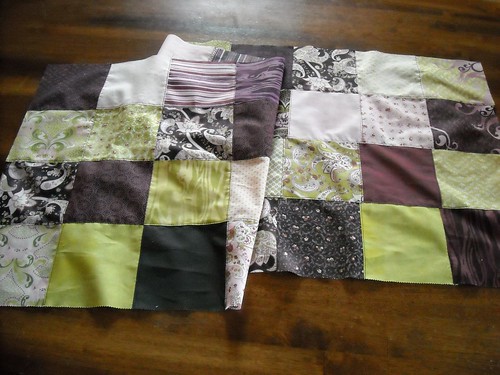
Step 7: Lay your rows out and admire them. This isn't really that hard, is it?
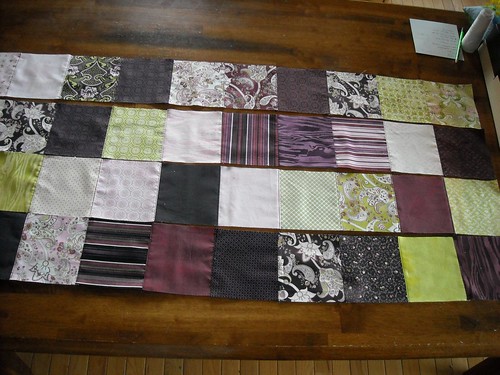
Step 8: Sew your rows together.
Step 9: Zigzag your seam allowances, press your seams all in one direction, and topstitch. Looks good!
Step 10: If you need to, straighten out your edges before sewing the skirt into a circle. (That is a sad broken ruler.)
Much better.
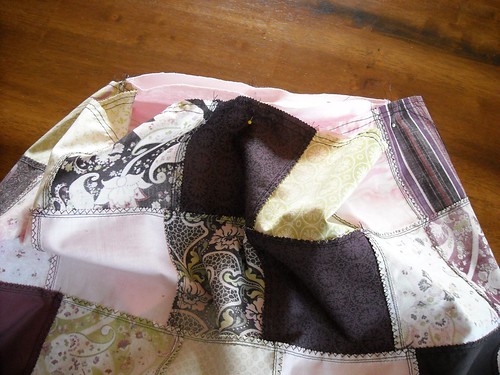
Step 11: Sew the skirt into a circle, zigzag your seam, press it, and topstitch it. Then turn the skirt around different ways until you find the side you want to be the front. Lay it flat and mark the side edges, at the very top, with pins.
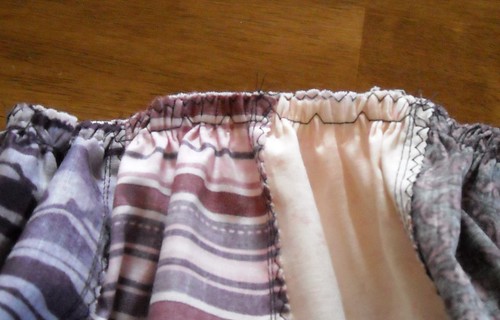
Step 12: Sew gathering stitches. Adjust your sewing machine stitch length to the longest possible length. Start at one pin and sew 1/4" from the edge to the other pin. Stop sewing and cut the threads, leaving 4-6" thread tails. Start sewing again close to where you stopped and stitch around to your first pin. Leave 4-6" thread tails on all the ends of these gathering threads. Sew a second row of gathering stitches 1/4" in from your first row, starting and stopping at the same places and leaving thread tails again.
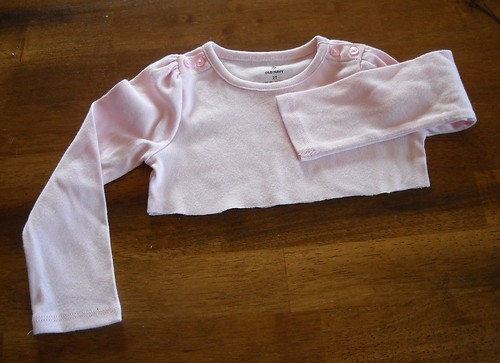
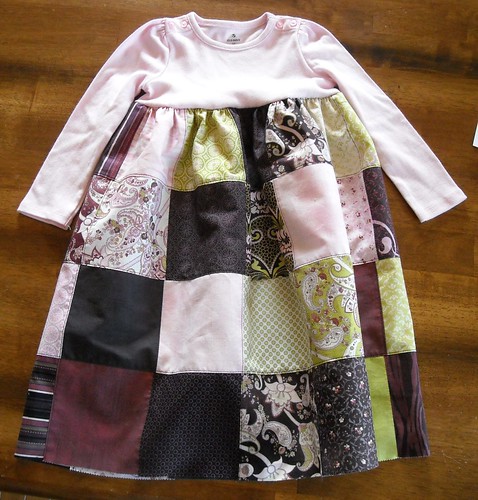
Step 13: Cut off your shirt. I cut this 2T shirt off 2" below the bottom join of the sleeve to the shirt. For the 12 month dress, I also cut off the shirt about 2" below the armpit intersection of the sleeve and shirt. For the 6-9 month dress, I cut the shirt off about 3.5" below the sleeve/shirt intersection. You can experiment with different t-shirt and skirt lengths and figure out what works for you.
Step 14: Use pins to mark the center fronts and backs of the shirt and skirt.
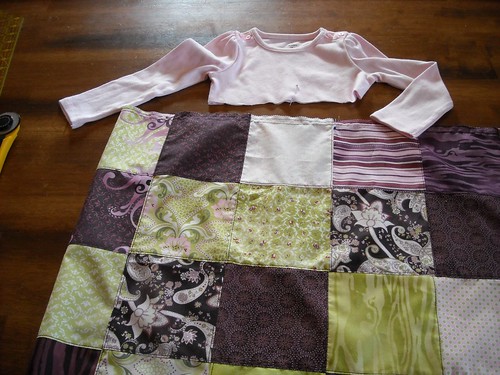
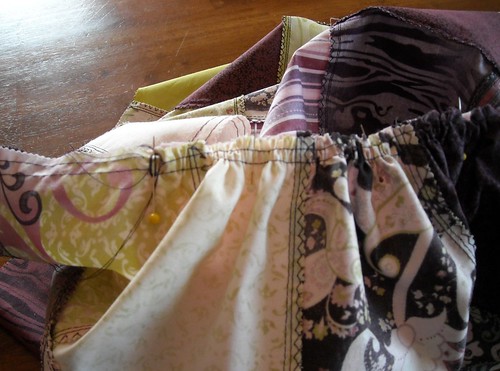
Step 15: Turn the skirt inside out and pin the shirt and skirt together, matching the center fronts and backs, and matching the side seams of the shirt with the places where you started and stopped your gathering stitches.
Step 16: Gathering. Hold onto the two threads from the side of the skirt facing you. Pull the threads while at the same time using your other hand to gather the skirt fabric. Pull the threads until the gathered skirt edge is the same length as the section of shirt you will be sewing it to. Gather from one side seam to the center front or back, and then repeat this from each side seam, until your skirt is all gathered up.
Once the gathered edge is the right length, I take the two threads and wrap them around my pin a few times to keep the gathers from falling out. Next, evenly spread out your gathers and pin a few times in between your center and side seam pins.
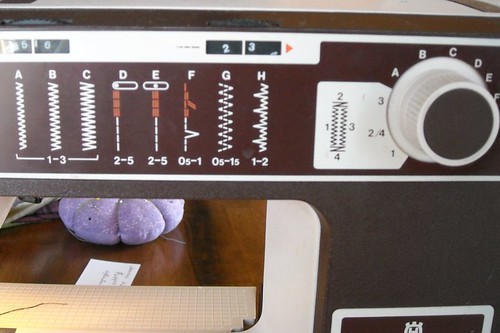
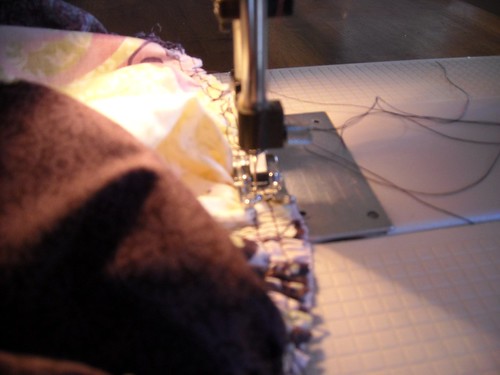
Step 17: Sewing skirt and shirt together. Change your sewing machine needle to a new ballpoint needle. You don't want a woven needle to put holes in your t-shirt fabric after all the work you've done! I chose a stitch with some stretch in it, stitch "F" on my machine. I worry that if I used a straight stitch that the seam would pop too easily since the t-shirt is meant to be stretchy and the dress is put on over the head. You could use a narrow zigzag stitch, or even serge the skirt and shirt together.
Sew the seam in between your two rows of gathering stitches.
Step 18: Take a look at how cute the dress is. Look closely at the bodice/skirt seam and make sure there aren't any unwanted folds or tucks in the t-shirt fabric. If there are, unpick them and fix them before you go further. Once the seam is good, go ahead and pull out all your gathering stitches.
Step 19: Zigzag the edges of this seam.
Step 20: Hem the bottom of the dress by folding the raw edge under twice and stitching near the folded edge.

Step 21: Press the hem. You're done!

So, there you go. I hope everything is explained clearly enough here, please let me know if you have questions or need clarification on anything.
I would love to see pictures if you make a dress using this tutorial.
Also, if you modify this tutorial for a larger size, please let me know so I can either link to you or include your modifications here, if you prefer.
13 comments:
Darling! I may just have to make one for my daughter!
Very cute. Inspirational. I can't wait to make one! Thanks for sharing.
SewCalGal
www.sewcalgal.blogspot.com
Great tutorial... I might see about making my niece one for Christmas!
Beautiful! Now, to just find time to make one as a Christmas present...
I love this little dress! Thanks for sharing the tute :)
What a wonderful tutorial and it's such a lovely skirt! All made with just one charm pack! awesome! now to find a cute little girl to make this for... (or figure out how to make one for myself... :D)
Hi, thanks for this tutorial! This is probably the best tutorial I have read. I am going to make one of these dresses for my granddaughter immediately. Love the concept and the ease. Janet
Awesome! Thanks for sharing. I think I'll make one for my niece using a onesie and not cutting off the bottom. Think it will work?
So cute! I have to make one for my 2 grand girls. Thanks for sharing.
Jo
This is such a cute dress I just bought 2 charm packs so I can make one for my 3 year old daughter. Now to figure out how many squares to use for a 3t.
;)Rachel
Hah! great idea! I should try it for myself as well :)
http://sewingyourstyle.tumblr.com
Gorgeous! Great tutorial!
I loved your tutorial. Made a Halloween dress for my great niece who just turned one. She lives in California and I'm going to meet her for the first time this weekend. Would love to send you a picture. I used a onesie but didn't cut it apart. Turn out great. Thank you for sharing.
Post a Comment