Saturday, August 04, 2007

Attached Elastic Waistband Tutorial

This tutorial explains how to do an attached waistband with enclosed elastic. I use this technique on shorts and jeans for my boys.


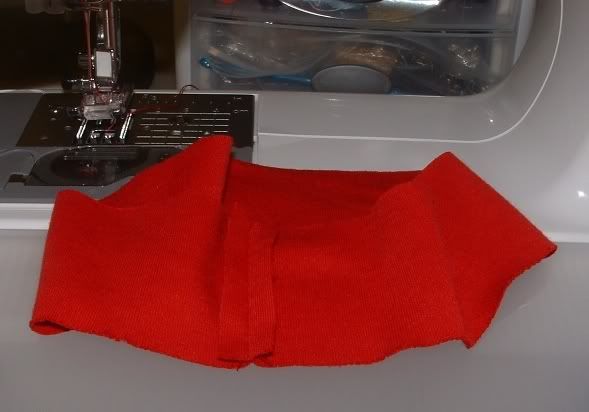
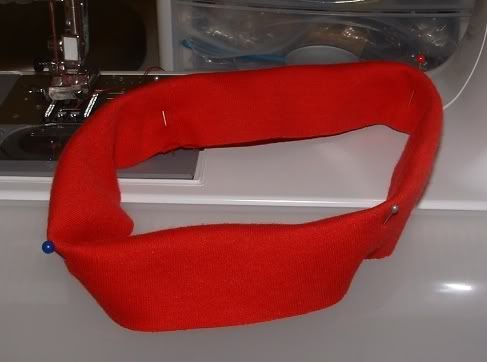
Step 1. Sew the waistband piece into a circle, press seam open. Sew the elastic into a circle. I overlap the elastic 1/4" and zigzag, making sure to backstitch. You will have to determine how much elastic to use based on how much recovery it has and the kind of fabric you're using. I use pretty firm elastic so I just cut the elastic the length of my child's waist measurement. If your elastic has less recovery you will need to use less.


Step 2. Turn the pants right side out and pin the waistband piece inside the pants, with the waistband piece's right side facing the pants wrong side. For some reason my waistband pieces don't always fit quite right, I had to unpin it and sew it a bit smaller before it was the right size on this pair of pants.


Step 3. Sew the waistband to the pants. I tried to keep this seam at about 1/4"-3/8".


Step 4. Fold the waistband piece up and press. Press the seam allowances towards the waistband.


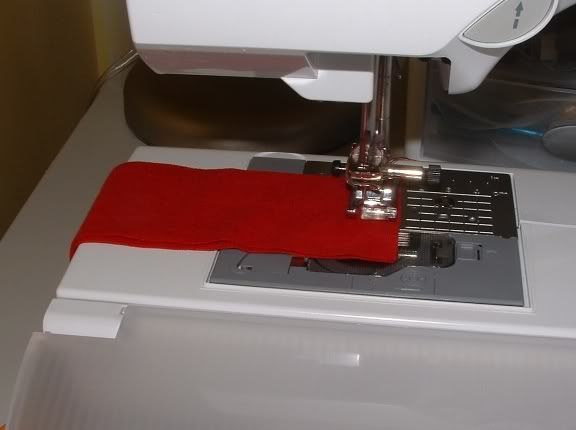
Step 5. I don't know if my picture shows this well enough but I'll try to explain. For this step you will be topstitching the waistband down on the right side of the pants, so change to topstitching thread. (I use a different machine to topstitch, my more heavy duty, older machine.)

Turn the pants wrong side out. Place the elastic on the waistband and fold the waistband down over the elastic. Fold the edge of the waistband under about 1/4" (you can press this first, it might be helpful, but I usually don't.) Make sure the folded waistband edge is past the edge of the elastic and start sewing. You will need to make the folds and adjust the position of the pants as you sew. Take your time.


Step 6. Just keep going. As you sew you will need to pull the fabric from the back around to the front, since you will be sewing the circle. Another thing that will help is to adjust the fabric and elastic so the waistband is starting to get gathered.


Step 7. When you get to the last 1/3 or 1/4 of this seam, you will need to use both hands to stretch the elastic (within the waistband casing) while you sew. You can adjust the waistband and then stretch and sew a bit, and then adjust again and sew again.


Finished! You can shrink the elastic down a with some steam from your iron. It will also likely shrink down a bit after being washed and dried. I don't sew through the elastic or do anything else to make sure it won't twist in the waistband, but I haven't had any problems with it twisting in denim fabric.

Please let me know if you have questions or if something isn't clear.

Friday, August 03, 2007

posting when frustrated

I should have waited to write about those jeans. They are always a big project for me, and I don't have the perfect machine(s) for doing topstitching and hemming well. I'm usually frustrated right after and I sure was when I finished up this pair of jeans. But now I'm happy that they're done, I really like how the photos look, and I know they they will look even better after getting a bit distressed in the wash. And finally, my child will grow and they will look really cool on him eventually. I'm going to make some easier projects for the next little while.

Thursday, August 02, 2007

Finished!


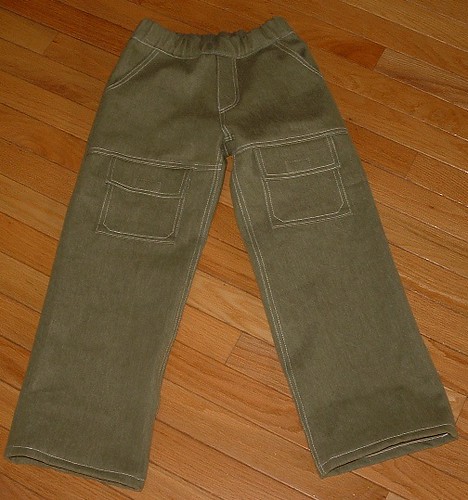
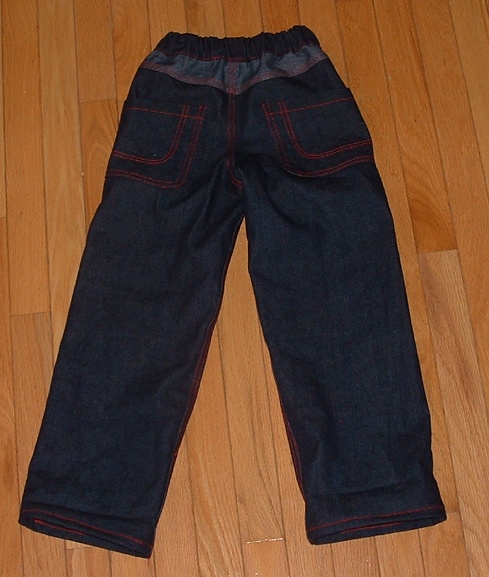
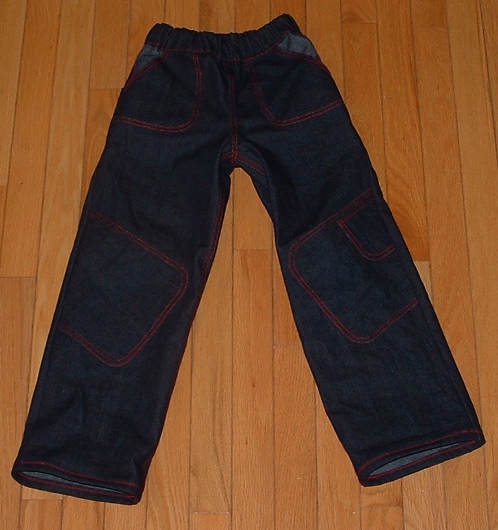
Big sigh of relief. What a project. These are from Ottobre Design 1/2007, made in size 116 with 128 length. (Way too long.) I realized once again my dislike of pocket flaps. I had D try these on and they are absolutely huge on him. And I already know this fabric won't shrink much. Oh well, at least he will grow. I will wash and dry them a couple times right away to break them in a bit.


I had a bit of an issue on the back pocket velcro. The back pockets themselves, too. The directions for the pleat detail weren't very clear but I figured it out. Also, I hemmed the pocket tops first, then realized I should sew those pleats and then hem after that.

I didn't figure out how the (back) pocket and flap velcro were going to match up before sewing. And I ended up having to unpick the pocket velcro... it was already after the pockets were sewn on the pants and I didn't want to undo that topstitching so I handsewed the pocket velcro on after the flaps were in place.

Wednesday, August 01, 2007

working on jeans

I am making some Ottobre jeans for my big boy and they are tedious. I do not much like making pocket flaps. I just broke a serger needle going over a thick seam. I am looking forward to making something easier next. I need to find a pattern for jeans that have front pockets, back pockets with no flaps, and that's all.

Monday, July 30, 2007

Scrap Catcher


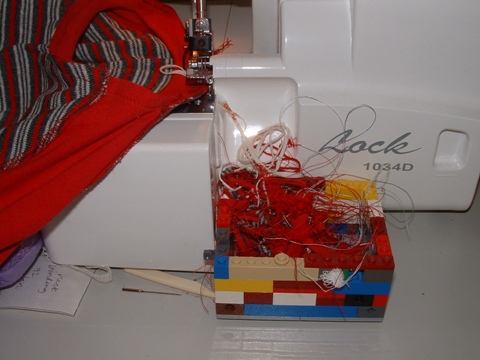
My son made this Lego scrap catcher for me. It holds the scraps and threads from my serger. I think it's really clever and cool.

Friday, July 27, 2007

T-shirt Bound Neckline Tutorial

How to sew a double-folded binding on the neckline of a t-shirt.

The length of the binding piece will vary depending on your fabric. This was a very stretchy rib knit and I used a binding piece a bit less than 2/3 the length of the neck opening in the shirt. For less stretchy fabrics you might want to use closer to ¾ the length of the neck opening. The binding piece used here was 1 5/8” wide—it is the pattern piece from the women’s t-shirt pattern in Ottobre Design 2/2007.


Step 1: Sew the binding piece into a circle, and use pins to mark it into equal fourths.


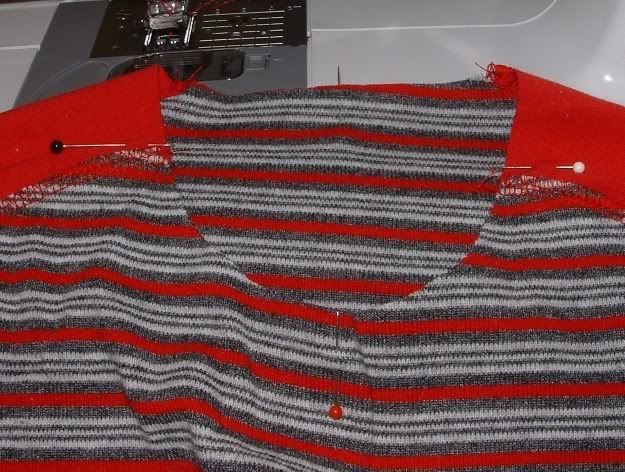
Step 2: Your shirt front, back, and sleeves should be already sewn together (but don’t sew the underarm/side seam yet). Turn the shirt right side out. Use pins to mark the neckline of the shirt into equal fourths. This shirt has some gathers in the center of the front neckline and there are also pins holding the gathering threads tight in the front. The center front pin is a bit hard to see here but it is there.


Step 3: Finger press the binding seam open, and pin the binding’s RIGHT side to the WRONG side of the shirt. With your shirt right side out, pin the binding to the inside of the shirt neckline. It will probably not seem right, in fact, I did it wrong on this shirt and then had to do some reverse sewing. Double check so you don’t have to unpick!


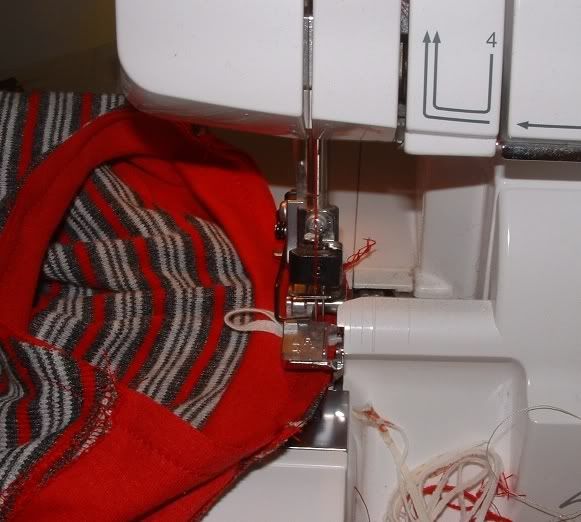
Step 4: Sew the binding to the shirt, stretching the binding piece and making sure the 2 edges line up as you sew. I used a scant ¼” seam allowance here.


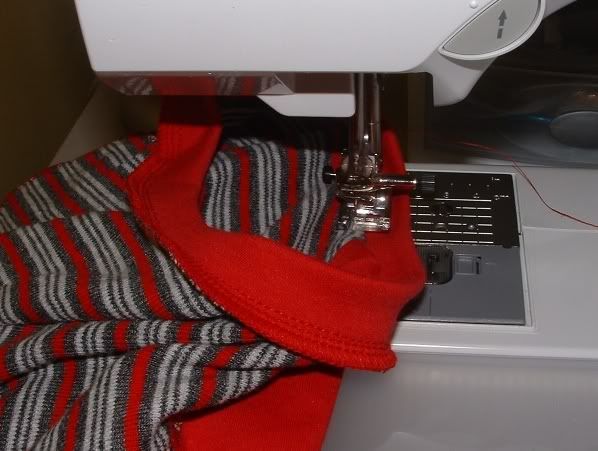
Step 5: Next, fold the raw edge of the binding over about ¼”, then fold again, making sure the fold covers your first seamline. Sew binding down close to the fold edge. Going slowly will help.


Finished! If the neckline seems to be stretched out a bit, you can steam it with the iron to shrink it down.

Thursday, July 26, 2007

Yes, you can save money sewing!

Something I hear a lot when talking with people about sewing... is "I used to sew a lot but I don't now because it doesn't really save me money." I'm here to tell you that it really is possible to save money sewing clothing for your family!

A few things I do that help me save money sewing for my kids and self:

I buy much of my fabric online, and I use coupons and shop the sales at the local fabric chain stores. I buy almost all my knit fabrics online because any knit fabrics available locally are usually too expensive or not the fabric content I want.

I keep some fabric on hand, and although I don't have a huge stash, right now I'm glad to have several colors of denim that I can use to make shorts or jeans for my boys when they need them.

I sew my children's pajamas. I make them flannel sleep pants in the winter, and light cotton woven shorts in the summer. They wear store-bought or made-by-me undershirts with their sleep bottoms. I like doing pajamas because they are just about the easiest project out there, so it's kind of instant gratification. I love having a finished project after about 20 minutes of sewing. Another reason I like sewing pajama bottoms is that I love all the fun prints that are readily available in flannels and cotton wovens. I definitely spend less to make these pajamas than I would and have in the past when I have bought pajamas for my kids.

All that said, saving money is not the main reason I sew for my kids. I sew because I enjoy it, I sew because I like the challenge of trying a new pattern or technique (or the challenge of fitting patterns for myself, which is the biggest challenge of all), and I sew because I feel like I put a little bit of my energy and love into the things I make for my boys. I also like the feeling of accomplishment, and of having made something cool looking and useful, that I have when I finish a garment and then again when I see my kids wearing it.

Tuesday, July 24, 2007

100 Things (that I have sewn)

I decided to try a different take on the 100 things thing. So... here goes.

1. A small bear, when I was 6.
2. A navy and white polka dot skirt with a ruffle for 4-H, age 9.
3. A light blue floral dress with elastic in the neck, waist, and sleeves, for my 2nd year of 4-H.
4. Light blue dressy pants and vest with coordinating button-up shirt, age 11. Again for 4-H. Sadly, the fit was poor and I quite disliked this outfit. I learned to do a collar at this time.
5. Boatneck t-shirts for myself and my sisters, around age 10-11.
6. Culottes, I made a yellow pair and a white pair. Still age 10-11.
7. Loads of cloth diapers. My mom used the flat style and her sewing machine had a foot that could do a very narrow rolled hem. I remember hemming a whole bunch of these when I was 9.
8. Barbie clothes. I remember pink taffeta capri pants and dresses with a fitted bodice and puffy sleeves and gathered skirt.
9. A green and white print skirt. Age 15 or so. Gathered skirt on a flat waistband.
10. Navy blue shorts out of a kind of crinkly twill. Age 15.
11. Pink wool dress, for the National Make It Yourself With Wool Contest in 10th grade. Don't you love the princess lines, and the lace collar? I sewed the zipper in that baby by hand.

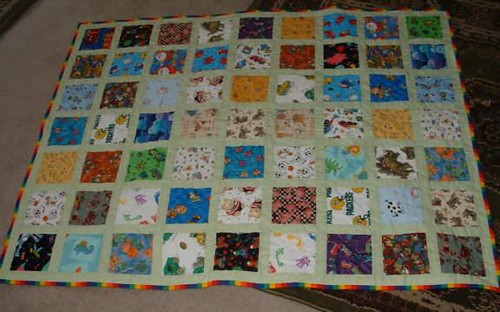
12. My ugly quilt. Made in 8th grade out of a rainbow of double-knit polyester. My grandma helped me make it, and I love it.
13. Pillowcase in 8th grade sewing class.
14. "Jam shorts" (remember those?) in 8th grade sewing class.
15. Oversized turquoise sweatshirt with pockets in 8th grade sewing class.
16. Floral skirt out of chintz. High school.
17. Shorts made from quilters' cottons. High school.
18. Mock-neck shirt with long sleeves, made from white french terry or something like that. High school.
19. Blue and pink puppy. Jr. high.
20. White teddy bear. High school.
21. Straight leg jeans, age 10.
22. Green taffeta and white lace dress, junior year. (Made from this pattern.
23. Laura Ashley pattern light green and white dress, senior year.
24. Dresses for my mom and her sister for my uncle's wedding, senior year. Pink.
25. My wedding dress. age 23.
26. My friend A's wedding dress.
27. A huge, heavy jeans quilt.
28. Flannel pj pants made with chicken print fabric.
29. Khakis for my oldest son when he was about 2, made from recycled husband's pants.
30. Navy sweatshirt knit pants for ds1 when he was 6 months old.
31. Red, white, and blue quilt for ds1.
32. "Cold blanket" for ds1.
33. Quilt for my niece S.
34. Quilt for my niece C.
35. Diapers for ds1, lots of them.
36. Linen maternity pants when pregnant with ds2.
37. Prepatch maternity skirt when pregnant with ds2.
38. Baby quilt for ds2.
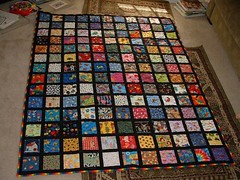
39. Big quilt for ds1.
40. Fleece pants for ds2, when he was a baby.
41. Romper for ds2 for his baby blessing. Light blue and light green homespun plaid. Really cute.
42. Overlap t-shirts for ds2 for his first winter. NCBE pattern.
43. Knotted hats for ds2, his first winter. (overlap shirts, fleece pants, and knotty hats from this pattern.)
44. Eared hat for ds2, his first winter.
45. Flannel pants, purple and green plaid, back in college.
46. A tiny outfit, in 1/4 scale, for my flat pattern design class in college. Pleated yoked skirt and blouse with a sailor collar and long sleeves.
47. Snowboarder Ottobre hats for my boys, 2005.
48. Pointy hats for my boys, 2006.
49. Kitchen curtains in our first house.
50. A quilty birthday calendar made for my mom's 50th birthday party. I don't have any photos of it!
51. A witch quilt for Halloween.
52. A red, white, and blue flag and star quilt wall hanging.
53. Recycled jeans frayed edge rag quilt with yellow and turquoise flannel backing.
54. A turtle wall hanging quilt.
55. Yellow print flying geese quilt, queen size.
56. Baby quilt for nephew B.
57. Baby quilt for niece C.
58. My second make it with wool outfit, a dark teal slim skirt and a cropped, cream colored jacket. (Oh man there is a big story about the night of that competition).
59. Baby quilt for nephew C.
60. Finger puppets with ds and friends, 2006.
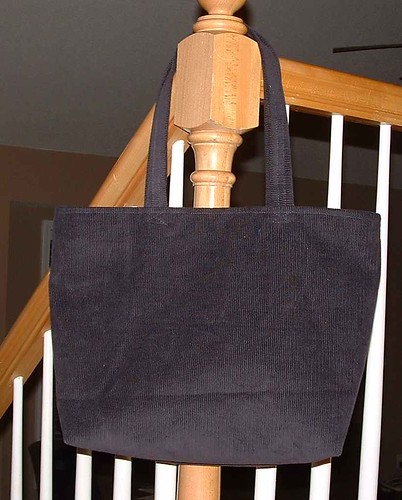
61. Purple corduroy library bag.
62. Purple corduroy long skirt for me.
63. Purple corduroy jean jacket for me.
64. Purple corduroy bag for a friend.
65. A tiny, quilty, flag fridge magnet.
66. Flannel pajama pants for my boys.
67. Woven pj shorts for my boys.
68. White undershirts for younger ds when he was 2.
69. Maroon/beige/pink quilt for the end of my bed.
70. Pink pillowcases for my bed.
71. Darth Vader and Yoda pillowcases for ds1.
72. Light blue denim skirt for me.
73. Baby dresses and bloomers for my friend and my niece.
74. Yellow knit dress for next-door neighbor 3 yo.
75. Twirly skirt for neighbor 3-yo.
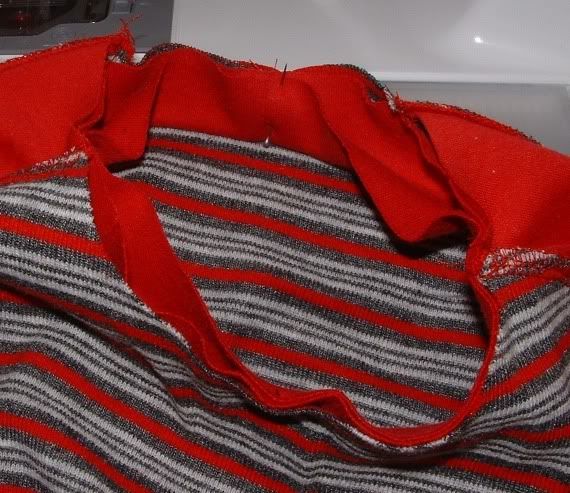
76. Red and gray striped shirts with red long sleeves for my boys.
77. An offwhite backpack bag for church, with an orange and pink prepatch inner. 2002.
78. Diapers for my younger son, fitted ones and prefolds too.
79. Poquito pants for my younger son.
80. A small quilted wall hanging for my MIL.
81. A roll-up portable chalkboard.
82. 4 Alice in Wonderland dresses.
83. Navy blue hooded sweatshirts for my boys.
84. A pink floral skirt, cut on the bias, for me (1999).
85. Sage green bridesmaid dress, 1997.
86. Dark green bridesmaid dress, 1997.
87. Maroon bridesmaid dress, 1995.
88. Dress made of bandanna fabric, 1995 (poor fit, that. Also not a good style for my body.)
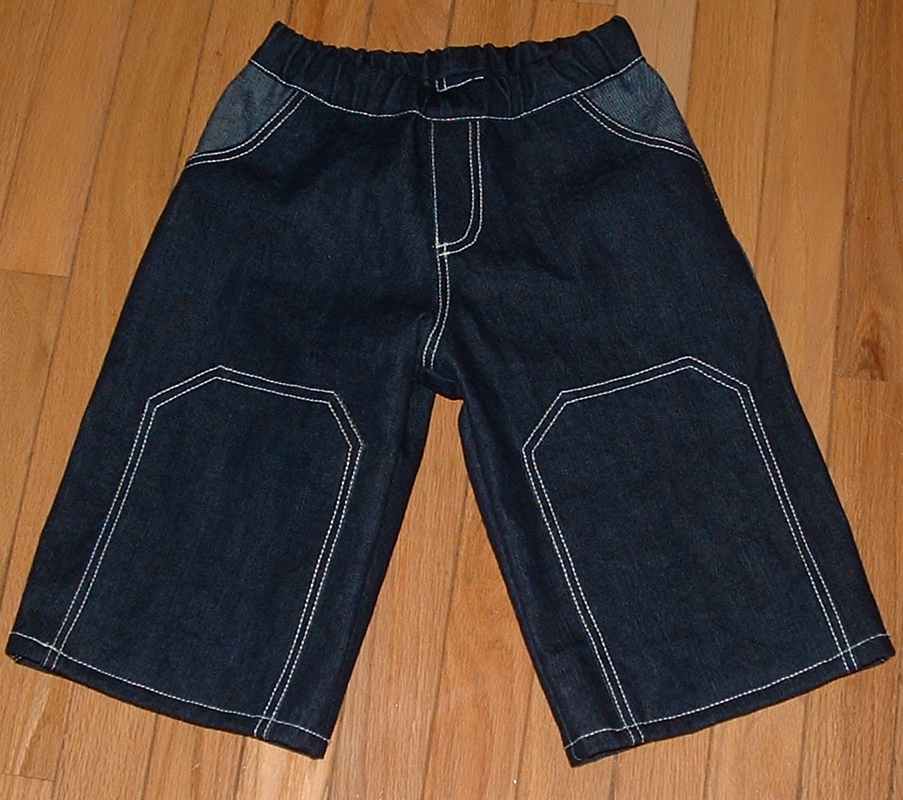
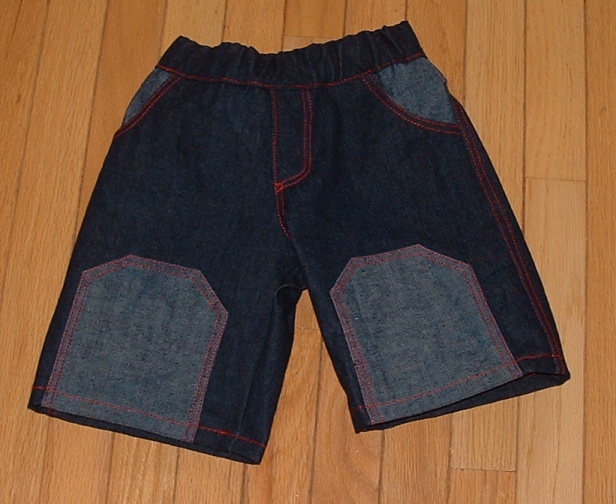
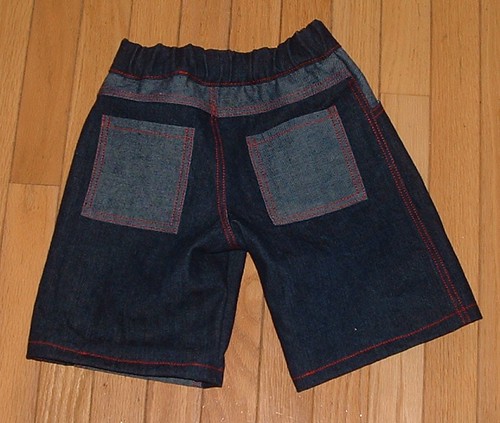
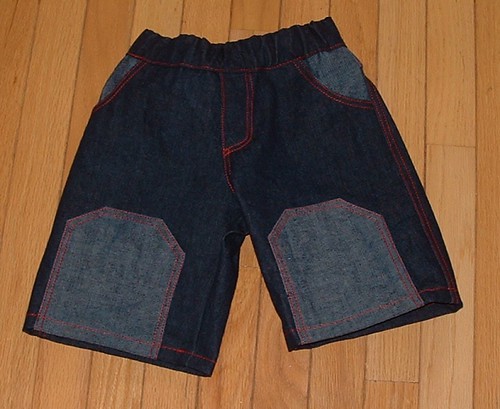
89. Shorts with pockets over the knee, first for my older boy, now my little one wears them.
90. Fleece socks.
91. Hooded sweatshirt for dh, blue sherpa.
92. Hooded sweatshirt for me, pink.
93. Wrap around blouse for me.
94. Flounced skirt for me.
95. Pink skirt for me.
96. Black linen skirt for me.
97. gathered neck t-shirt for me.
98. Shorts for my boys. 2007.
99. Red hooded sweatshirts for my boys.
100. Boxer briefs for my boys.

T-shirt Neckband Tutorial

These directions are for sewing a ribbing-style (not bound) neckband on a t-shirt. You can use ribbing/ribknit fabric, interlock fabric, or jersey that has some lycra content for the neckband. If you use a stable/non-stretchy jersey for this piece, the shirt may not fit over the head of the shirt wearer.


Step 1: Sew the neckline piece into a circle. I prefer to use my regular machine instead of my serger for this step as it reduces bulk. Make sure you backstitch at the beginning and end of the seam.

Step 2: (not pictured) Make sure the neckline piece fits over the head of the shirt wearer, if possible.


Step 3: Use your finger to press the seam open.


Step 4: Fold the neckband in half lengthwise (around the circle), and use 4 pins to mark the circle in equal fourths.


Step 5: Your shirt front, back, and sleeves should already be assembled. Fold the shirt at the neckline, matching up the sleeve seams, and mark the center front and back with pins. Fold the shirt again, matching the CF and CB pins, and mark the halfway points on each side.


Step 6: Pin the neckband into the shirt, making sure the seam is in the center back, and matching all the pins.


Step 7: Turn the t-shirt INSIDE OUT and sew the neckband to the shirt with the neckband on top. You will need to stretch the neckband as you go. Make sure all 3 edges match up, especially along curves. You can skip this step and just serge the neckband on, if you want.


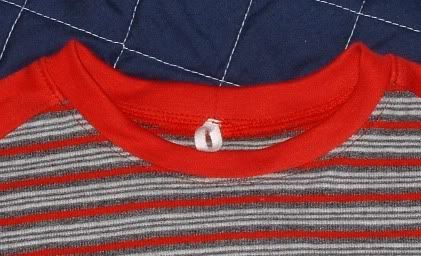
Step 8: Serge. If you want, you can sew in a printed tag or a bit of folded twill tape or bias tape to the center back. If you don't have a serger, you can zigzag your edges together for a more finished look.


Step 9: Topstitch. Again, the shirt is inside out and I sew on the right side of the neckline. I use a normal straight stitch and I stretch the neckline a bit as I go. If I had a coverstitcher I’d use it here. The topstitching makes a nice finished look.


Finished!

Friday, July 20, 2007

yesterday was a cutting day

Yesterday I cut out 4 shirts, one for an order, the rest for my boys and myself, and a pair of green jeans for my 7-year-old. I am going to do a t-shirt neckline tutorial and a jeans waistband tutorial as I sew these up.

Monday, July 16, 2007

sociable guerilla bagging

I'm gearing up to make my first batch of morsbags, see their site here. I went and bought a sheet and a cloth shower curtain at Goodwill and when they come out of the wash I'm going to be cutting and sewing this afternoon. I'm making some to give away and some to keep. And I'm considering making my own version of cloth reusable bags for sale once I get set up on etsy.

I also bought the border fabric for my scrappy log cabin quilt top. I'm going to do a sewalong of how to do the binding when I get to that part of the project.

Other sewing projects near the top of my list: a foldover tote bag for me, for church, a t-shirt for me, and jeans for my 7-year-old.

Monday, July 02, 2007

Jeans-style front pockets tutorial

Here's a sew-along for jeans-style front pockets that I put together. Enjoy!

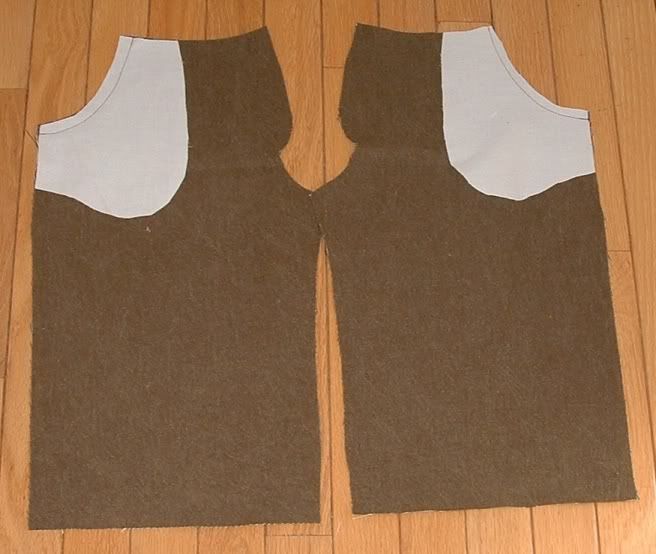
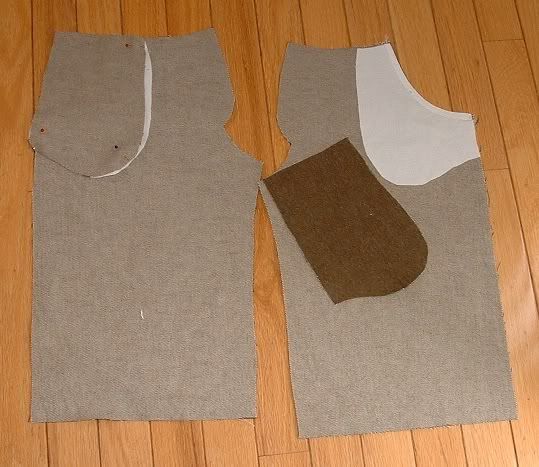
There are 3 pieces--the pants front, the pocket facing, and the pocket back. Your pattern directions might have other words for these pieces. I didn't take a picture of the pieces before sewing them but you should get the idea anyway.


Step 1: sew the pocket facing, right sides together, to the pants front. Trim the seam allowances. I trimmed the one on the right, it's a little funny at the top there.


Step 2:
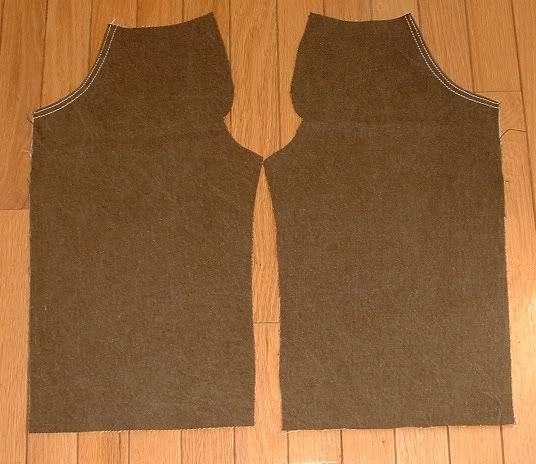
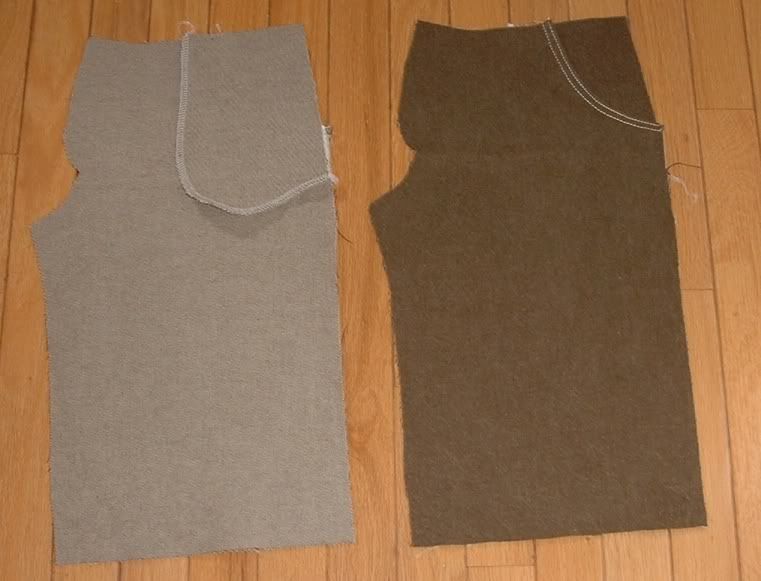
After trimming your seam allowances, flip the pocket facing to the wrong side of the fronts and press in place. Some patterns have you understitch, which is a good idea but not totally necessary.


Step 3:
Topstitch.


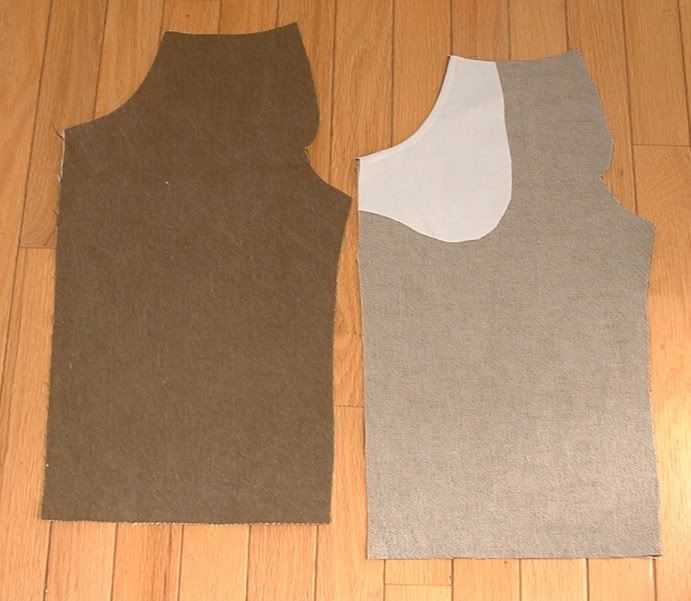
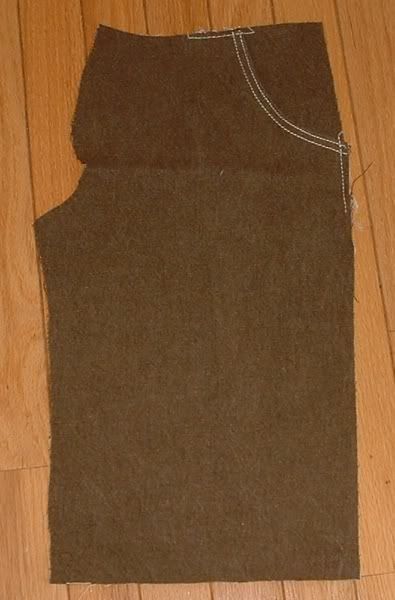
Step 4: pin your pocket back piece, right sides together, to the pocket lining. It didn't line up exactly for me but that's ok. I will sew the curved edge--from the red pin to the other red pin.


Step 4: sew that seam--here is a picture of the wrong and right sides after sewing:


Step 5: Baste the upper and side pocket edges to keep the pocket in place when you sew the side seams and waistband. I used topstitching thread so it would show in the photo.


Still working on the formatting but it's a bit better now.

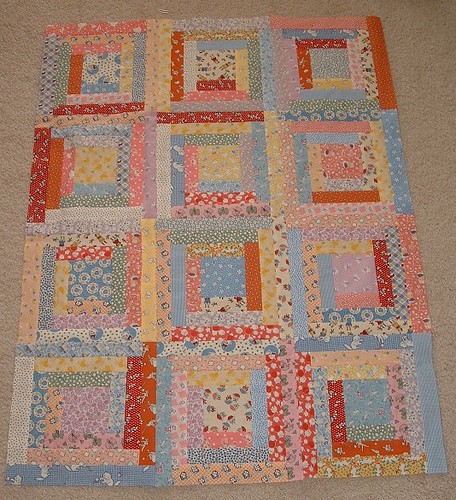
log cabin quilt top


Just finished this up. I need to decide on a border for it. I'm not 100% happy with how it turned out, could have used less of the dark orange and red but I used what I had.

Monday, June 11, 2007

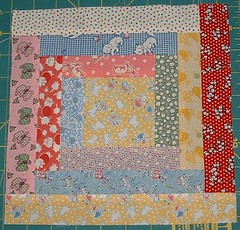
3 log cabin blocks


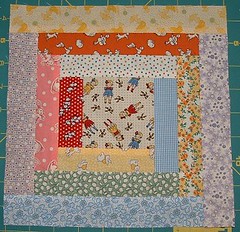
I made these today and I'm really happy with them. I've had these 30's prints for a while and a couple of them I think are quite ugly but I like how the blocks turned out. If anyone wants to swap scraps with me, let me know here and I'll set it up.

Just wanted to post again that I got this idea from Melly and Me. I did make my blocks bigger; the finished measurements are: center square 3", logs 1" wide. Finished blocks are 9"--approximately.

And. Anybody have any ideas for getting the pictures to line up just in one column here? This is ridiculous.

Sunday, June 10, 2007

scrappy log cabin

I have been looking at log cabin quilts and blocks on Flickr and really loving them. I came across this tutorial for scrappy log cabin blocks and I'm hankering to make some! Soon! SILs will be giving birth to a boy and a girl in the next few weeks so I'll be making a quilt for each of the new babies. I have a stack of 30's fabrics from a swap a while back and I'm going to start making log cabin blocks from them. I don't know if I'll use the same pattern as in the tutorial or make the blocks bigger. I'm thinking bigger. But I like how it looks to have the middle square bigger than the logs so I'm keeping that in mind while I plan.

Wednesday, May 30, 2007

Hawaiian July 4th Shirts

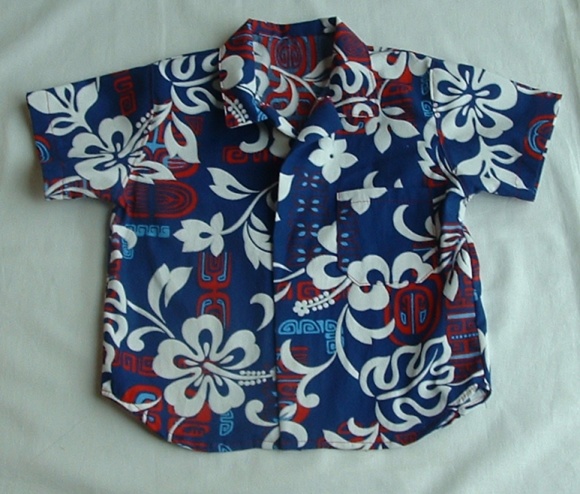
Last year I made really cute 4th of July shirts for the boys out of a woven print from JA, white background with wee red, navy, and light blue stars on it. This year I looked locally for good red, white, and blue fabric, and just couldn't find any that I really liked. So I asked for a little help on sewingmamas.com and someone pointed me to really great red, white, and blue Hawaiian fabric. It actually came from Hawaii. I was so excited when it came that I sewed up the shirts within 2 days. I will have cute modeling photos when the time is right. Still deciding if I should make bucket hats to match.

Thursday, May 24, 2007

Finished baby quilt for C

I have 8 nieces and nephews and 2 kids of my own and I've made baby quilts for everyone except the steps who I didn't know when they were babies (2 of them). This is for the newest baby, C. She was born in January. So it's about time I get this sent off to her.

I will be making 2 more quilts this summer--one for a boy and one for a girl. I don't know what they're going to look like yet but I have some ideas for the girl one.

I got the idea for this quilt from a magazine pattern by Valori Wells. I used the color scheme and square in a square block ideas from her pattern but didn't use the large print fabrics that were in the original.

Never been tagged

My first meme. Oh my. I'm supposed to write 7 random things and then tag 7 bloggers to do the same. (Amy's who tagged me.)

1. I'm left handed and so is my dh. Our children are both right handed.
2. I like crunchy supreme tacos from Taco Bell.
3. I worked at McDonald*s as a teenager and it was a good experience.
4. I have an unfinished quilt project that I started in 2002. I'm still planning on finishing it but don't know when.
5. I want to live closer to our families some day. We are a 2 day drive away right now.
6. I am getting started on red, white, and blue Hawaiian shirts for my boys today.
7. I'm reading Summer of the Monkeys to my 7 yo.

So... who I'm going to tag...
Kerry, Rebecca, Kathy, Kami, Shannon, Stephanie, and Jill

Monday, May 21, 2007

foldover bag


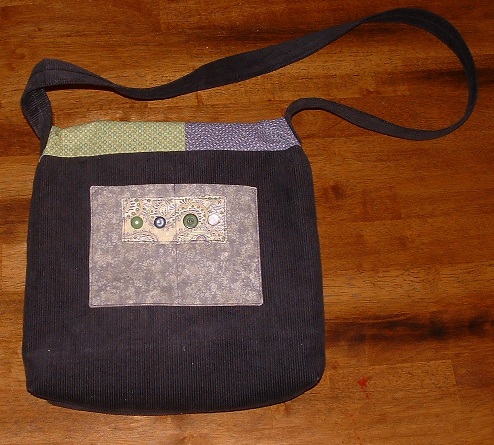
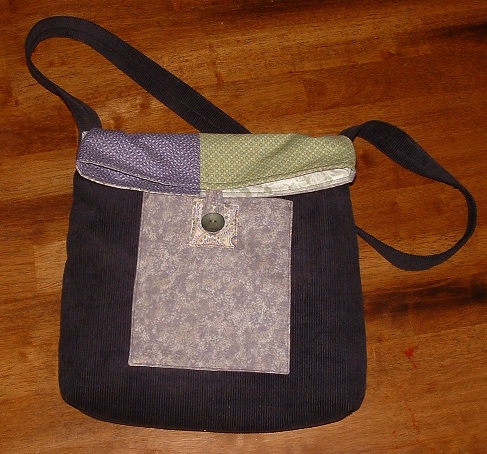
Finished this up for part of a trade I'm doing. I like it but boy am I getting sick of this particular corduroy. I have a skirt, jacket, and library tote all made from this fabric. I do really like the various buttons.

Tuesday, May 15, 2007

sewing slump

I am having a hard time with procrastination and, let's face it, laziness, about sewing. I'm needing to be working on some items for a swap with a friend and I'm having a hard time getting to work! The tote bag is done all except the handle. And it is a very cool bag so maybe I should just go make myself sew for 15 minutes and see how it goes. I even have the handle pinned, ready to go.

I also have some mending that I'm doing for a friend. Ugh. I should just go do it and be done with it.

Then also I am thinking about business sewing and how much if any of that I want to do anymore. It is hard work to sew for money and I'm leaning towards not wanting to put my energy into it, at least online. I think I do want to get some labels for my own kids' clothing and maybe sew a little bit for local friends.

Finally upcoming projects I want to make: *the gathered neckline Otto tee for myself. I even have the fabric, nice thick maroon rib. *Blue camo tees for my boys. *New pj tees for my younger boy. *The 10-gore skirt from Ottobre for myself. *4th of July woven camp shirts for the boys. *Nappy bag for the pool.
Wednesday, May 09, 2007

pajama shorts

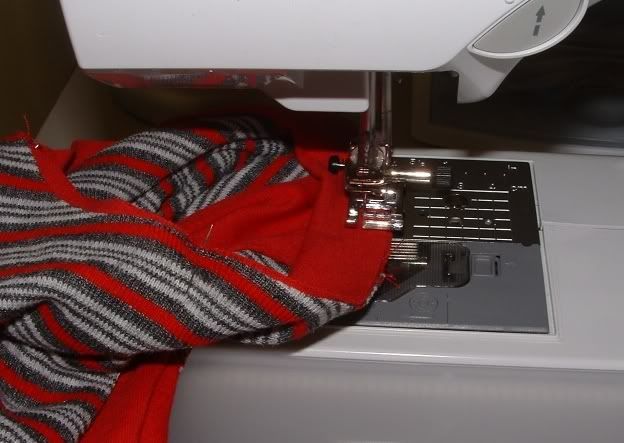
I sewed up 6 pairs of pj shorts for my boys. They are big and I'm really hoping they will last 2 summers. Probably my most favorite instant gratification item to make. I also made my version of the maternity top in the new Ottobre woman, for my friend. I made it a regular t-shirt instead of the very-low necked cross top. I really like the gathers in the side. Maybe someday I'll make one for me.
Up next--tote bag and baby quilt.


Wednesday, May 02, 2007

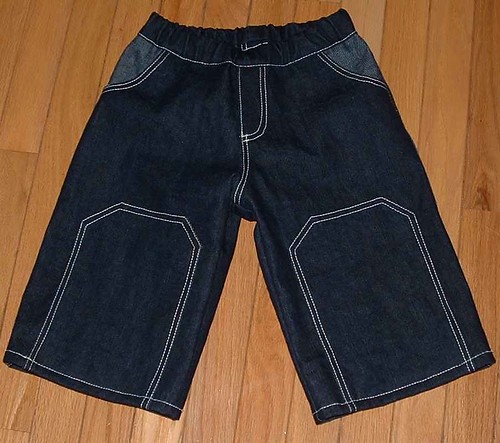
jeans

I just (finally) finished these jeans for my son who is now 7 (yay!). I am ready to buy a new sewing machine. My Wlamrat brother is just wimpy--for this at least--and the old Viking I use for heavier stuff like jeans hems has been not working well for that any more.

I'm intrigued by the Bernina BSR machine(s?) and might look into that. Depending on the price, that might be cool, especially if it can also handle garment sewing that occasionally gets a little on the heavy duty side.

They are from Ottobre design 03/05. I'm ready to take a break from sewing denim for a while and give my poor wimpy machines a rest.


Monday, April 30, 2007

The Alice Dresses

Here are the 4 Alice in Wonderland dresses. Pattern is the princess dress from 1/2007 Ottobre. Modified to have the apron top sewn into the bodice and omitted the sash.

more shorts


This was the first pair I made from this pattern. Size 110 and they are plenty big on my narrow 7 year-old. I made a green pair as well.

shorts


I've made 2 pair of shorts for my now 7 (!) year old and one pair for the younger one. These are from Ottobre Design 02/05 in size 80. They are huge on my 2y10 month old. I think I'll fold some of the fullness out of the pattern when I make him another pair. This pair has elastic issues as well... new elastic, I didn't realize I needed to use a smaller length to allow for stretching.

Sunday, April 01, 2007

Alice dresses

I am finishing up 4 Alice dresses for the homeschool group play. It has been a bigger, more complicated project than I anticipated and I can't wait until they are done! I have them all done except the zipper and neck binding on one last dress.

Then I will be working on olive denim shorts for my son and a few other things that have been on my list for ages.