

Here are instructions for making a chicken quilt block. This block is 7x8 inches as shown and will end up 6.5x7.5 inches when sewn into a quilt. All seam allowances are 1/4".
Step 1: Cutting.
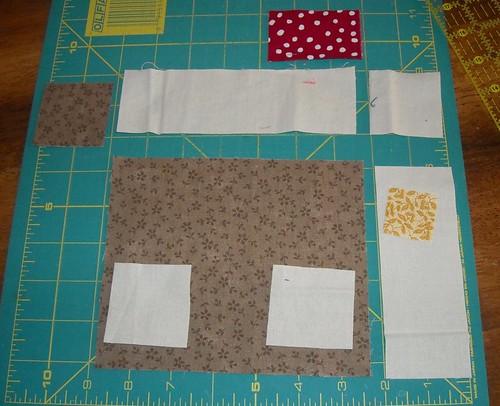
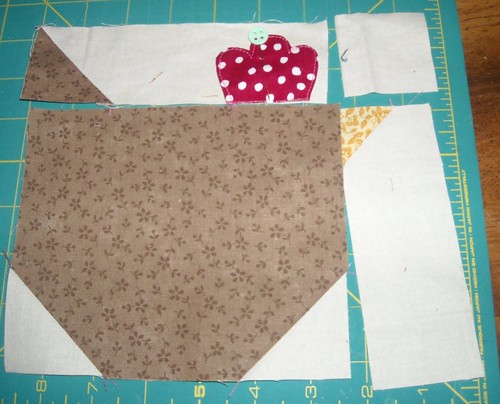
From your chicken body fabric, cut a rectangle 5.5x6.5 inches, and a 2x2 inch square.
From your background fabric, cut 3 squares, 2x2 inches, a strip 6.5x2 inches, and a strip 5.5x2 inches.
From your beak fabric, cut a 1.25" square.
From your comb fabric, cut 2 rectangles about 2x2.5 inches.
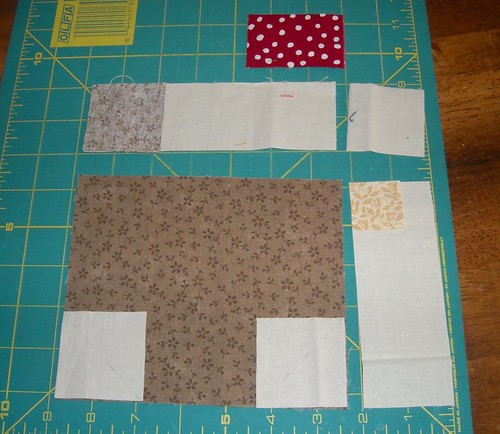
Step 2: Draw diagonal lines on all your squares except for one of the background fabric squares. Mine are kind of light, I will make up for that by stitching them in a bright color so you can see them better! (It was a good excuse to not change my thread.)
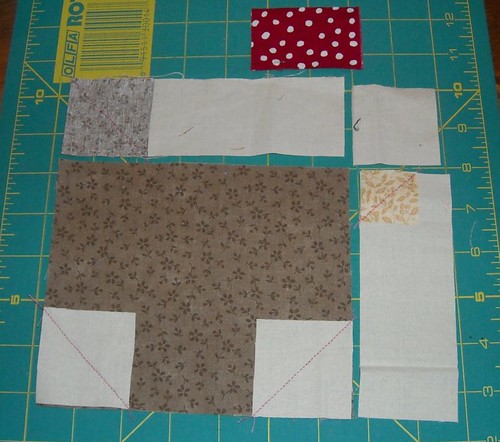
Step 3: Stitch on all the diagonal lines as shown in the above photo. The stitching on the tail square doesn't show up really well--it goes from the upper left corner to the bottom right corner.

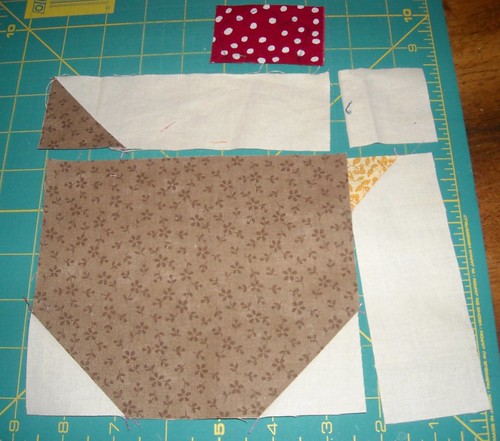
Step 5: Press your seam allowances toward the darker fabric. Also, draw a comb shape on one of the comb fabric pieces (this didn't show up very well in my photo, sorry). You can use a water soluble marker or whatever else you have on hand. I used a regular pen and will put the side with ink facing backwards when I stitched it into the block. Place the 2 comb fabric rectangles wrong sides together.
Step 6: Sew close to your comb shape drawing, and cut out the comb shape close to your stitching. Pin the comb so that the bottom edge lines up with the bottom edge of the upper left rectangle and the right side is about 1/4" in from the right edge of that rectangle. You can baste it in place if you want, or not.

Step 7: Sew the two left pieces and the two right pieces together. Press the seam on the left side down and the seam on the right side up.
Step 8: Sew the right side and left side together, nesting the seam allowances so they match up well. Press that seam and you're done!
If you make a chicken quilt block using this tutorial, I'd love to see it! Can you think of any variations? Maybe a patchwork chicken, maybe a wing, maybe a change in size... I might have to make a couple more of these.
Also I would love to see your chicken blocks on instagram, feel free to tag me @vickidjl and use the hashtag #chickenquilt.
Update March 2025
All images and designs are copyright protected. Please feel free to share the link to this blog post. Do not sell patterns based on this block or rewrite the instructions for this block to distribute to others. You may use this tutorial to make personal projects as well as items you make for sale. Thank you for respecting my intellectual property and copyright.
All images and designs are copyright protected. Please feel free to share the link to this blog post. Do not sell patterns based on this block or rewrite the instructions for this block to distribute to others. You may use this tutorial to make personal projects as well as items you make for sale. Thank you for respecting my intellectual property and copyright.
28 comments:
Thanks for the tut! Can't wait to make one of these :)
Ooh! So fun! ANd your tute makes it look very easy too!
Thanks for the tutorial. I've been looking forward to it! Can't wait to try it out.
So adorable! Thanks for sharing!
Your tutorial is wonderful as well as fun! And I really appreciate how at the end you state that it's okay to use this pattern to make things for sale, too. You are a blessing. Thank you. ~karen
great tut. thanks so much for putting this together. it is wonderful.
so fun and such a great tutorial
That is so cute!
Thanks for sharing the tute on your cute chicken! What fun!
Thanks for sharing the tute on your cute chicken! What fun!
What a cute idea! I love a cute chicken pattern! I'd love to share a link to this tutorial on sewwwhattoday.blogspot.com on March 3!
Cute tutorial.
Love your tutorial! Thank you for sharing!
This was fantastic!
This was a really darling block! Thank you so much for sharing the directions and the clear photos. We are doing this block this week for Friday's Block Party.
Is the red comb shape sewed down on the white rectangle? Will it fray when washed? I want to make this block into placemats ,using colors to match my little flock of chickies!
Is the red comb piece sewn onto the white along the curves of the comb? Will it fray when washed?
Made my first one! I love it! It is fashioned after my Barred Plymouth Rock chicks, Nora and Dixie!
[IMG]http://i472.photobucket.com/albums/rr84/sonally_01/DSC_0322.jpg[/IMG]
sonally, the comb is only sewn down at the base--the other edges will fray when washed. p.s. your chicken turned out cute!
Thank you for sharing. This is so cute!
My sister and BIL own a very small farm in Utah and they've built the cutest chicken coup I have ever seen. They have bought and named their chickens and we love to go let them out into the yard and watch them peck around. I have made my sister a lovely Christmas table runner but was wondering what I was going to do for my BIL. I think I'll make him a pillow using this cute design. Thank you for the tutorial. It is just perfect. :)
I cannot believe I found your tutorial after making up my own for my tea towel challenge quilt. Mine were based on the polka dot chicken blocks in the blog header image of the Polka Dot Chicken blog and made in a more liberated, un-matching style.
Great tuto, thanks for sharing
What a great tutorial! :) I love it and I sew a Easter set with it (http://work-with-patches.blogspot.com/2014/04/od-jajka-do-kury-from-egg-to-hen.html) :) Thx for sharing.
Greetings from Poland
Kamila
Very cute chicken!
Darling!! I'm making some Christmas Chickens for my Christmas Corner Post and will link back to you! Thanks for the sweet tutorial!
Thank you its adorable!
Post a Comment