Friday, January 06, 2012

Tablet Keeper Blog Tour--Kindle Fire Measurements

Hi everyone! I'm excited to share my version of the Tablet Keeper today! The Trace 'N Create Tablet Keeper template is a versatile pattern that can be made in 3 sizes for electronic tablets or paper tablets. The pattern is in the form of a template on clear plastic with cut-out areas where you can mark cutting lines, elastic placement, and strap placement. 


I was really happy to be asked to participate in this blog tour, but when the template and other materials arrived, I found that the smallest size on the template was still much too big for my Kindle Fire. So I knew I was going to re-size the pattern to fit, but I was a little worried about getting it right.

First, I decided to use some of the fabrics from my Parisville fat quarter set. Here's the initial fabric (and interfacing) pull along with the template & instructions, rectangle rings, strap interfacing, and tablet keeper "shapers" which are hard plastic inserts for making the tablet keeper really sturdy.
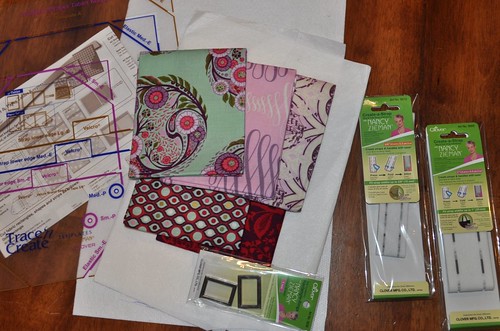
  tablet keeper supplies/template 
Next I stewed about making the measurements right for a few days, then re-read the instructions and realized the fabric measurements were pretty much the finished product measurements because the inner and outer layers are sewn together wrong sides together and then it is bound. I came up with the following measurements for the inner and outer fabric layers, along with the two interfacing layers:

8 1/4" tall
11 1/2" wide (or 5 3/4" from the fold--this will make sense if you have the instruction sheet)

I actually made a mistake and cut everything 8" tall and it worked out ok but I think it would be better with that added 1/4".

Here's everything all cut out:
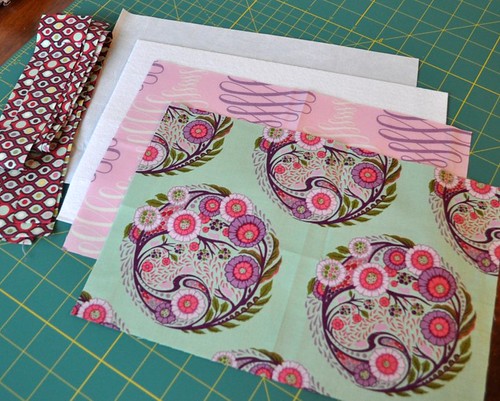
  tablet keeper fabrics cut 
(Except I switched to a lighter fusible interfacing and didn't use the heavier interfacing shown here. The very top interfacing in the photo.)

Also, two long strips cut from a fat quarter is *not* enough to bind the whole thing. Cut three strips across the long side of a FQ for your binding. 

After getting everything cut out, I just followed the included instruction sheet and looked at Nancy's blog too for some visual help on making my tablet keeper. A couple other changes I made were the strap length and placement. I made my strap 21", aka the long side of a fat quarter. I should have made it about 1.5" longer. So, my recommended strap length for a Kindle Fire-sized Tablet Keeper is 22.5". Then the velcro placement line needs to be at 5 1/2" and the fold line needs to be at 6 1/2" from the end of the strap. Again, these measurements will make sense if you have the pattern sheet. For the strap placement, I just eyeballed the middle of the cover and put it where I thought it looked good with the print of the fabric.

Some more notes about making my Tablet Keeper: 
*I used my walking foot to attach the firm interfacing (I think it's Peltex, not sure because I've had it for a long time.)

*The strap interfacing is really cool. You fuse it to your strap fabric and it has perforations that make it easy to fold in the sides perfectly. I am totally going to use this stuff next time I make a new bag.

*It would be really easy to add a pocket to the interior left side. I think if you do that you should make sure that whatever you put in it will be covered up completely by the pocket to avoid any scratching of your Kindle or whatever kind of electronic tablet you use.

*Elastic. I used a cut up hair band with non-slip grip stuff on one side, as recommended in the instructions. I am really happy with how securely it holds my Kindle in place.  It was kind of difficult to sew through though, and I recommend you use a ball point needle and stitch really slowly over the elastic. I marked the elastic placement using the template, I just positioned one corner of my tablet keeper on the template at a time, and moved it as necessary to mark all 4 corners.

*Tablet Keeper Shapers. These are the rigid plastic inserts for giving the tablet keeper good sturdy structure. I cut one of the large shapers into two small ones for the front and back of my tablet keeper, using my rotary cutter and ruler. It is not the easiest thing to cut, so be careful and go slow. I would suggest you measure your own tablet keeper for your tablet keeper shaper cutting measurements. My left one was cut to about 5" x 7 1/4" and the right one was a little wider, 5 1/8" x 7 1/4".

*Binding. I opted to sew the binding on the right side (outer side) of the tablet keeper and then hand stitch it down on the inside. 

So here's my finished tablet keeper:
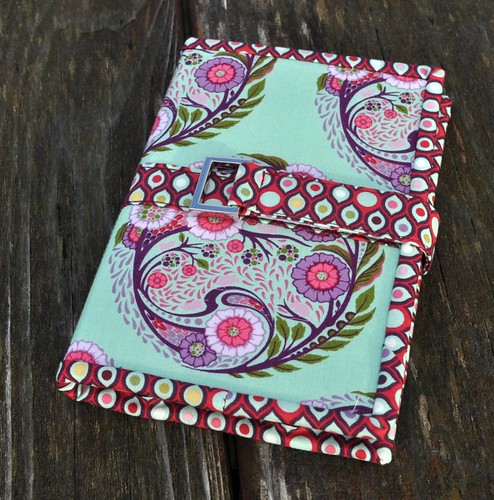
finished tablet keeper, front 
It actually turned out better than I thought it would! And it's quite sturdy too. I was worried about all the layers of fabric and interfacing before I sewed it up, thinking it would be too much for such a small cover, but it is just right.

Here it is opened up:
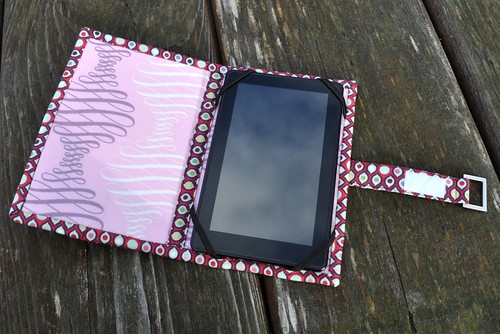
tablet keeper opened up

I really like it! If I made it again I think I would only change a few things: I would make it the full 8 1/4" tall I mentioned above. I would be more careful to make it more symmetrical, and I would make the strap a little bit longer too (it is folded over double from the ring to where it connects to the back of the cover and mine wasn't quite long enough to be doubled over that whole length.)


Thanks again to Nancy Zieman for asking me to participate in the tablet keeper blog tour. If you're interested in making your own tablet keeper, be sure to visit the other participating blogs and see how they customized theirs!

Also, don't forget to stop by Nancy's blog to enter to win one of three prize kits she's giving away! (They are really cool prizes, go look!)


January 3 Nancy Zieman http://www.nancyzieman.com/blog

January 4 Amy Ellis http://amyscreativeside.com/

January 5 Sharon Pernes http://craizeecorner.blogspot.com/

January 6 Vicki Christensen http://www.sewinspiredblog.com/


January 10 Pat Sloan http://patsloan.typepad.com/

January 11 Eileen Roche http://dzgns.com/blog/

January 12 Liz Hicks http://blogerisms.blogspot.com

January 13 Fran Ortmeyer http://cloverusa.wordpress.com/


January 17 Julie Herman http://www.jaybirdquilts.com/

January 18 Jenny Gabriel http://www.sewvacoutletblog.com/

January 19 Natalia Bonner http://www.piecenquilt.blogspot.com/

January 20 Frieda Anderson http://friestyle.blogspot.com/


January 24 Beckie Hansen http://www.nancyzieman.com/blog

January 25 Amy Webb http://www.amylouwhosews.com/

January 26 Allie Robertson http://thinkcrafts.com/

January 27 Mary Mulari http://www.nancyzieman.com/blog

January 30 Laura Wasilowski http://artfabrik.blogspot.com/

January 31 Carol Porter http://www.nancyzieman.com/blog

Disclosure: Clover provided the Tablet Keeper template set, strap interfacings, hardware, and tablet keeper shapers for this project.

Also! If you're new here, and interested in Free Motion Quilting, check out Focus on Free Motion Quilting

Thursday, January 05, 2012

FFMQ Guest Post, Elizabeth from Such a Sew and Sew

Links to all of the blog posts in this series are located in the "Focus on Free Motion Quilting" tab below my blog header image. 

I cannot count my day complete 'Til needle, thread and fabric meet. –Unknown

Hello, Sew Inspired readers. I'm Elizabeth from Such a Sew and Sew. It is nice to meet you. I'm very honored that Vicki would invite me to guest post about free-motion quilting. At the very least, I hope that I what I have to say will not bore the pants off you. I'm hoping for the best, that you might find something helpful and be at least slightly amused in the process. Off we go then. So. Free-motion quilting. When strung together in that order, those are the three scariest words in the English language. I've been FMQ-ing for a year and a half and in that time I've FMQed 13½ quilts of various sizes. I still have to take a deep breath before I take that first stitch because free-motion quilting is scary, plain and simple. No matter how many times I do it, there is always that worry in the back of my mind that I'm going to mess it up. 

I think the hardest part about FMQ is knowing where to start. If your LQS offers a beginning machine quilting class, that is a good place to start. Keeping your expectations reasonable helps too. I went very simple for my first free-motion quilt because up to that point I'd only done a few small projects in straight lines, with a walking foot. It took me about 10 hours to do a fairly tight meander across a 52" x 68" quilt. It was tedious. I missed dropping off my quilt top at the long-arm quilter and getting it back transformed into something amazing. I saw every single imperfection. I worried the whole time that I had ruined it. I didn't think I would ever want to quilt my own again.
After a trip through the washer, the imperfections seemed to disappear. I was fairly content with my first attempt at FMQ and I even felt kind of fulfilled in making a quilt start to finish. Necessity {i.e. lack of funds} dictated that if I wanted to finish any more quilts, I'd just have to do it myself. So I tried again with loopy flowers on the next quilt. It was an interesting adventure that turned out pretty well. I went back to meandering and straight-line on a couple more quilts and then did some more loopy flowers. I decided to give feathers a try and they didn't come out too badly. I branched out from there, adding in a bit of something new to each quilt, along with the old stand-by favorites. My skills improved, my stitches got more consistent and my quilting got more elaborate. At the end of June 2011, I finished a second snowball quilt, identical to the one I'd started with. This one took about 35 hours to quilt, there wasn't one straight line or meander anywhere on it and I didn't find it tedious to spend all that time at the machine. As a matter of fact, I loved it. I loved free-motion quilting.
So, how did I go from a somewhat iffy edge-to-edge meander to a 35-hour custom quilt? Practice. Not the answer you thought I'd give, right? You were hoping I had a magic answer. An answer that would make free-motion quilting easier and more appealing. It really does come down to practice, which can be discouraging and frustrating {my first attempts were craptastic}, if not down-right boring. But I'll tell you a secret. The key to great free-motion quilting is learning how to make a smooth curve. Once you learn how to make pretty curves, you can do pretty much anything you want with FMQ.

The best place to practice curves is by doing a meander. I started with a paper and pencil. It helps tremendously to get the motion down if you doodle it out on paper. Imagine making little bunny silhouettes—two ears and a nose. Or picture puzzle pieces. I filled four or five 3" x 5" notecards with a super-tight meander. On a quilt it would be called a micro-stipple. Even though I couldn't {and still can't} quilt it that small, practicing at a small scale helps your brain to learn the motion. Once you've got it down on paper, move to a practice quilt sandwich. Or three. And then when you feel confident {or even if you don't} move to an actual quilt. Start with a quilt you're not really attached to, like two 1-yard pieces of fabric you pulled out of the bargain bin and sandwiched together. Then, if you don't love it when you're done it can be donated.

I probably did four or five quilts with an edge-to-edge meander before I felt like I could try anything else. When I wanted to try something new, I sketched out the design on paper over and over and tried it out on a practice sandwich before moving to my real quilt. I not only sketch out different quilting designs before I try them, I sketch out how I want to quilt each quilt before I begin. It helps me to organize my ideas, lets me practice moving in one continuous line, and gives me a framework to work within {I'm a color-inside-the-lines kind of gal} when I move to the actual quilt. And is easier to erase a sketch than it is to unpick quilting. This is a quilt I'm working on right now. My goal is to finish it by the end of January. I sketched out the blocks on grid paper, scanned it and enlarged and printed the images of each of the blocks. I made a sketch for each block and then I printed out a smaller copy of the entire quilt. I transferred each block design to the thumbnail size copies in the full quilt layout. When I quilt each block, I refer to my sketches. Sometimes I follow them exactly and sometimes I decide to go with something different. Not every sketch or every quilt I do is this elaborate. The quilt is a pinwheel sampler, so I thought it might be fun to have it also be a quilting sampler.
I asked Vicki if she wanted me to talk about anything in specific and she said she'd like to know my favorite design to quilt. For me, quilting should compliment the design of the quilt, not cover it up. And so that is what I work towards in my quilting. My favorite design to quilt is a row of swirls in the sashing. I use it a lot.
Notice a trend?
Yep. Swirls in every single quilt.
Thanks for letting me bend your ear a little bit about something I really love! If you don't love FMQ yet, with a little practice I hope that you will. xo -E

*************
Hi, it's Vicki again! Thanks so much, Elizabeth, for such a thorough post about your free motion quilting process. I am amazed by your attention to detail and the dedication you put into your quilting!

Elizabeth and I have followed each others' blogs for quite a while now and we were finally able to meet each other last summer at a fun blogger meet-up. She brought her beautiful snowball quilt; it is truly an amazing quilt. I hope you feel like some of Elizabeth's advice will be helpful to you in your free motion quilting adventures. I am gearing up to quilt my king size flea market fancy quilt and I want to quilt some feathers in the borders and sashing. I'm actually really nervous about it but I'm going to start practicing drawing feathers and see how it goes. Please be sure to stop by Elizabeth's blog, Such a Sew and Sew, and get to know her better. I really like the heart table runner she made and showed off in this post.

You can find all the Focus on Free Motion Quilting posts linked here. Feel free to comment with your questions or FMQ tips. Are you brand new to FMQ? Or wanting to improve your skills? What are you going to make this month?

Finally, I wanted to mention the sponsors for Focus on Free Motion Quilting. Thanks for your support!


Wednesday, January 04, 2012

Blogger's Choice Fat Quarter Bundle

Do you already know about this? Laura from Quokka Quilts has joined up with Fat Quarter Shop with a fun contest. All you have to do to enter is go through the wonderful selection of fabrics on fatquartershop.com, and choose 12 prints and 3 solids. The winners get a half yard set of their chosen fabrics. So here's my picks:
  my blogger's choice FQ bundle wishlist :) 
There are a lot of good turquoise, orange, and gray fabrics available right now. I love the gray damask in the top left corner. And the houndstooth prints too. And also the dots. Ok that's all for now. Cross your fingers for me! Or go make your own entry, if you haven't yet, and cross them for yourself!

Tuesday, January 03, 2012

Focus on Free Motion Quilting!


focus on free motion quilting
Links to all of the blog posts in this series are located in the "Focus on Free Motion Quilting" tab below my blog header image. 

Welcome to Focus on Free Motion Quilting! I decided to host this series on my blog a few weeks ago, hoping that a few people who have been wanting to learn how to free motion quilt, or improve their free motion quilting skills, will feel like they have the information they need to get started. And then maybe practice and get better at it. Free motion quilting can be intimidating when you are new at it but it's something that I believe anyone can learn, if you're willing to put in the time to practice! So, for the rest of January here at Sew Inspired Blog we will work on learning how to start free motion quilting and improve our quilting. I have some wonderful guest bloggers lined up that will share their tips and tricks for free motion quilting and there will be some really cool prizes at the end of the month for those who complete a project that is free motion quilted with a home sewing machine.

machine quilting sampler 1


To begin, here's a list of things you need to have on hand to start free motion quilting.
*Quilt sandwich (two layers of fabric with batting in the middle)
*Quilting pins for basting (or you can use spray baste or fusible batting, or even baste with needle and thread)
*Sewing machine with free motion quilting foot or darning foot 
*Thread
*Quilting gloves--you can buy gloves specifically for quilting or use clean gardening gloves if they have plastic grippy stuff on them. I've also used disposable cleaning gloves for quilting when I was at my mom's house and didn't have my regular quilting gloves on hand.


Here is a basic practice quilt sandwich prepared for quilting:
If you are brand new to free motion quilting, you might want to use some fabric you don't really care a lot about for practice. You can use whatever fabric you have for quilting, just try to choose something that you will be ok with making mistakes on. I didn't measure this but it's about 11" square.


To set up my sewing machine, I thread it, attach my darning foot, and lower my feed dogs. I have only quilted with my feed dogs down, but Leah from the Free Motion Quilting Project has written about why it's ok to quilt with them up. This is something that it's totally ok to experiment with, especially if you have a sewing machine that doesn’t have feed dogs that drop. Go ahead and try quilting with them up and see what happens.


Free motion quilting is basically like drawing on your quilt using your needle and thread as the pen and your quilt as the paper. The difference is that you move the fabric, which would be like moving the paper if you continue the pen/paper analogy. So here's what you need to do to start quilting:


Put your fabric under the needle, lower your presser foot, and using the hand wheel take one stitch down and up. Gently tug on the top thread and pull the bobbin thread to the top of your quilt sandwich. Take about 3 stitches in one place to anchor your threads. Now you can start quilting. Put on your quilting gloves and remove any pins that are very close to your needle, and start stitching!


I suggest trying stippling or loops to start. Stippling is just nice smooth wavy/bumpy lines that fill a space, typically without crossing over previous stitching. But don't worry about that for now. Experiment with different speeds with your foot pedal and moving the quilt sandwich slower or faster with your hands. You might find that you need to make the machine go faster, or your hands slower, than you originally thought. Try to get your stitches a uniform length, not too short and not too long.

Other things you can try are writing your name in cursive or doing wavy lines or loopy lines. Just practice, and know that your quilting will improve the more you do it. I did my first free motion quilting over 11 years ago and I am still improving with every project I make.

If you want to read a more detailed free motion quilting tutorial, here's the one I wrote up over 4 years ago. I was using my older machine to quilt then and this tutorial also has information about how I roll up larger quilts to do the quilting. I know some people don't like to roll their quilts, but it works well for me. 


So here's the plan for the rest of the month:
*There will be one Focus on Free Motion Quilting post from me and one from a guest blogger each week. 
*I welcome your suggestions and/or questions about free motion quilting. Feel free to ask questions or add suggestions in the comments, and if you want to write your own blog post about free motion quilting, please send me a link. I'd love to read it, and share it with those who are following along here. 
*You can use my button in the right sidebar if you want to link to Focus on Free Motion Quilting on your blog.
*Be thinking about what you want to do for your free motion quilted project for the prize drawing at the end of the month. It needs to be finished this month but can already be started if needed. The project could be a small mini-quilt or a large quilt, or something in between, it’s up to you. Over the next few weeks, I will share some projects that I think would be good for beginning or improving free motion quilting skills. 
*About the prizes--there will be a link-up at the end of the month where participants can link to a blog post or flickr photo sharing their completed free motion quilted project. The link-up will be open for 24 hours and then winners will be chosen randomly from those who enter.
*I will update this post with links to all the future Focus on Free Motion posts so they will be easy to find.


Finally, I want to thank the sponsors who have donated generous prizes!
 
The prize from Connecting Threads will be a set of four cones of Essential Pro polyester thread in Natural.


Hawthorne Threads is providing a gift certificate for $50 to their shop.
And the prizes from Fat Quarter Shop will be three $50 gift certificates to their shop!


Wednesday, December 28, 2011

Reflections + Made in 2011

Hi friends! It's almost the New Year, time to think about the year past and make a whole bunch of resolutions I'm not going to keep. Or, maybe this year will be different. I've bought my copy of the 2012 Workbook and Planner from the Goddess Guidebook site, I've started filling it out, and I'm planning on using it to help me plan out my projects and goals for the year.

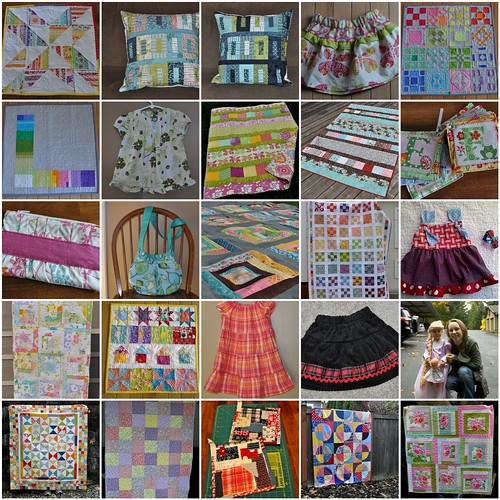
Sew, Mama, Sew has a year-end questionnaire and I decided to share my thoughts on some of their questions. But first, the Made in 2011 Mosaic! Here are a bunch of my projects from the past year:
Made in 2011 
(If you want to see any of the individual photos bigger, click the mosaic to be taken to flickr where you can see the links to each photo, ok?)
Onto the questions....
Looking back at the 2011 sewing scene, what trends stand out in your mind?
The Kona and Habitat challenges within the various Modern Quilt Guild branches, rainbows and bright colors. Projects including both hand and machine quilting. 


What were some of your favorite things related to sewing this past year? 

Getting a little more creative with my free motion quilting.
 

What did you make that you’re most proud of?
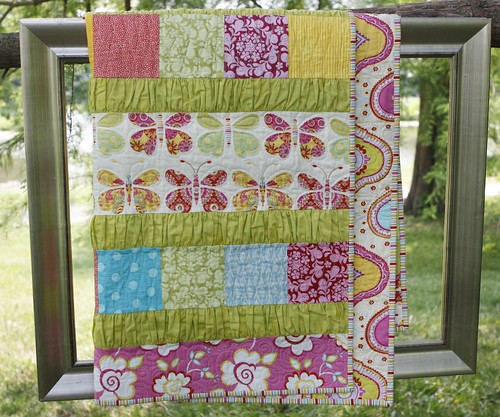
I finished up my first PDF quilt pattern; it's called Ruffle Crush. Writing and making the pattern took forever and I'm glad I finally got it done. I have a couple more ideas for patterns that I'd like to get written up soon.
Ruffle Crush Baby quilt  
What sewn projects have you seen this year that you absolutely love?
This pair of quilts by Amy and gooma8x, seen on flickr. They collaborated to make this intricate and beautiful pair of quilts; I love the colors and the detail and someday I would love to be part of a similar project.
 

Do you have a favorite sewing book or pattern from the past year to recommend?I got Material Obsession II this year and I think it's a great book, really one of the more creative newer quilting books in my opinion. I also got a copy of Natural Patchwork by Suzuko Koseki, and love the simple cute projects included in that book.

Are there any trends you’re over and done with?
Don't hate me, yellow and gray. It's just not my thing.  


What are your thoughts about social media? How is it going for you? What do you love or hate?
I still love reading blogs and I enjoy the feeling I get of actually glimpsing part of the author's life. I like pinterest for the eye candy, but it gets too overwhelming for me very quickly. I guess I like the stories behind projects and pinterest doesn't provide that.
 

Did you have a favorite fabric collection or print in 2011?
Not really. I have a good rainbow of stash fabrics that I enjoy sewing from. I still really like Tula Pink's Neptune, and I only ever had a honey bun from that line (remember those?)--maybe that one should be reprinted some day.
 

What do you predict for 2012 in the sewing industry?
Popular fabric colors are changing to more muted colors, people are trending towards using offwhite, cream, or tan backgrounds instead of stark white. Orange and blue/aqua will continue to be a popular combination in quilting. Someone else said more quilters will branch out into sewing clothing; I think that's probably true. I still wish we could get some more clear blue blues and green greens (as opposed to lime green and baby blue or aqua) in newer fabric collections. Like the blues and greens from the Katie Jump Rope collection.

Can you tell us what to expect from you in 2012? Any big projects or life-changing goals?
Sewing wise, my goals are to continue to whittle down the UFO list, to make Dan's new quilt and Laura's baby quilt and finish J's quilt and my king size quilt (machine quilting it myself!), continue submitting project ideas to magazines, and finish more PDF patterns to sell on my own. Also to make and donate at least 3 quilts to charity.

As far as blogging, I'm hosting Focus on Free Motion Quilting next month (starting on January 3!) and would like to do a series here on the blog on how to sew clothing from patterns later in the year.

Christmas gifts

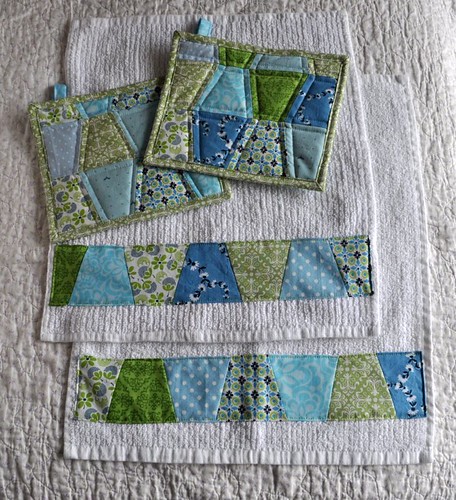
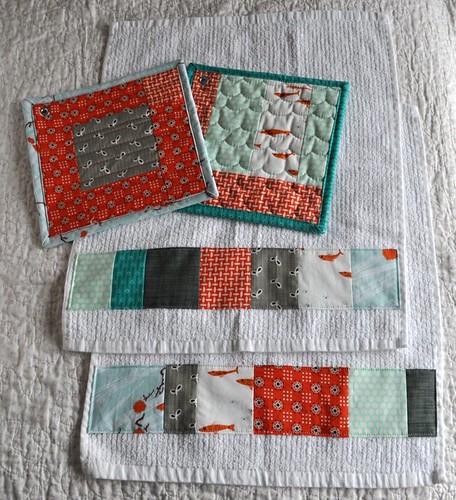
I made just a couple gifts for Christmas this year; first is a set of potholders and dishtowels for my sister-in-law Amy C.
I was excited to use my Go! baby cutter to make this set after it had been stored away for a while. I think the tumblers are so cute and would like to make a bigger project with them sometime. For the dishtowels, I just used bar mop towels that I had on hand. I want to buy more flour sack dishtowels to pretty up, but I don't know if people (who I might give gifts to) would like them as much as I do.

And for Josh and Laura (my brother and his wife) I made this set:
orange and aqua kitchen gift 
I wasn't planning on including the aqua fabrics at first but they just sort of needed to be included. I like this color combination a lot. I put grommets in this set of potholders and had help from kids who were excited to help hammer. I am running low on the Katie Jump Rope red-orange fabrics and need to find a replacement!

And I got to open up this beauty on Christmas morning!
quilt made by my mom 
My mom made quilts for her grandkids the last two years (there are 15 with one more on the way!) and this year she made a quilt for each of us 6 kids. I asked for a fall quilt and I'm really happy with this one. :) I have a jelly roll of this same fabric line, I might make some pillows to go with it.

****
p.s. I'm working on getting things ready for Focus on Free Motion Quilting, please come by next Tuesday (1/3) for the launch!

Sunday, December 25, 2011

Merry Christmas!

Hope you are having a wonderful holiday season!

Not a fan of the big guy. 

The kids at the beach on Christmas Eve. Seattle was so nice yesterday.

Dark pic of our tree last night.


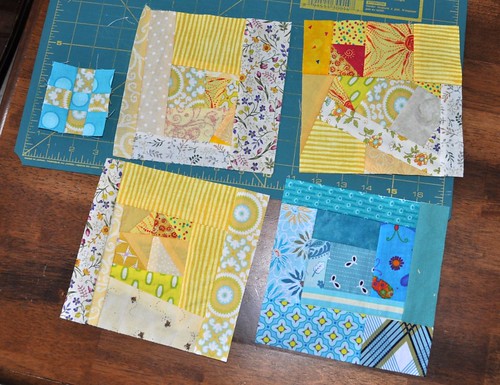
scrap blocks, tiny 9-patch 
 The quilt blocks I've been making the last couple weeks. These scrap blocks are 6 1/2" and I think I'll make a big quilt with about 80 of them. Tiny 9-patch for no reason, I just wanted to make it.

Wednesday, December 21, 2011

Finished Baby Quilt

A couple weeks ago I finished up my niece's baby quilt and sent it off to her in SLC:

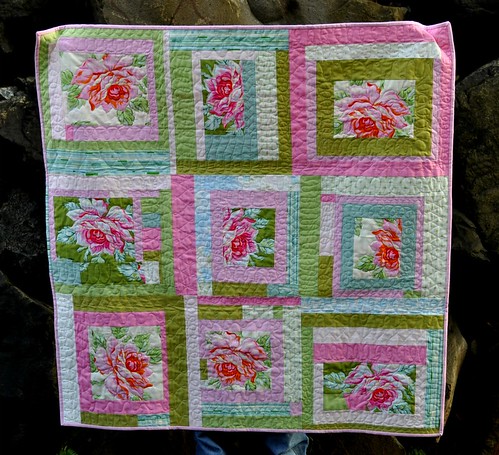
rose baby quilt 
I started this quilt in Kansas, with hopes that it would be finished and sent off quickly. Then we found out we were moving.  I finished the quilt top while we were living in our temporary apartment, and then quilted it right after we moved into our house in November.

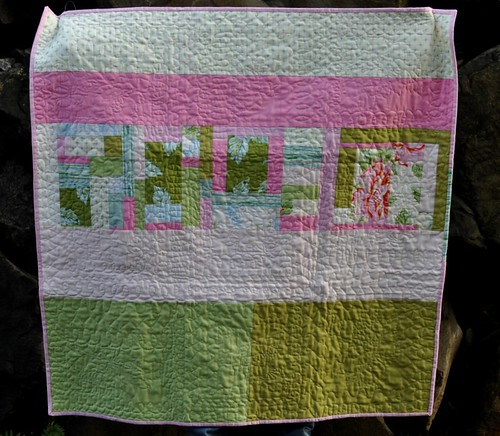
Here's the back:
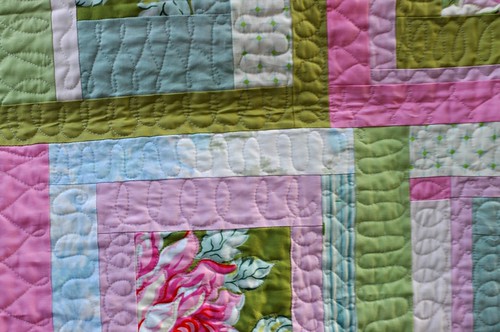
It's about 45" x 45". A little bigger than I usually make baby quilts, but that's ok. I had fun quilting it. The strips in each block were each quilted with one of three different designs:
I used loops, S-curves, and loopy zigzags, and just tried to make sure that adjacent strips were quilted with different designs. The roses in the centers of each block were quilted on the outlines of the roses and leaves. This was kind of similar to the quilting I did in my vintage sheet quilt, but in that quilt I did a different design in each strip of each block (designs were repeated in multiple blocks, though). Using only three designs made the quilt look more unified, I think, and there was less thinking/decision making along the way, too. 
So, overall I am pretty happy with this quilt, and I'm excited to make my next baby quilt for another niece who's expected in February. :)

Don't forget about Focus on Free Motion Quilting next month; we'll have how-to's and encouragement, along with a free motion quilting link up at the end of the month. Beginners and quilters with all levels of experience are welcome!
p.s. Feel free to get the button over on the sidebar. :)
focus on free motion quilting

Saturday, December 17, 2011

Circle Quilt Top, and Giveaway Winner!

Hi everyone! Thanks to all who stopped by to enter my giveaway this past week. I really enjoyed reading about the projects you made this year. The winner, picked by random.org, is #161, Nancy Sue, who said,

"I crocheted a baby afghan for my newborn nephew in 2 days this past summer. I took yarn and a hook with me on a camping trip. Between 8+ hours in the car and time around a campfire and porch, I finished it. I could then enjoy the rest of the week camping without that deadline hanging over my head :)"

That's amazing to me, I have always been quite slow when I crochet.
I've emailed Nancy Sue and will be sending her the mini-quilt in a few days.

*******
I also finished up this not-mini quilt top yesterday, I'm excited to show you:
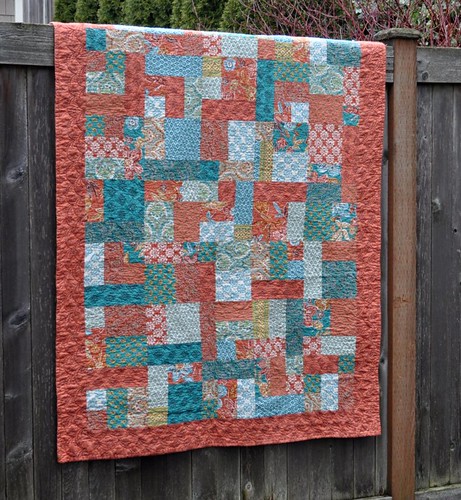
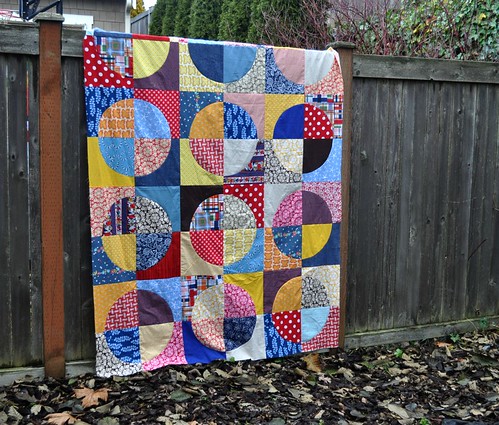
circle quilt top, finished 
This is our back fence; the quilt has one more row of quarter-circles (half circles, I guess) hanging over the top of the fence. The quilt measures 60" x 80". This was fun to put together and it didn't take me too long. It will be a little while before I'm ready to quilt it but I have something fun in mind for the quilting.

My boys are out of school for winter break now, so we'll be trying to do some fun activities over the next couple weeks, and I'm going to work on fitting some sewing in as well. I hope you're having a good holiday season!

Monday, December 12, 2011

Giveaway Day!

***giveaway is closed now, check back soon for a winner!***

Hello friends! Today is the beginning of Giveaway Week at Sew, Mama, Sew, and I have a little Christmas mini quilt for one lucky commenter.
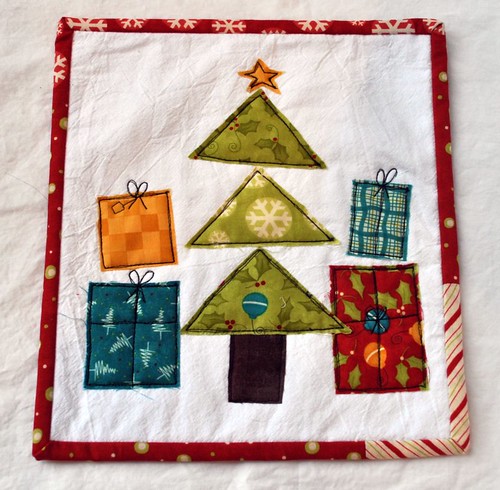
mini quilt for SMS giveaway day

It's about 10" x 11" and the appliqued tree and presents and the binding are from Moda's Merry and Bright line from a few years ago. 

And quickly, before you leave to go enter more giveaways, I wanted to let you know I will be hosting Focus on Free Motion Quilting next month! We will talk about getting started with free motion quilting (non-beginner quilters are welcome too!), and I have some great guest bloggers lined up to talk about their experiences with it as well. At the end of the month we'll have a link-up for participants to share projects with their new free motion quilting skills and there will be a few prizes as well. There's a button in the sidebar if you want to spread the word--and please check back on January 3 if you're interested in participating!

To enter to win the Christmas mini quilt, just leave a comment (one per person) telling me about your favorite thing you made this year. Make sure that you're *not* a no-reply blogger, or put your email address in the comment if you're not sure. The giveaway will be open until 12/16 (that's Friday) at 5 pm PST, and I'm willing to ship anywhere in the world this time. :)

Don't forget to head over to Sew, Mama, Sew for tons of other giveaways!

Thursday, December 08, 2011

Bright colors

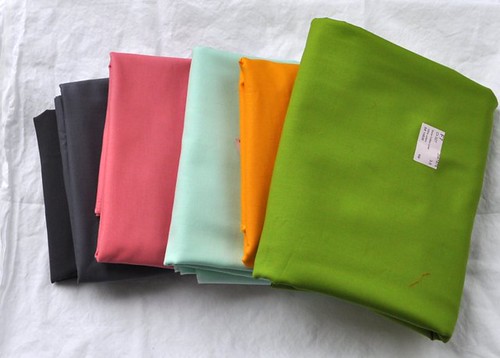
I got this pretty stack of fabric on my doorstep yesterday:

quilt back fabric 
This pile is for making the back for this quilt. These colors match the flea market fancy fabric (and others) in the quilt top really nicely. From left to right, they are Kona charcoal, coal, melon, ice frappe, and lime. The binding's going to be lime, too. I'm still not sure how I will quilt it, but I'm excited to get going again on this quilt.

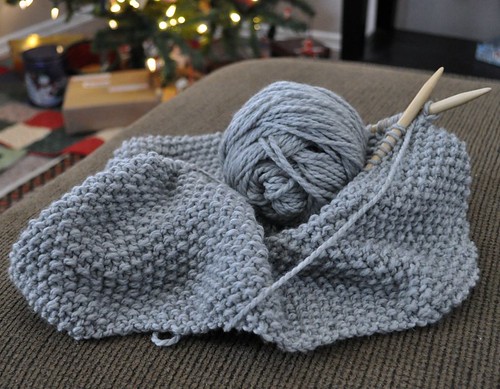
I've also been working on my knitting; I try to do a little bit every day so my cowl will be done soon.
gaptastic cowl--progress 
My purling has improved a ton since I've been working on this project. Here's the link to the pattern if you want to know more. I cast on 10 fewer stitches than the pattern called for, to make it a little shorter. 

I am still working on some gifts and my circle quilt. I have the blocks for 5 rows (out of 8) completed now. I also found out the other day that my new home, the greater Seattle area, is home to the top 15 cities with the least sunlight in the US. So even though I'm now in a house with big windows and more light, this is the time of year when there's less and less light and I'm in one of the darkest parts of the country. So that's my excuse for all the dark pictures lately. I'm doing my best to learn a little bit more about photography and see how I can improve my photos. Please be patient. :)

Monday, December 05, 2011

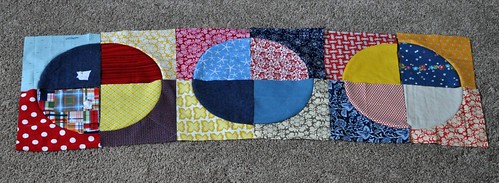
Circle quilt progress

circle quilt progress 
I got the blocks put together for the first two rows of my circle quilt. So far, I'm liking it! The first blocks on the left of each row have a little paper pinned on with the row number, to help me keep everything straight while I'm sewing. I haven't pressed any seams yet; I'm waiting until all the blocks are done and I can make sure I like the layout. Then I'll press the seams alternating "in" and "out" so the top will go together smoothly.

I have a couple of small projects I want to make for Christmas gifts and I think I'm going to work on one of those this afternoon. I might sew 6 more circle blocks together first though.

Also--I wanted to tell you about something I'm working on for January.
I'm going to host a free motion quilting challenge. My hope is that people who haven't tried free motion quilting will give it a try, and that those with a little (or a lot of) experience will maybe try something new with their free motion quilting. I'm planning on having a link-up at the end of the month for people to share projects with their new skills. Oh yeah, there will be prizes, too! I'm still working on the details, but for now if you have any questions or problems related to free motion quilting, let me know in the comments and I'll work on including answers next month, ok?
Saturday, December 03, 2011

Christmas spirit

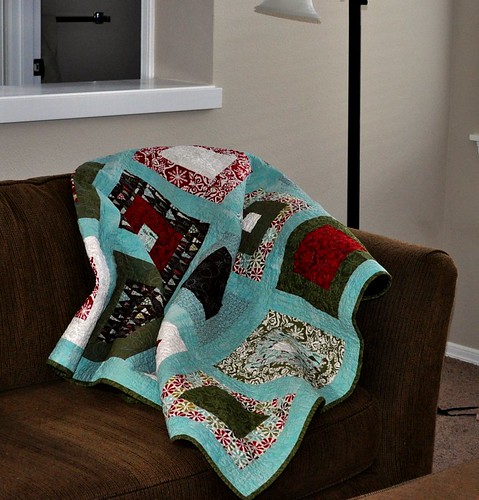
 I pulled out my favorite Christmas quilt the other day and have been enjoying snuggling up with it.
my snuggly Christmas quilt 
I love the colors; the figgy pudding fabric by Basic Grey is just perfect. I would love it if they reprinted this line, I'd totally buy more. The red and white would make a gorgeous little girl's skirt.
We also finally got our Christmas tree up after not having enough lights, and then buying the wrong lights (bright white and warm white *don't* go together) and then finally getting the right lights. I am not a very fancy person when it comes to my Christmas tree, but I love my tree and my ornaments. (I will try to get a good pic of the tree in the next couple days.)

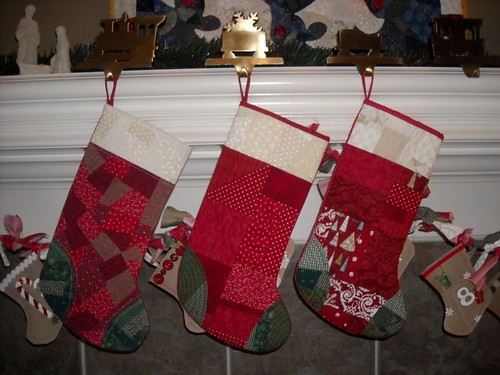
I wanted to remind you of my scrappy stocking tutorial; it was posted last year over on the Sew We Quilt blog. These aren't difficult to make and I think they turn out pretty cute. I'd love to see a picture if you make one, ok?
Also, are you on Pinterest? I am trying to find (and pin) the cutest handmade ornament ideas and then I think I'll pick one or two to make a few of this year. You can follow my boards here if you want.

I've also been knitting and working on my circle quilt; more on that soon!

Wednesday, November 30, 2011

Starts and Finishes

I'll start with a finish:
finished charity quilt
9 year old (yes it's true, sadly) UFO, finally complete. I'm going to send this one to Bumble Beans Basics.
I've also finished some other projects that need to wait before they get their turn on the blog.

And I spent some time picking out fabrics for a new quilt. Because I want to.
(Wish I had better light! I might have to start taking more photos outside.)
I'm planning on making another circle quilt.
This one will be bigger, I'm thinking 60x80 inches. 48 quarter circle blocks that are 10" square finished. I had a wider assortment of colors picked out at first and decided to try out a primary color scheme this time. I don't have very many blue fabrics. I am going to make my templates for this one right away.

And I picked these out for a quick little secret (for now) project: 
orange and grey fabrics
 What are you working on? Do you have any secret (or not) holiday projects you're making this year? 

Tuesday, November 22, 2011

Potholders

One of the books I've found in my unpacking adventures is my copy of Natural Patchwork by Suzuko Koseki. I decided to try out the raw edge applique potholders. Even the binding is applied with raw edges, and I kind of thought that was a little bit wrong but wanted to try it out anyway. Also, I dropped one of my potholders in the oven the other day and it's a little melty-burned.
potholders
I used some of my moda twill tape, probably from a layer cake or other precut, for the hanging loops. Even though I never use hanging loops. They look cool though. Also I pieced together some batting scraps, two layers each, for these. It was fun to make something quick, and to use scraps too.

I found these rolls of binding scraps last night. I made the big roll when I was sorting through my fabric before the move, and I found the smaller one in my scrap bin last night. I think I need to make a super duper scrap quilt and use some of these scraps to bind it. Someday.
binding scraps
Today I'm working on a giant amount of laundry due to a certain 3 year old who's had crummies in her tummy. And also a couple of quilt bindings. One by hand, one will be done completely by machine. I hope it turns out ok!