Tuesday, June 29, 2010

vacation sewing prep

I've been getting a few things ready to sew while I'm on vacation.
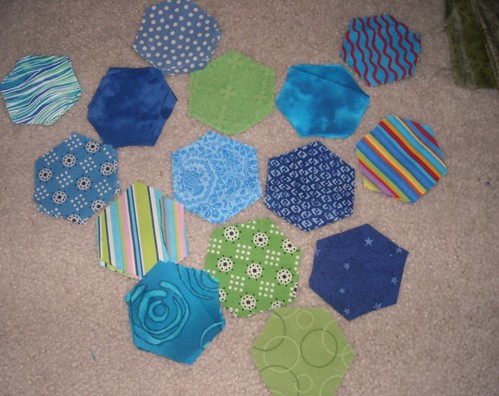
hexagons for my dqs9 project
Some hexagons to sew for my DQS9 project. The green up there in the corner is maybe going to be part of this project, too.

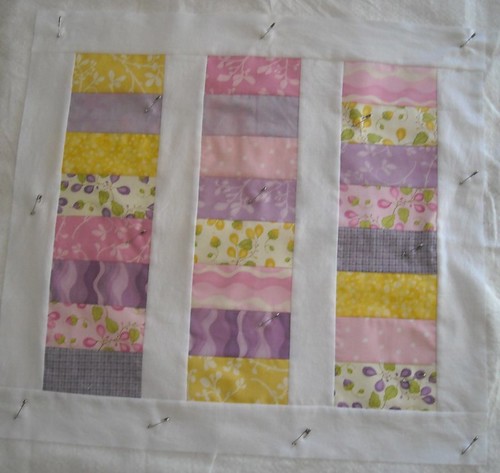
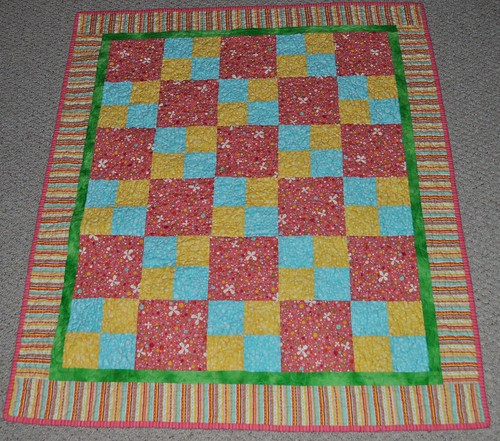
stacked coin doll quilt
A doll quilt for someone... pretty sure the mom of this someone doesn't read my blog, maybe she'll see this though? This is quilted now, binding is made, and I'll hopefully be ready to hand sew the binding down on the trip.

And a few things not pictured: I have fabric and thread ready to make a cape. I don't have any velcro though--if the cape recipient could pick some up that'd be great. (yes, pretty sure she does read my blog)

I'm also preparing a sleeve to sew on a quilt that will be entered in a quilt show on my trip.
And bringing an unquilted quilt... gonna try out my mom's Grace quilting frame and see how I like it.

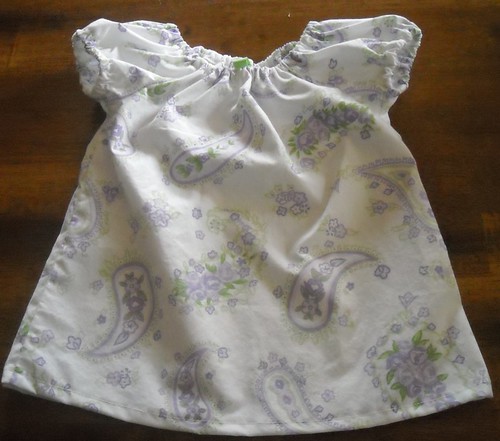
I made another peasant top for my girl the other day:
peasant top
It's from a thrift store pillowcase. I thought it was vintage but I found the tag and it's a Pottery Barn Kids pillowcase. 100% cotton, even. I made a matching one for her doll:
doll peasant top

I entered the girl's top in the Sew, Mama, Sew Make it/Wear it contest. I had hoped to make myself a skirt this month but I just didn't get to it. Maybe I'll make it in July.

Friday, June 25, 2010

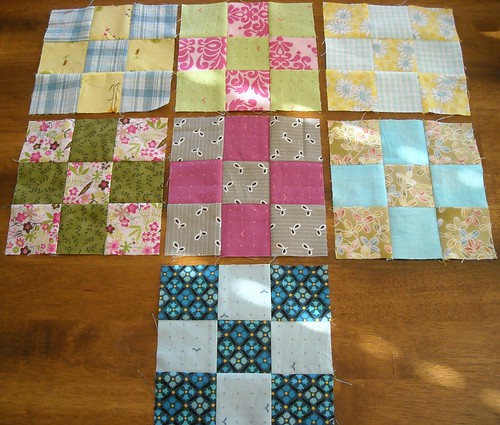
9-patches week 5

I was hoping to have all 11 of the rest of these done this week. Not yet, though.
9-patches week 5
There are some interesting combinations here. Some of these are not my favorites (blue stripe!) but I think they will all look fine in the finished quilt. I used three fabrics in a couple of the blocks... I really wanted to use the rose print in the block with solid yellow, and same with the rainbow dot fabric (with the froggies), but didn't have enough of those two for four 2.5"  squares. I do have to say that the green viney print with the pink hearts is from my first ever quilt shop fabric purchase (circa 1997) and is still one of my favorite prints.

I finished two more 9-patches as leaders-enders while I was sewing my last bee block today, and I have the fabric picked out for the last two.
Block Swap 2 disappearing 9-patch
Here's my June block for Leslie of Block Swap 2. My first ever disappearing 9-patch. Hmm... I was thinking about doll quilts for my nieces today... this would make a quick and easy design for them.

And I finally finished up my Drunk Love blocks for Julie. These, for me at least, take some time and thinking. I really like the finished results though.
Neptune blocks for Bee Beautiful
I can't decide which one I like more. I really like the coral fabrics, but the green and navy blue look so good together too. I still need to sign my name on the siggie block. The solids in these blocks are Kona crush fabric, I'd never seen it before. It has a crinkly, cushiony texture and I really like it. I might get some for the sashing in my 9-patch quilt. 

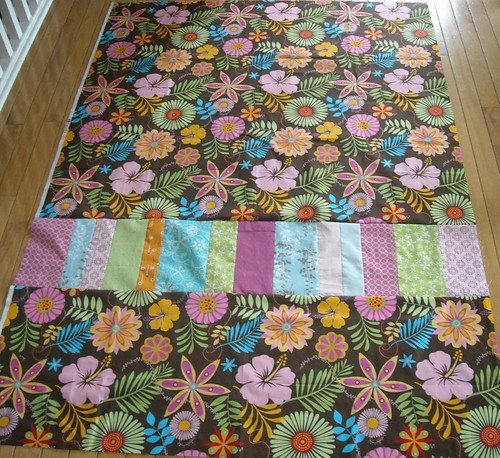
Finally, I'll show you what I was working on first thing this morning--the back for my circle quilt:
circle quilt back
I couldn't make the back without piecing it. I used the more solid-ish fabrics for the pieced strip and I like how it turned out. Especially the orange part. This quilt is pin-basted now and ready to quilt, as soon as I can get to the quilt shop for thread. 

I'm linking up at Sew & Tell Friday again; go see what everyone's been making this week!

Friday, June 18, 2010

9-patches week 4

I looked through my pile of blocks last week and realized I only had about 2 with red fabrics in them! I guess I need to do a bit of stash-building in that area. I found a couple of good reds in a Love is in the Air layer cake I have though, and I like how they turned out. More orange, too.

I only need to make 11 more 9-patches and then I'll be ready to put this quilt together. It's going to be so cute!

I'm linking this over at Sew & Tell Fridays--go see what other people have been working on, this week!

Monday, June 14, 2010

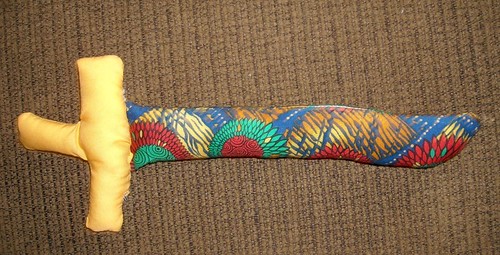
Mom, can you make me a sword like my brother's?

My 10-year-old made this today--well, he made the handle and blade parts, and stuffed them, and I stuffed them some more and hand sewed them together. His brother just came upstairs and asked for one of his own. I'll have to get right on that.
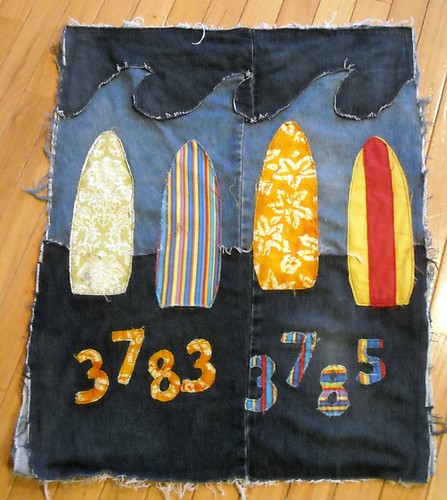
I got this done last night, just in time--day camp started this morning! The colors are a bit off because (a) it was still slightly damp but I had to take the photo before I delivered it to Megan, and (b) it was starting to get dark. And I forgot to get a picture of the back. Partway through stitching the second "8" on, I remembered that my machine came with a knee lift bar, and I went and found it and attached it. It made it so much easier to get through all the pivoting required for sewing on the curvy numbers. The number seven is super easy to applique, by the way.

I love how it turned out--the slight fraying of the wave curve looks so cool, if I do say so myself! Wouldn't this design make a cool pool bag? Or picnic blanket? (Without the pack numbers, of course!)

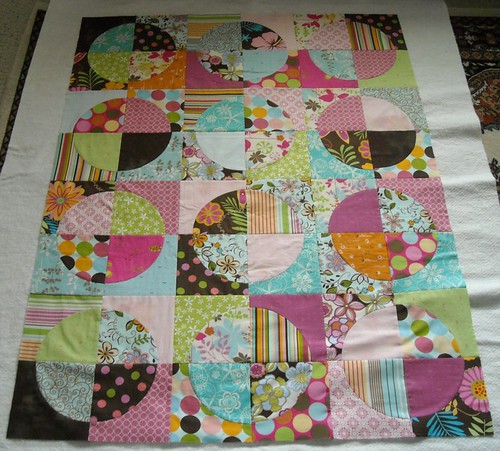
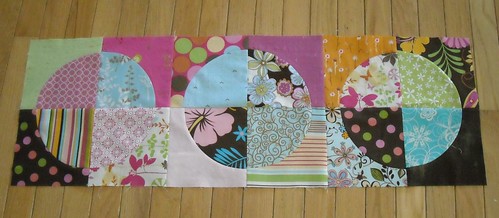
And, guess what? I got the circle quilt top finished today too!
I used this piece of batting as my portable design wall--I was able to keep all the pieces in order once their placement was decided, and I just rolled it up when I wasn't working on it. It did make the pieces get a bit more wrinkled than they would have otherwise, but it was really helpful for this particular project.

Now I need to decide if I should piece the back or not. The back will be made from (mostly?) the large floral on a brown background that's in the very bottom right corner. I could do a simple pieced strip across the back, but I don't know if this quilt needs it or not. Maybe I'll start something new while I think about it.

Saturday, June 12, 2010

9-patches week 3

Got them done. I need to go through and pick out fabrics for next week's blocks.

It has been a crazy day--3 inches of rain during the morning and early afternoon. I forced my poor children to help with some housecleaning. There was a lot of weeping and wailing but they made it through and I even gave them the Wii controller so they can watch Netflix later on. We had a neighborhood barbecue and my youngest didn't start her nap until about 4:45. And I still need to finish up the Cub Scout flag for camp, today! I just have 4 numbers left to sew on, and two surfboards on the back. I'll show a picture here after I finish it up.

Friday, June 11, 2010

doll quilt swap 9

I am excited to be participating in the 9th round of Doll Quilt Swap on flickr! If you don't already know about it, it is a huge swap that is a ton of fun. It's a secret swap in that nobody knows who is making the quilt for them. People post in-process and finished pictures of their quilts but don't reveal who the recipient will be. This swap has a couple hundred participants and there are several "swap parents" that each take care of a group of swappers to make sure things go smoothly.

Anyway, in the discussions on flickr, they have asked for people to update their profiles with some information about what they are interested in. This will help my swap mama pair me up with someone great! I decided it would be a good blog entry, too:


things I love in quilts--
*scrappy
*includes fabrics from more than one "line" (I will make the rare exception especially if it's basic grey but I think you generally get more depth and scrappy happiness if you use fabric from more than one designer)
*clear, bright, happy colors
*a little bit of crookedness here and there, sometimes
*white can help those clear colors stand out really well!
*the wonky shoo-fly block is sooo adorable
*little (or big) square in square blocks (really? I know you are shocked)

some quilt patterns I would love to make:
whirlygiggle
tumbler
finished hexagons (I have some started)
zigzag!
another churn dash (I made one and gave it away and didn't even properly blog about it.)

Dear Jane (hahahaha... someday.)

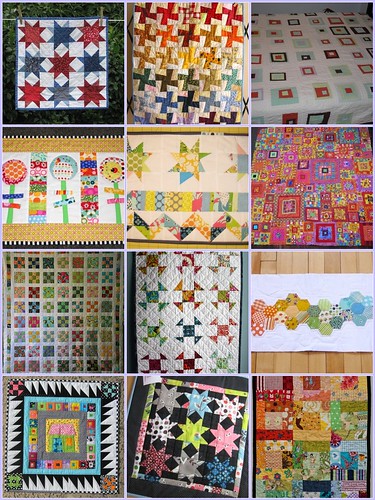
I also made a photo mosaic of some of my favorite quilts on flickr. Some of these are not mini-quilts but they are gorgeous and inspire me so I had to include them.
1. Doll Quilt Swap I:  for lej619, 2. Doll Quilt Swap I: received, 3. Square Quilt, 4. DQS7 my sent quilt..., 5. placemat received, 6. My lovely Kaffe Fassett quilt top, 7. scrap 9 patch, 8. Shoo Fly Quilt - DQS8, 9. hex front mini quilt dqs8, 10. dqs7, 11. DQS8 quilt received, 12. Doll Quilt Swap 8

I'm excited to be in this round of the swap, and can't wait to find out who my partner is so I can think up something really fun to create! I have loved making a few swap mini quilts over the last year and a half or so but miss them, too. So this time, I'm pretty sure I will be making a twin for my swap quilt that I will keep.

Thursday, June 10, 2010

lucky me

I've been wanting to write about the bag I won in the May giveaway for a while.
Isn't it pretty? I won it from Julie at www.kundhi.com. I've been taking it with me to the pool in the mornings (while the boys have swim lessons)--it's the perfect size for a couple spare diapers, a book, a snack for my youngest, and my tiny purse fits in there too.

And today, my prize from Blogger's Quilt Festival came. I won a cute pincushion from Cindy at sewing on the edge. I got to pick one from her shop and I decided on California Dreamin'.
The pincushion is filled with crushed walnut shells, and has a nice weight to it that my fiber-fill pincushions don't have. I love the piping around the edge. And yes, I'd love to go to California, but my sister and parents are making me jealous by telling me about their southern Utah adventures this week. It is killing me to hear about their hikes in Zion National Park--I wish I could go there soon!

Also, this afternoon I finished up my potholders for the swap at our quilt guild tonight.
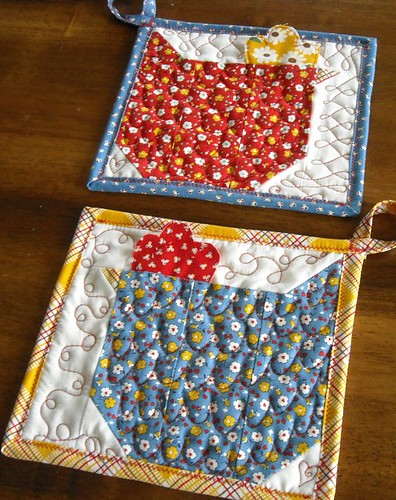
They are Happy Camper hens (made from Moda Happy Campers fabric). I hope whoever gets them doesn't mind the machine stitched binding! While I was making them I was thinking about all the different fabrics that would make good chickens. I might need to make some more modern ones.

Tuesday, June 08, 2010

summer's here

School has been out for just over 2 weeks now. Here's a list of some things that have been going on here:

*swimming lessons for my boys--they are taking 4 weeks of lessons this month. Today was rained out though.
*decluttering. I am off and on with this but doing pretty well. What is working right now is focusing on the number 50--put away or put in the donation bag or trash 50 items (total) from one room or area at a time.
*taking my toddler daughter to urgent care yesterday to get a bead out of her nose. Thrilling fun. The wait was about 4 1/2 hours and then it took about 10 seconds for the doctor to remove it. I'm so, so thankful to have had a friend offer to watch my boys so they didn't have to come, too.
*finding out today that apparently the computer we thought was broken for 2 months wasn't. Maybe I can post to the blog a little more often now.

*getting ready for Cub Scout day camp. I don't have a boy going this year and so I'm not going, but I'm a den leader and have been helping with the preparations for our little crew of crazy guys. Here's the flag I'm working on for them:
photo taken with my droid phone, color corrected (pretty close, not exactly right) in picnik
My den leader partner in crime, Megan, and I worked on this today. She provided the old jeans/fabric (originally her mom's). I'm working on adding the pack numbers at the bottom. I think it's going to look really cool once I wash it and the denim edges fray. 
*working on some swap potholders for this week's KC Modern Quilt Guild meeting. 
*working on a service project idea for the guild too
*listening to Cowboy Junkies--Pale Sun, Crescent Moon.

Saturday, June 05, 2010

Saturday Sewing

Here are this week's 9-patches. I think I have 45 done, now. The purple fabric in the top left is leftover from when I was a kid. I made a Barbie dress from it when I was 10 or 11. And the blue fabric on the top right is also from that same era. My cousins and at least one sister and I all had dresses made from this fabric for serving at our uncle and aunt's wedding reception. 

And here's what I've been working on today. The pillowcases are for a church service project. We had a goal of 150 pillowcases (part of the million pillowcase challenge) and we've already met that goal! I think we will have over 170 pillowcases when they are all turned in.

And I got some Batman pajama shorts cut out for my boys. The fabric is from a Savers bedsheet. I'm going to work on sewing them up this afternoon!

Hope you're having a good weekend!

Thursday, June 03, 2010

designing your own circle quilt--part 2--making your templates

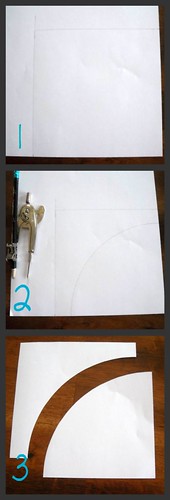
I have 7 out of 12 of the full circles in my circle quilt pieced together--it's coming along. Today I have a tutorial for making your own circle quilt block template. In part 1, I talked about determining the size of your quilt and from that, deciding on the size of your quilt blocks. My quilt blocks (one quarter circle and the square it fits into) are 6 inches square, finished. Here's how I made my template:


Image 1. I drew my 6" square on a piece of paper, using the corner of the paper for two of the sides of the square. Seam allowances will be added later--don't worry about them for now.

Image 2. Using a compass, draw the arc of the circle while holding the pointy part of the compass on the corner of the square. You might want to draw a few different blocks, making the quarter circle section different sizes, to see what you like. When I made the template for my quilt, I had my 10-year-old draw up a few different sample blocks and in the end decided on one where the quarter circle is kind of large in proportion to the square.

Image 3. Cut out both pieces.
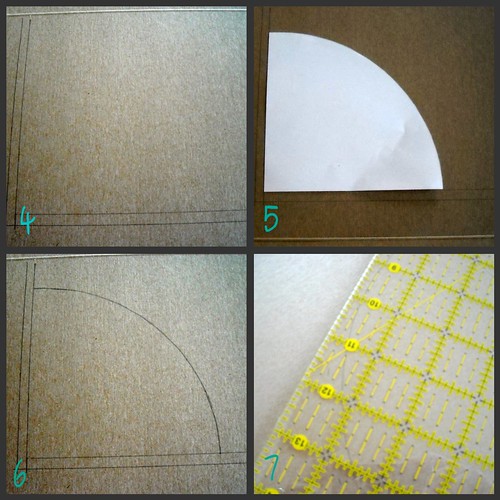
Image 4. Now we need to trace the templates onto cardboard. I used a cereal box. You can also get template plastic at quilt shops, if you want. Start out by tracing the straight lines of the quarter-circle shape using my quilting ruler. Add the seam allowance lines, again using the ruler. I had to place the ruler slightly less than 1/4" away from the first lines I drew, to allow for the thickness of my pencil lead. (A sharper pencil would have helped but I couldn't find a pencil sharpener.)

Images 5 and 6. Place the paper template on the cardboard next to the straight lines, and trace the curved edge. Or, you could use your compass, making sure it is adjusted to the same angle it was for the original  paper template.

Image 7. Add seam allowance to the curve. I use my ruler to make a series of small marks that are 1/4" from the original line, and then draw a line to connect them. Rotate the ruler as you go around the curve to make sure the marks, and the seam allowance you are adding, will be an even 1/4" from the original line. (I hope that makes sense. If you have another way to add even seam allowances to curves, please share!)
Image 8. The quarter circle unit with the seam allowance for the curve marked.

Image 9. The template for the square corner part of the block. I used a ruler to draw all the straight lines, and traced the paper template edge for the curve. Then added the curve seam allowance using the same method I used for the quarter circle template.

Image 10. Cut out your finished templates!

Please let me know if you have any questions or if this is confusing at all!
The next post in this series will address figuring out your fabric yardage requirements, and cutting out the blocks. I'd love to hear from you if you are working on a quilt (or thinking about it) using these ideas!

Tuesday, June 01, 2010

mini-quilt Monday! (on a Tuesday)

No--it is not Monday! But it feels like it!

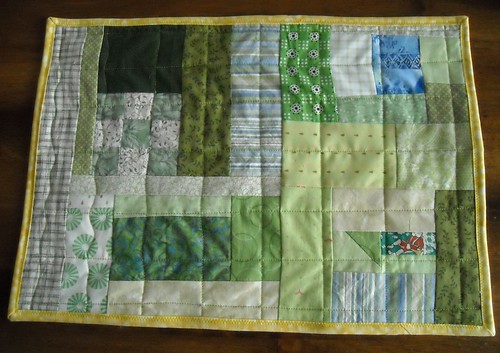
I finished up the green placemat-I love how there's a mix of some of my really old fabric in there, some from my nephew's baby quilt I made a couple years ago, and some newer stuff too.

I think that sewing the binding down by machine make the binding a bit ripply. I tried to steam out the wave, but it didn't really work. Turns out that my little girl is using these placemats to wrap her baby in; I need to make a bigger doll quilt for her.

This was my last finish for the Spring to Finish project--I got about 6 finishes done, not exactly the ones I had on my list, but I made good progress.
Here are last week's 9-patches. I'm really going to finish this one up, too! I have the first 3 for this week cut out and ready to go.

I got these fabrics last week for a super secret project. Well, the Blush is for a super secret project; the fat quarters are just for fun. My green selection was getting really sad. Natalia from Piece N Quilt had a great sale--thanks Natalia!

I've got a busy week ahead--my boys start their 4 weeks of swim lessons today and we're still easing into summer, working on routines and making sure they have enough jobs to do and not too much TV to watch. Also need to clean up from the long weekend!

Thursday, May 27, 2010

May Bee Blocks

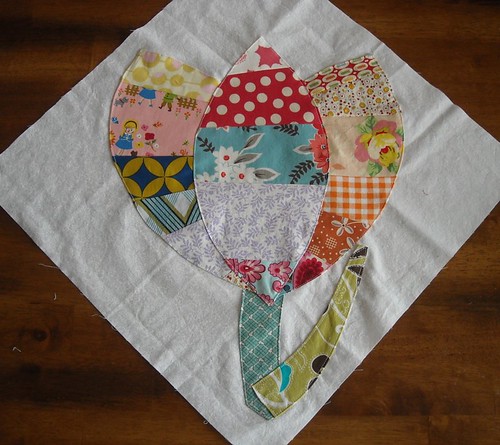
Finished up my blocks for May! This ginormous tulip block is for Penny. It is 18x18 inches, bigger than you might think from the photo. Someone commented on flickr that it looks like an elephant. Funny, huh? I had to do a substantial, tulippy leaf there.

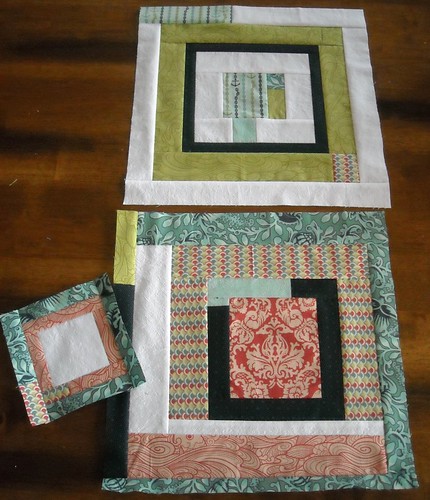
These two will go to Mary in the Block Swap 2 group. She said we could use decorative stitches on these if we want, and I love how it looks. Especially the one with darker thread. This could be fun on a mini-quilt... someday, maybe. I had to get a little creative for the block on the left, I was running out of larger pieces of fabric so I pieced a couple of the strips. These are foundation pieced on printed muslin fabric. I haven't done foundation piecing for a long time, it's different than using paper!

And, I decided to get on the ball with a couple more UFOs for the Spring to Finish challenge.
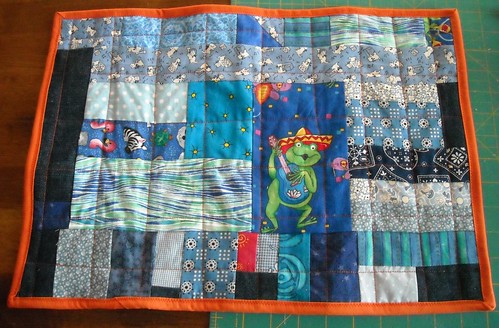
I collaborated on this placemat with my oldest son, who's 10 now (he was 9 when we started). It's been sitting, partially quilted, for a long time. I finished it up today, including machine-finished binding. I'm not sure if that's why it ended up so wavy around the edges. Maybe it will shrink up after being washed.

I also pulled out the pieces of the green placemat I had started for the 5-year-old. He helped sew one important seam in it tonight. The top needs one more strip added so it will be the same size as the blue one. I am thinking of binding it with yellow.

And, really, in the spirit of not letting projects drag on for ever and ever. I'm going to get on it and finish my 9-patch quilt.
Right now the plan is to make 7 of these each week. I'm hoping to get them cut out so I can use them as leaders and enders while I'm doing other projects. I had 31 finished before today, and pulled the fabrics out to make 11 new ones. I'm planning on making this quilt which calls for 70 nine-patch blocks... so a little more than 5 weeks. Unless I make them faster. I'm excited for when this quilt will be done--it's going to be so pretty.

Monday, May 24, 2010

circle quilt progress and designing your own circle quilt--part 1

Here is the 4th row of the circle quilt for my not-yet-born niece. It turns out that these blocks really needed to be squared up, I assume because the process of sewing the two curved pieces together stretches the fabric. I started sewing the first complete circle without squaring or trimming the subunits but decided I needed to undo it and get the subunits down to their correct size first. It takes some time to trim them down so I decided to do 3 complete circles today and I plan on trying to get 3 done each day for the next few days, too. We'll see how that goes. I'm calling it the 4th row because it's the bottom of the quilt. But it's the first one I've actually sewn.

This quilt is inspired by the roundabout quilt-along by Amy over at A Commonplace Life. I love the first quilt she made and have wanted to make a similar circle quilt ever since I first saw the one she made. When I found out my sister-in-law was having another baby I eventually decided I would like to make her a circle quilt, and I was excited when we talked about it and she said she liked the roundabout quilt too. But when I went back to the tutorial I found that the blocks--the quarter-circle blocks--finished up at about 11 inches. I like to make baby quilts somewhere around 36x42 inches, and an 11-inch quarter circle block seemed way too big for the quilt I wanted to make. This time at least.

So I did some drawing and figuring, and decided I would go with 6-inch finished quarter circle blocks, 48 of them, for a baby-sized quilt that will end up about 36x48 inches.

So here's part one of designing your own circle quilt--first you need to decide the size of quilt you want. If you want to make a standard bed sized quilt, go ahead and do a google search of quilt sizes. Most of the quilts I make are baby quilt size (around 36x42" or slightly bigger) or throw size (I like to go with 50x70"). From there, think about what size of quilt blocks will fit within those finished quilt dimensions. If you want to have all the blocks made into groups of four that look like circles, you'll need to keep that in mind. There are other layouts you can use though--you can check out the roundabout quilt pattern flickr group for some ideas.

It might help to draw out your quilt to get a rough idea of how it could look. Don't worry about having perfect drawing skills, just get your idea down on paper. If I can find the original little sketch I made for this quilt, I'll take a picture of it to show you.

In the next few posts I'll write about calculating the fabric yardage you need, drawing and making your template, cutting your fabric, and piecing the quarter-circle units. I'd love to hear from you if you think you'll make one of these quilts--what size of circle quilt are you thinking of making?

Friday, May 21, 2010

Y2K10... aka my Watercolor Quilt... aka my Insane Quilt Project


Thanks so much to Amy for hosting the Blogger's Quilt Festival!

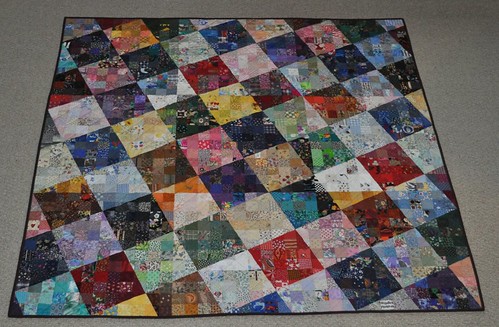
Finally, I finished my Insane Quilt Project! Its official name is Y2K10. It is about 62" square.


I started this quilt in early 2002, late to the Y2K charm square swapping party. Back then, there weren't really any quilt blogs but quilters were hanging out on quilt message boards on sites like quilting.about.com. Lots of quilters were swapping 2 1/2" or 3" charm squares in order to make a Y2K quilt with 2000 different charms. There were even magazine articles about how to join these swaps. Mostly people would send out sets of 25 different fabrics, plus a signature square. It was a fun, and really inexpensive way to get a hold of a large variety of fabrics (this was important because we had a tight budget during those grad school years). Each swap was set up individually via email (there would be lists of people willing to swap on various websites), and a lot of people sent a little typed up biography of themselves with their squares.

I found the pattern in the May 1999 issue of Quilter's Newsletter Magazine--it is called Colourwash Checkerboard and was designed by Deirdre Amsden. (I modified the pattern slightly for my quilt.) This back issue is no longer available on the QNM website, but you might be able to find it elsewhere. The designer wrote a book titled Colourwash Quilts: A Personal Approach to Design & Technique which is available used on Amazon, if you're interested.

It was a really time consuming quilt to make--I cut every single piece individually--the triangles and the square-minus-triangle-chunk shape were each cut with templates, and the squares were 2 1/4" before sewing, so I had to cut each square piece down to size too. If you look closely you'll see the quilt is made of 9 sub-units, and each one is made of several different blocks of colors. I pieced each color block together first, then made the large sub-units, then pieced the whole thing together.
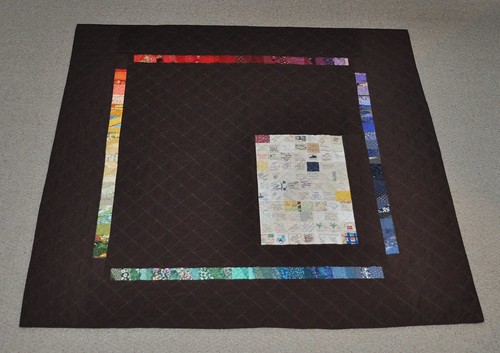
Here's the back. I just made the back a couple months ago. I used leftovers and scraps to make the rainbow strips. This photo shows the quilting better than the front, too. I didn't want the quilting to take away from the fabric and color so I chose to do a simple grid design. I quilted it with tan/blue/brown variegated King Tut thread that was recommended by Debbie at my local quilt shop. I had thought I would use a gray, or a gray variegated thread, but I'm glad I went with this one.

I quilted it with my old Viking 100 machine, using the walking foot with the presser foot pressure slightly loosened (having it slightly loosened made a big difference and I didn't have any problems with the layers shifting as I quilted). I used painters' tape to mark my lines, and quilted diagonally through the squares on the front of the quilt (every other diagonal row). This didn't necessarily translate to perfectly straight lines, but you can't tell that from the front.

The main backing fabric is a brown quilter's only solid from JoAnn. I used this same brown on my figgy pudding Christmas quilt that was finished at the end of 2009.

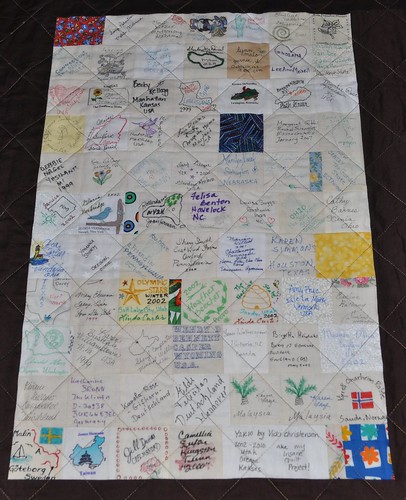
Here's the signature block. I received a total of 71 signatures from 37 US states and 7 other countries.

Aren't they great? I love the variety--handwriting, transfer/printing, stamps, embroidery, fabric paint.

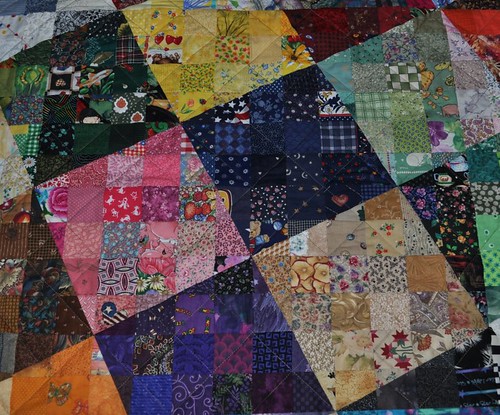
This is the center section of the quilt, it's the first section I made. I made the navy blue color block in the middle first. You can see the small template shapes a bit better in this photo. If you're interested in getting a closer look at the whole quilt, I've posted photos like this of the 9 quilt sections on my flickr account.

The process of making this quilt was a real education in color and value. I first sorted my fabrics by color, and then value (lightness to darkness of the color). The fabrics in this quilt were divided by their value into lights, medium-lights, medium-darks, and darks. I kept the sorted fabrics on quarter sheets of posterboard that were stacked on top of each other and stored in a cardboard box that fit the posterboard just right. This was really helpful for keeping the project all together and made it easy to take it with me too. I started the project in Utah, took it with me when we went to Oregon in the summer of 2003 for my husband's graduate school internship, continued in Utah for another year, and then brought it out here to Kansas.

Sometimes I wonder what it would look like if I hadn't sorted by color, and just done it by value. I think that if the fabrics hadn't been sorted by color first, some of the fabrics would have ended up in different value categories--I'm thinking about the yellows here. I do love how it ended up of course, but I think it would be interesting, someday, to make a "values" quilt where the values were focused on more than the colors.

Now that I'm done... for a long time I've said I would start a Dear Jane quilt as soon as I finished this one. I don't think I'm ready for that yet--maybe after I finish a few more projects!

Just in case you want to read even more about this, here are my previous blog posts about this project:
8 out of 9

and we're back
rainbow
watercolor quilt back

If you have any questions about this project I'll answer in the comments! Thanks so much for stopping by my blog today, and enjoy looking at all the Quilt Festival quilts!

Thursday, May 20, 2010

Giveaway Winner and UFO #4!

It's #241. (I still don't know how to take a screenshot, sorry.)

I'll be back after I've triple checked the results.

Robyn! I'll email you just as soon as I get this posted.
Thanks so much to everyone for all the comments! Lots of people are very nostalgic for Rainbow Brite! And thanks to everyone who said nice things about my quilt top, too.
I also wanted to share finished project #4. Sadly this sat for a week with about 7 inches of binding left to do. I finished it up this afternoon and washed and dried it.

This is my Quilts For Kids quilt, finally finished and ready to go. If you don't already know about this, you can go to quiltsforkids.org, sign up, and they will send you a free kit to make a quilt. You have to provide your own batting and binding, then wash and dry the quilt after it's done and send it back. The quilts are given to children who have life threatening illnesses or are victims of abuse.

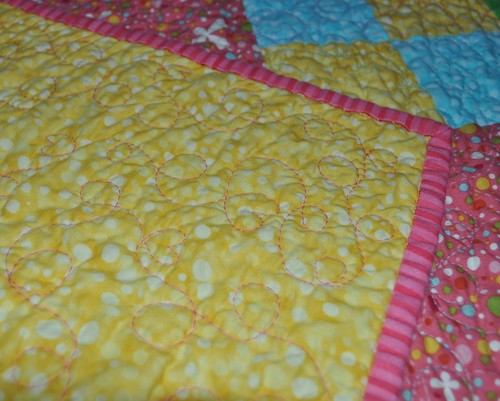
I'm pretty sure this is my first ever quilt made from non-prewashed fabrics, and it seemed to crinkle up a lot more than quilts made from prewashed fabric. I love how it turned out. I'm working on a second non-prewashed quilt now, can't wait to see how it looks all quilted and washed up. Here's a picture of the back, you can see the texture of the quilting a bit better here:

If you look close you can see a couple of the hearts in the quilting stitches. I stitched a heart after about every 4th-5th loop that I quilted.

This was fun and pretty easy to make, but even so it still took me a long time to finish. I'd like to make another one, but I have so many other projects going on that I'd like to finish up first. I will definitely commit to making one next year, if I don't get to it sooner.

Tomorrow's the Blogger's Quilt Festival! Are you participating? I'm excited to see all the quilts. I think this time I might ration my quilt viewing time and look at some quilts every day for a couple of weeks. Hmm....

Monday, May 17, 2010

It's May Giveaway Day!

Happy Giveaway Day!

Thanks so much for visiting my blog! I have a few vintage sheet goodies that I hope one lucky winner will really enjoy!
My giveaway includes the following:
*one half of a fitted Rainbow Brite sheet (I couldn't bear to give the whole thing away, really I still might use it someday, right?)
*two vintage sheet fat quarters
*one charm pack of 40, 5-inch vintage sheet squares

Here's another photo of the sheet:
I tucked under the edges in this photo to make it look a little more neat--so you'll be getting a bit more than what you see here.
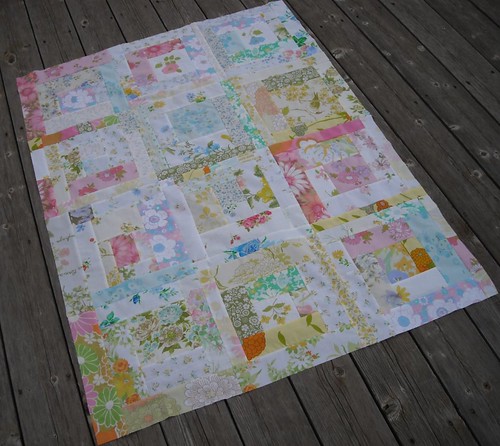
The charm pack includes almost all of the fabrics I used in this quilt top (plus a few that weren't):
There are about 5 duplicate prints in the charm pack.

I am willing to ship internationally, and you can enter until May 20. If you'd like to enter, please just leave a comment below! Please make sure your email address is available in your blogger profile or include it in your comment, please.

Sunday, May 16, 2010

toddler peasant top

Sorry I haven't posted for a while! I wanted to post this a few days ago but I haven't been feeling the greatest. I'm glad to be feeling mostly better now though.

This is one of my finished projects I didn't get around to showing yet.
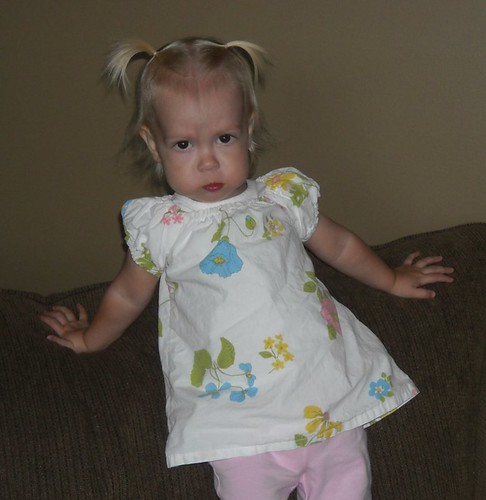
She cracks me up. The shirt is the project, by the way--it's modified from Simplicity 5695. I made another one of these for a friend and am going to make one more for another friend and swap for some hairbows.

Check back tomorrow morning for my giveaway post! And don't forget to visit sewmamasew.com for links to lots of giveaways starting tomorrow! 

Thursday, May 13, 2010

Left Handed Rotary Cutting Tutorial

I decided to make a tutorial for rotary cutting for left-handers--hope this helps some of you out. If anyone has any questions or needs more help on this, please let me know--I'm glad to help!

Some safety tips first:
When rotary cutting, always cut away from your body.
Close the protective cover on the rotary cutter every time you put it down. Every. Time. Thank you.
If you have kids in your house, put the rotary cutter up high when you are stopping working with it, even for a short time.

I started out with a fairly long piece of fabric that was also the complete original width. I needed to straighten my edge so I could get straight strips that went across the whole width of the fabric. First I held up the fabric, with selvedge edges together, and adjusted the two top corners until the selvedges were parallel and there were no ripples in the fabric. Amy has a tutorial just for squaring up fabric here, if you want to read more about it.

The photo above shows how to line up the ruler along the fold of the fabric, making sure that the cut edge will be a 90 degree angle to the fold. (The fold is lined up with the 1/2" marks near the bottom of the ruler.)

For left-handed rotary cutting, you will always cut on the left side of the ruler, while holding the ruler firmly in place with your right hand. (This action shot courtesy of my 5-year-old.) For long cuts, after you have cut up to where your fingertips are on the ruler, pause for a second and carefully (don't move the ruler!) move your hand higher up on the ruler.
After I make the straightening cut, I like to unfold my fabric and lay the ruler along the center of the fabric to make sure it is straight. If it's not, sometimes I will try the folded technique again, or sometimes I will cut the edge straight while the fabric is unfolded. This requires carefully shifting the fabric as the whole width of it doesn't fit on my cutting mat.

Now I am ready to cut strips. I move the bulk of the fabric over to the left of the ruler, so I can use the ruler to measure the width of the strip I am cutting (2 1/4 inches, here). It doesn't have to be perfectly lined up with the lines on the mat for this. If you are going to be cutting several strips, it might be a good idea to unfold your fabric and check that it is still straight after 4 or 5 cuts.
If I need to cut a strip that is wider than my ruler, then I use my mat to help measure. I make sure the edge of the fabric is lined up with a line on the mat, and then line up my ruler using the measurements on the edges of the mat. The above photo shows the set up to cut a 6 1/2" strip. The left edges of the ruler are lined up with the 11 1/2" mark on both the top and bottom mat edges (see photo below). 


I also wanted to show how to use the 45 degree line on the ruler to cut the edges for binding strips. Line up several layers of fabric on top of each other.
Place the 45 degree line along the long side of the strip, and cut.
For the other end of my binding strips, I place the 45 degree line along the long edge of the strip, but in the portion that will be cut off. This is so the strips will sew together correctly into one long binding strip. (More about quilt binding here, if you're interested. )

I hope this is helpful! I'd love it if anyone has feedback about this. Does everything make sense? Have I left anything out? Please let me know in the comments.