Saturday, January 30, 2010

pink

Today I sorted my quilt fabric scraps. And I made this:

Here's the chunk I had left over, and the much smaller pink scrap pile:
 
And yes, I'm kind of copying Amanda Jean.
What should I do with the leftover rectangle?

Friday, January 29, 2010

Guest Blogger: Natalia from Piece N Quilt

Hello, I am Natalia from Piece N Quilt. I am so honored that Vicki asked me to be a guest blogger here on her blog today! I am really inspired by Vicki's work, I really love her Figgy Pudding quilt and someday I'm going to make one for myself!

A little about me, I was born and raised in Heber, UT, a small town in the Utah mountains. I was born on my Great Grandmother's birthday who was a very avid quilter and won many awards for her quilts. I claim that's where my love for quilting came from. My mom is very talented with fabric, decorating and designing so I have, and still do lean to her for a lot of advice and support.

Three years ago, while pregnant with my daughter I got this crazy idea, a pregnant mind, and made an impulse purchase and bought a Gammill long arm quilting machine. I initially bought it with the intent that I would have something to do while being a stay at home mom. I didn't realize that I had a drive to do more and more. Just quilting for fun wasn't enough. Within a year of purchasing my machine I had won two different awards for my quilt "Daisies and Lattice". My mom designed this quilt and I pieced and quilted it. It did go on and win a few other awards as well.


Last year something crazy hit me and I became OBSESSED with pre-cut fabrics. I traveled around Utah teaching at quilt guilds, retreats and presenting trunk shows about pre-cut fabrics. My mom and I again made this "Strut Your Stuff" quilt entirely from Jelly Rolls and won Judges' Choice at one show and Best of Show at another quilt show.


(I intentionally used pictures with my daughter so you can see how most of my time is spent.)
This past December I was honored when I was contacted by Moda Bake Shop and asked to design quilts for them from pre-cut fabrics. I have designed two quilts so far and have two more in the works.


I work full time from home with my online quilt shop Piece N Quilt or my blog. You can come over there and check out what I'm up to each day!
I'm also offering a 15% discount off your total purchase today only when you use discount code "Vickiblog".

Thanks again Vicki! Thanks for inspiring me each day!
~Natalia

Thursday, January 28, 2010

Book Review: Tranquilista by Kimberly Wilson

I recently received a review copy of Tranquilista: Mastering the Art of Enlightened Work and Mindful Play by Kimberly Wilson. There is a lot of great stuff packed into this book! The book is comprised of 8 chapters about topics including spirituality, style, creativity, and becoming and growing as an entrepreneur.

There were several parts of the book that I really enjoyed; first is the section about the tenets of yoga in chapter 1. There's more to yoga than just the poses, and the author talks about how the way we treat others and ourselves, doing yoga poses and breathing, and meditating are all essential parts of living a mindful life.

Chapter 2 is a guide to taking stock of our lives and setting goals, both long term and short term. Wilson recommends evaluating your goals and your life at several different times throughout the year and explains how to break goals down into doable action steps. I am planning to use some of the goal and action steps techniques outlined in this book as I continue working on my creative and personal goals this year.

Chapter 4 is another one I really enjoyed; it's the creativity chapter. This chapter encourages you to try out different creative disciplines, along with treating yourself to weekly artist dates, as originally outlined in The Artist's Way by Julia Cameron. This chapter is a good reminder that things like cooking, gardening, and fashion can all be great ways to express your creativity.

The last three chapters of the book are a guide to starting your own business and expanding it over time. Lots of great information that could be useful to people starting similar ventures as Kimberly's (yoga studio, clothing line, nonprofit, and more) and also to those interested in starting or growing an online business as well.

Overall, Tranquilista: Mastering the Art of Enlightened Work and Mindful Play is easy to read and is jam packed with great ideas for transforming your life and realistically accomplishing your goals. Kimberly Wilson draws from her experience of being an entrepreneur for over 10 years and thoroughly explains the consistent work and planning it takes to achieve your dreams, while also reminding you to take care of yourself along the way. I really liked this quote from the afterword: "Take the ideas that most resonate with you, try a few that don't, and do all you can to live your life in a way that shines."

Wednesday, January 27, 2010

Simple Squares Sashing + Cornerstone Instructions, baby quilt size

Here is the sashing + cornerstones tutorial for my Simple Squares Quiltalong. You can find all the other links (fabric requirements for 2 sizes and both block tutorials) here. Feel free to join in at any time; there's no set time frame for this project. If you want to see other variations of this quilt, take a look at our flickr group. Also, please let me know if you have any questions!

Step 1: Lay out your blocks


Step 2: Cut your sashing/border:
Cut 17, 10 1/2" x 2 1/2" strips
Cut 5 strips 2 1/2" x width of fabric
Cut 6 cornerstones, 2 1/2" squares

Step 3: Sew 10 1/2" x  2 1/2" strips to the right side of 8 of the blocks as shown below (press all seams as you go):


Step 4: Sew cornerstones to 6 of the 10 1/2" x 2 1/2" strips; these will be sewn to the bottom of 6 of the blocks as shown below. 10 1/2" x 2 1/2" strips will be sewn to the bottom of the blocks in the right hand column as well, except for the bottom right block.


The following photo shows the strips that are arranged in the above photo, all sewn on.

Step 5: Sew your rows together. Some of my blocks were a little uneven on the left edge:

So I straightened them up with my rotary cutter before assembling my rows:


Here are the rows all sewn together:

Step 6: Sew the rows together.
 
Step 7:  Borders. You will use your width-of-fabric strips for the borders. Cut off the selvedges from two of the strips and piece them together. Then press that seam and sew the border to one of your long sides. Cut off the excess--I cut about 1/2" beyond the quilt top edge with my scissors and then go back and trim with the rotary cutter after pressing the border piece.

Then make sure you have a straight edge on your short piece and repeat for the other long side. Press and trim the border pieces on the long sides.

Sew the remaining border pieces to the short sides of your quilt, trim the edges and you're done with the quilt top!


Tuesday, January 26, 2010

my next project

Well, one of them.

The fabric on the left will be the dress, the one on the right--bloomers.

Saturday, January 23, 2010

KC Modern Quilt Guild

This morning I got to go to the first meeting of the Kansas City Modern Quilt Guild. And I forgot my camera! Someone else will post photos soon, I'm sure, and I will link up to them so you can see pictures of our good times. I was a little late, and there were over 30 people there! It was bigger than I thought it would be. Everyone introduced themselves, and we talked about some of the things we hope to accomplish in the group, and we had a fun show and tell. I enjoyed meeting people, and I want to go back to the blog list and see if I can match up the real people I saw with their blogs. (I was going to look at all the blogs beforehand, but I ran out of steam and only looked at Laura's blog.) I'm excited for future meetings and sewing time with new friends!

I've been working on decluttering my bedroom this afternoon... I still have a long way to go but I've got a good start. I never know if I should do it flylady style and stop after 15 minutes or just burn through and do as much as I can....

Friday, January 22, 2010

charity sewing


A woman from my church is heading up a big project, getting lots and lots of these medical procedure dolls sewn up. (I believe they will be used to explain to hospitalized children the medical procedures they need to have done.) She asked for help sewing them and clipping the seams, and I've got my stack done--21 of them. I've had them for a long time and it's good to get them done!

This isn't a super exciting project, but I'm going to go ahead and link up to Sew and Tell Friday over at Amy's blog. Go see what people made this week!

Thursday, January 21, 2010

9 blocks done, 3 to go


I made a couple of these the other night and some today. I am not loving the blocks with the white-background outer fabrics, but keep reminding myself that it will look different when I get it put together with the sashing. I had these on the floor for a while during naptime, and then after Sissy woke up I had to figure out a layout for my photo and pick them up, otherwise she would be dragging the quilt blocks all over the house.

I didn't exactly follow my cutting/sewing plan with the blue silhouette fabric so there will not be two blocks with that fabric in the outer position. Oh well, it will be ok and I'm sure I have enough of the other fabrics to make all the blocks I need.

Tuesday, January 19, 2010

Sewing and Quilting Bloggers to Watch--part 2

Here's my second installation of quilting and sewing bloggers to watch in 2010! You can see part 1 here.

House of Krom
Sarah makes wonderful bright quilts with lots of free piecing. I love her wonky quilt houses.

Craftypod
Sister Diane of Craftypod has a great podcast and has published several craft and craft blogging ebooks recently.

Freda's Hive
Nanette and her daughters post about great quilt projects and beautiful fabric.

Craft
Craftzine is updated several times a day with the latest ideas and projects from the craft blogosphere.

Dutch Blue
I love all the bright red, white, and blues in the crafts that Corry shares on her blog.

Craft Leftovers
Kristin makes a cool zine and also blogs about all things related to living a craft-filled life.She writes patterns (knitting, sewing, weaving, and more) for her zine and gives some of them away for free, too.

Blue is Bleu
Audrie has been quilting for less than a year and she makes lots of sweet quilts. She's funny, too!

Spirit Cloth
Now here is a different perspective from a lot of the quilting blogs out there... I appreciate Jude's "slow cloth" approach and the food for thought her writing and photography provides.

Oh Fransson
This is a beautiful blog; Elizabeth has done several gorgeous quilt tutorials and sells some of her patterns too.

True Up
All fabric news, all the time! I love this site!

Mr. Monkeysuit
Lots of inspiring projects, fun things to do with kids.

Ikat Bag
This blog has great, classic sewing and pattern drafting instruction; the author, LiEr, did a series on girls' skirts last summer and is finishing up a series of how to draft jumper style dresses for girls right now.

I'd love to hear about your favorite sewing or quilting bloggers--share them in the comments or post about them on your own blog!

Saturday, January 16, 2010

sew and tell Saturday: hoodie dresses, a couple of quilt blocks


I made a couple of dresses for my girl this past week. The toile print one, above, was my rough draft. The pattern I wanted to use doesn't go as small as I needed, so I cobbled a pattern together using 3 patterns (and one existing hoodie shirt) that were her size. I made up this quick version just to check fit and make sure the hood fit on her head right. I ended up taking in the sleeve and side seams enough that I might be able to use this pattern again next year; we'll see how big she is then.

Here's the fancier version:

I lined the hood, added a kangaroo pocket, and topstitched the sleeves and neckline for this one. I like it! I think they both would look cute with leggings; maybe I'll work on that next week.

I also got my first two blocks done for the quiltalong:


I think I'll make a couple more tonight!
I'm linking this (late) over at Sew and Tell; go check out what everyone shared!

Friday, January 15, 2010

Cutting Diagram for Simple Squares Quilt

block A instructions

Yesterday afternoon I was thinking about the quiltalong and decided I should share the cutting diagram I made when I was figuring out yardage requirements for this quilt. There might be another way to do it that will work, but this cutting laying is how I figured out that you can make the larger quilt with 12 fat quarters. Let's see if I can figure out how to explain this...

If you think about the blocks, there are 2 fabrics in block A (the large square and the outer square) and 3 fabrics in block B (the innermost small square, the outer square, and the square in the middle).

With the cutting diagram above, you will be able to use each fabric one time for each of these 5 different fabric placements. Does that make sense? I don't know if it will work though if you try to use one fabric for two of the large block A squares, or, say three of larger outer squares. One way you can get around this is to use more fabric than I suggested--I counted and I actually used 17 fat quarters for my Figgy Pudding quilt. Part of the reason I needed more fabric for that quilt was that I used directional prints and needed to cut strips for my blocks in different directions. So if you are using a directional print, keep in mind that you will need extra yardage.

There have been a couple questions about the timeline here... go right ahead and start making your blocks. I will make a blog post explaining the sashing in a week or so when I get to that point in my quilt. I have seen other quiltalongs where the directions for different blocks are posted once a week or a few days apart, but I have started and then procrastinated this quiltalong enough times that the block instructions are all ready for you to get started. So, go ahead and start making your quilt blocks when you're ready!

Here are the other links for the quiltalong, just in case you need them:

Thanks for joining in!

Thursday, January 14, 2010

Quilt Along--fabric requirements for larger quilt

All right, are you ready for the Simple Squares quiltalong? Here are the fabric requirements for the larger quilt, which has 24 blocks and finishes up at 50x74 inches:

12 fat quarters for the square blocks (updating to suggest 14 fat quarters to give yourself a little wiggle room)
1 3/4 yard fabric for sashing (strips in between blocks) and border
1/2 yard for binding
3 1/2 yards for backing

The fabric requirements for a baby quilt, 38x50 inches, made with 12 blocks, are here.


Here are the fabrics I'm going to use, this will be a baby quilt for my nephew Landon who's almost 7 months old!

I was going to go to the quilt shop to look for coordinates for these Oh, Boy fabrics but there is a budget crunch at my house this month. I looked in my stash this morning and found the blue check and the HR dots (I picked out the yellow solid a while ago... it's part a thrift store sheet, leftover from my cape project) . The dots match perfectly, the blue check I'm still not completely sure about using. I don't have my sashing fabric yet but I'm going to start my quilt blocks anyway.

I already have the block instructions posted: block Ablock B. Here is the link for the sashing/cornerstone instructions for the baby quilt.

I'd love to know if you're planning to join in. I've started a flickr group for this quiltalong, please share your fabric and sewing progress photos there!

Tuesday, January 12, 2010

prize goodies, and PR's top 10 patterns of 2009


Here's what I made to send in the friendship bag I made for a prize for Jacquie's Joy in the New Year challenge. I also stuck a charm pack in there for the winner. The small patchwork piece is glued onto a magnet.

I also wanted to give a heads up about Pattern Review's Best Patterns of 2009 article that just came out. It looks like a great bunch. I'm hoping to sew a few clothing items for myself this year; and one of my favorites from this article is the knit top and cardi-wrap, Simplicity 2603. I'm going to go read some of the reviews now!

Monday, January 11, 2010

Sewing and Quilting Bloggers to Watch--part 1

Here's part 1 of my list of Sewing and Quilting Bloggers (in no particular order) to watch this year!


Obsessively Stitching
Care loves sewing and posts LOTS of cute, fun, amazing tutorials. Watch for her dollar store crafts!


Park City Girl
Amy really made a name for herself last year with the spring and fall bloggers' quilt festivals. Quiltmakers signed up by the hundreds to show off their quilts. This year, she's promised more quilt festivals, and she's working on a book!

Tallgrass Prairie Studio
Jacquie was the mastermind behind Project Improv in 2009 and is always giving more to her readers. She offers many free tutorials and hosts events and contests to encourage quilters to try new things and finish old projects!


Candied Fabrics
Candy makes beautiful art quilts using her hand-dyed fabrics. I've really enjoyed watching her free motion quilting/sketching video tutorials. 


CraftSanity
Jennifer's podcast provides awesome interviews with amazing crafters and craft authors. She writes a blog, and does TV segments and youtube instructional videos too!

Geta's Quilting Studio
Geta is the only Romanian quilt blogger I know of. She has regular giveaways and sells patterns for her amazing shadow trapunto quilts.


Piece N Quilt
Natalia shows off her amazing longarm quilting skills and shares one tutorial after another for cute quilts and more. She also owns an online fabric shop that has fabulous sales!

Moda Bake Shop provides lots of inspiring patterns for sewing with Moda precut fabrics. Bloggers everywhere are wondering how they can submit their projects to be shown on modabakeshop.com.

Amy Lou Who
I love Amy's Sew & Tell Friday feature, where she encourages craft bloggers to link up to their finished projects. Amy shows off a variety of fun projects and shares tutorials on her blog as well.

My Itty Bitty Quilts
Kelli makes cute quilts and great tutorials. I was the lucky recipient of one of Kelli's doll swap quilts in 2009.


Mochi Studios
Rita makes the cutest Ninja beans and other softie creations and shares her indie craft fair adventures.


Here's part 2! Which blogs are your must-reads?

Sunday, January 10, 2010

yay!

Fruitcake. 2010 Christmas fabric by BasicGrey for Moda.
Ornaments, holly prints, snowmen, diagonal stripes. Cute!

Friday, January 08, 2010

inspiration

So how's the new year treating you? It is freezing, stinky butt cold here. Sorry about my language. School was supposed to start yesterday and they canceled it because of snow and the exceedingly low temperatures. Oh yeah, they canceled it today too, it's still cold.

Anyway, I have already not been doing as well as I'd hoped on my new year's goals but I'm going easy on myself. I've had a bit of a cold and it's been like 6 degrees outside and I can start over new whenever I want to, right?

I wanted to share some cool things with you though, things that I am liking right now.

Tranquility du Jour  is a really great blog, and it's also a podcast. Kimberly Wilson, the woman behind this site and podcast and a whole bunch of other amazing projects is so inspiring. She is involved in many different do-gooding endeavors, and she often interviews cool and inspirational people as part of her podcast.

One of her podcasts was a short video about decorating her new planner pad for 2010. I went to the planner pads website and it looks like an amazing planner! I am trying not to overwhelm myself with goals and planning stuff right now, but I am thinking about getting one later on. They are published with quarterly start dates so I could buy one say in April if I think I'm ready to try one by then.

Goddess Guidebook is another wonderful site with lots of ideas about having a positive attitude and achieving your goals. I actually first heard about the woman behind this site, Goddess Leonie, when she was interviewed on the Tranquility du Jour podcast. Right before the new year, I bought my own downloadable copy of Leonie's Creating Your Goddess Year Workbook and Planner for 2010. I have been enjoying filling out the workbook, planning out my goals, and starting to work with some of Leonie's wonderful suggestions for achieving your big dreams.

Here's a simple, and free one: Lara, who blogs at Overstuffed, linked to My Simpler Life, which has a free decluttering calender available. The calendar just gives you one decluttering task per day. I printed mine out and have done, well, just one of the days so far. But that is better than none, right?

Finally, Candy from Candied Fabrics, recently posted about the 52 Weeks of Blogging Your Passion workbook. Another really great resource that I don't think I can tackle right now, but I'm going to think about it again in a few months.

So... I hope you're still having a good new year. What is inspiring you these days?

p.s. I am a guest blogger over at Piece N Quilt today! Thanks so much to Natalia for asking me to post on her blog.

Audrie's Scrappy Patchwork Sewing Machine Cover Tutorial

Hi, it's Vicki--I'm excited to have Audrie from Blue is Bleu as a guest blogger here today! Here's a super cute sewing machine cover tutorial that she put together:

My sewing machine has been in dire need of a cover, and since I had so many scraps from quilting projects, I thought what better way to use them than make a scrappy patchwork cover!

What you'll need:
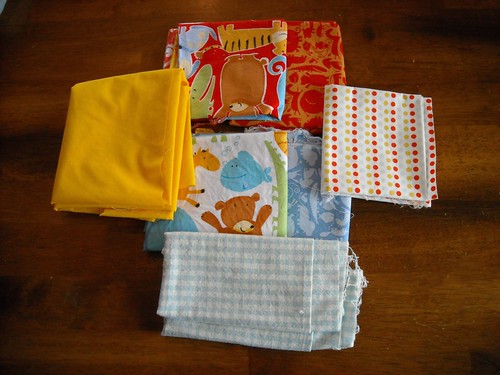
  • Approx. 1/2 to 3/4 yard each of fabric for quilt top and back (this depends on the measurements of your sewing machine so adjust accordingly)
  • Batting
  • Fabric for binding
  • Scraps of fabric
  • Thread for sewing and quilting
  • Ribbon (approx. 1.5 yards or less)
  • Pins
  • Scissors
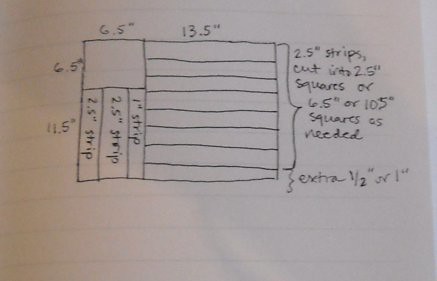
Before you begin, you'll need to measure your sewing machine. Mine was 27" from the bottom of the front over to the bottom of the back, and 16.5" across.


Cut your quilt top about 1" or so larger than the measurements. Cut your batting and backing fabric slightly larger than the quilt top.

Note: You can sew the scraps on the quilt top without the backing (just the top and batting), only adding it after all the scraps are sewn. This allows all the stitches to be hidden on the back. I personally like the stitching showing so I chose to work with the backing fabric.


Pin all three layers together.

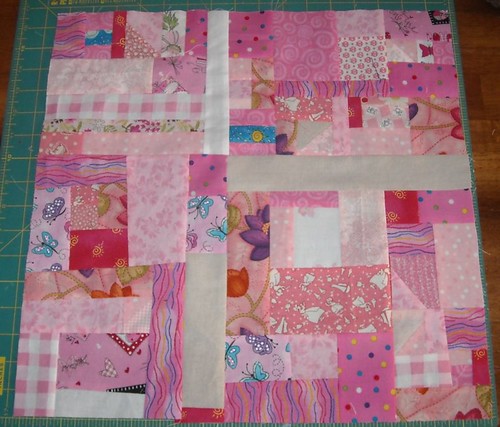
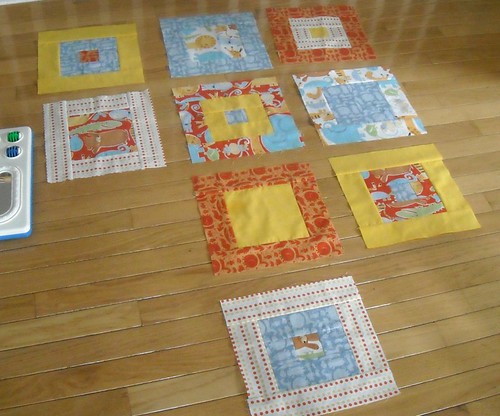
Gather your scraps of fabric. Cut them into different shapes and sizes.

Pin your first scrap on the quilt top and sew approximately 1/8" from the edge. I used my walking foot for this since there's three layers and I didn't want them to shift around.

And there you'll have your first finished scrap!


Don't worry about making a little pucker on the edge. My first scrap always seems to turn out like this, just like the first pancake.

Sew another scrap to cover the pucker... and it's all fixed!

Continue layering and sewing on your scraps...

And you'll end up with something like this.

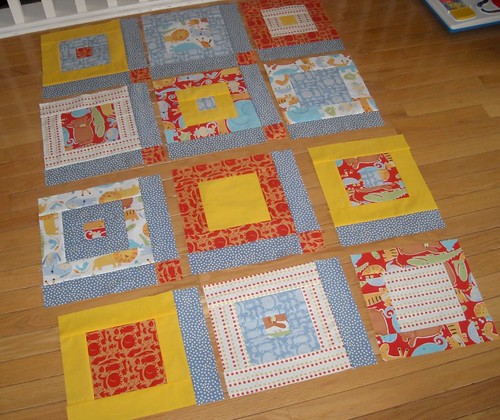
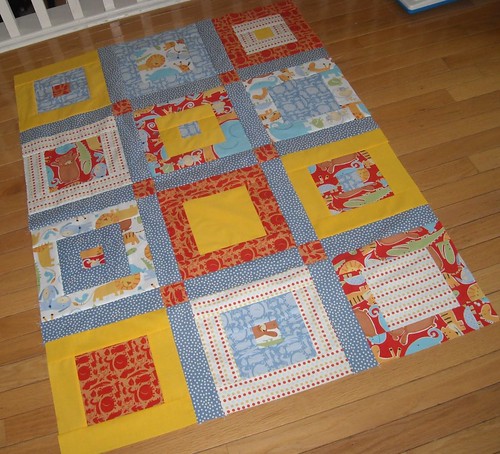
I decided to divide the cover into two halves -- one side made with girl quilt scraps, and the other with boy quilt scraps.


After all the scraps are sewn on and you're happy with how it looks, you can quilt the cover any way you please. I chose to do a grid pattern in a dark brown thread just by quilting vertically then horizontally without drawing lines. I like how it turns out all wonky.


Then I slapped on some brown dotty binding.

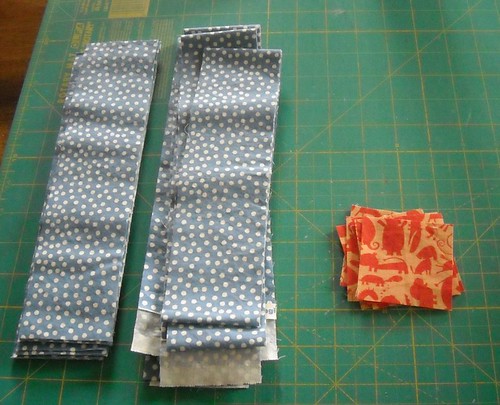
As for the straps, you can use ribbon or make your own straps from any fabric you like. I chose to go the ribbon route.


Cut your ribbon to the desired length -- I cut mine to 12" since my machine's about 7" wide. You'll need 4 pieces of cut ribbon.


I highly recommend treating the edges of your ribbon with Fray Check just so they don't unravel and look unruly after a while. 


Measure the side of your machine and where you'll like to place the ribbon. 2" up from the bottom works for me.


Mark on the reverse of your cover where you'll like the ribbon to go.


I placed my ribbons so that the mark is in the middle of the ribbon.


Pin your ribbon to the cover, turn over and stitch as closely to the binding as possible.


Tada! One ribbon fastened. Now repeat thrice.


You'll end up with one cute little scrappy patchwork sewing machine cover! 

A big thanks to Vicki for asking me to do a guest post on her blog :)

-- Audrie
 
Hi, it's Vicki again! Thank you so much for this tutorial, Audrie! If you have a chance, please stop by Audrie's blog--she makes lots of gorgeous quilts and also blogs about funny, random things in her life.