Here is the sashing + cornerstones tutorial for my Simple Squares Quiltalong. You can find all the other links (fabric requirements for 2 sizes and both block tutorials)
here. Feel free to join in at any time; there's no set time frame for this project. If you want to see other variations of this quilt, take a look at our
flickr group. Also, please let me know if you have any questions!
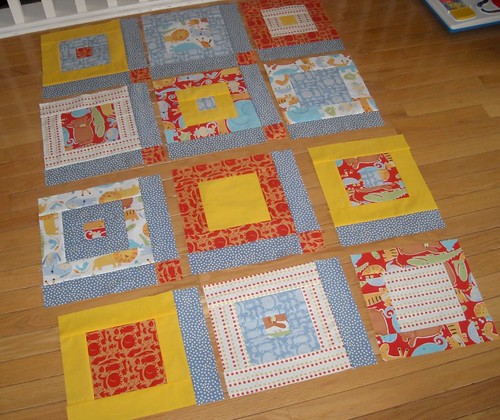
Step 1: Lay out your blocks
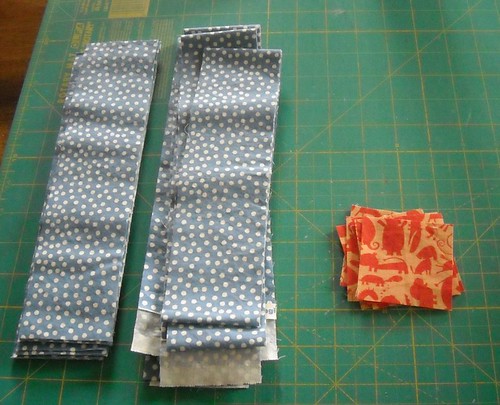
Step 2: Cut your sashing/border:
Cut 17, 10 1/2" x 2 1/2" strips
Cut 5 strips 2 1/2" x width of fabric
Cut 6 cornerstones, 2 1/2" squares
Step 3: Sew 10 1/2" x 2 1/2" strips to the right side of 8 of the blocks as shown below (press all seams as you go):
Step 4: Sew cornerstones to 6 of the 10 1/2" x 2 1/2" strips; these will be sewn to the bottom of 6 of the blocks as shown below. 10 1/2" x 2 1/2" strips will be sewn to the bottom of the blocks in the right hand column as well, except for the bottom right block.
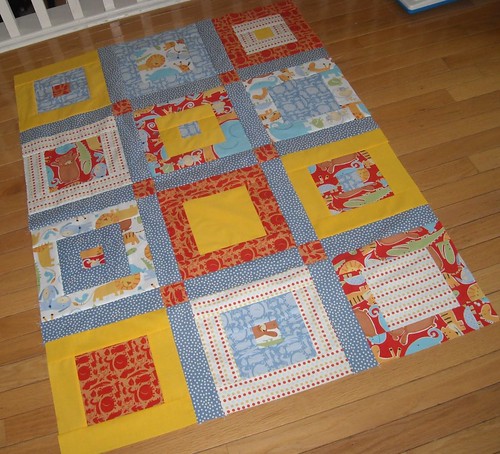
The following photo shows the strips that are arranged in the above photo, all sewn on.
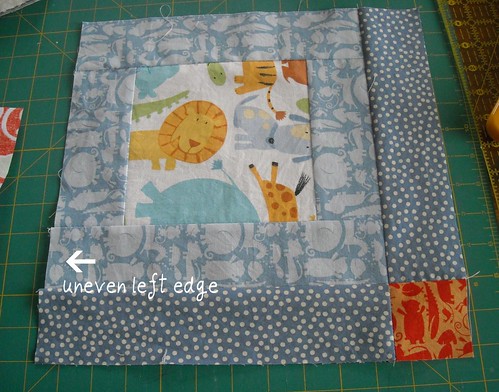
Step 5: Sew your rows together. Some of my blocks were a little uneven on the left edge:
So I straightened them up with my rotary cutter before assembling my rows:
Here are the rows all sewn together:
Step 6: Sew the rows together.
Step 7: Borders. You will use your width-of-fabric strips for the borders. Cut off the selvedges from two of the strips and piece them together. Then press that seam and sew the border to one of your long sides. Cut off the excess--I cut about 1/2" beyond the quilt top edge with my scissors and then go back and trim with the rotary cutter after pressing the border piece.
Then make sure you have a straight edge on your short piece and repeat for the other long side. Press and trim the border pieces on the long sides.
Sew the remaining border pieces to the short sides of your quilt, trim the edges and you're done with the quilt top!


16 comments:
Looks great! Can't wait to see it quilted!
Very cute! I really like the fabrics that you've used!
this is looking awesome...i am always a little afraid of sashing but this makes it look not too bad.
This is fabulous! You're so fast and you make it look so easy! Cute fabrics too! Thanks for the great quilt along and tutorial!
oh that came together terrific Vicki, love those dots!
Fantastic Vicki and you explained how it goes together so well! I am sure that sometime this year I will be coming back to this post so I can make one of these too!
looks great!
Really cute - I can't wait to try this!
What a cute quilt. It looks like it comes together really quickly! Thanks so much for the tutorial!
i love the orange and yellow, how they pop! quick and easy. great tutorial
Thank you so easy to follow.
Hello! Where can I find the instructions for finishing the quilt? Thanks!
Hi Kim! I hope you see this; I couldn't email you directly because you're a no-reply blogger. You can find instructions for layering, basting, free motion quilting, and binding in the free tutorials tab in the header of my blog. Hope this helps!
Thanks for the tute! I found you through google!
What about binding for this quilt, baby size?? You said 3/8 yard, but how wide to cute the strips?
Krista, I cut my binding strips 2 1/4". Sometimes 2 1/2".
Post a Comment