Pages

Friday, September 21, 2012

Beginning quilting group

I'm going to be teaching beginning quilting to some friends from church and we're going to start with a quilted plus pillow. I made up and quilted my sample over the last couple days:

plus pillow top
It's 16" square, and I still need to make it into a pillow. I quilted swirls and a few holly leaves inspired by the fabric. Here's a shot of the back so you can see the quilting a bit better:

holly leaf quilting


Speaking of pillows, my 12 year old boy made this creeper a couple weeks ago:

creeper
He's going to quilt it and make it into a pillow. It will be 20" finished (ok maybe a little smaller.) The creeper is from the game Minecraft, by the way. :)

Friday, September 14, 2012

Fall notes and giveaway winner

Thanks everyone for your birthday wishes! The giveaway winner was Karen O.; I'll be sending her a rainbow of scraps/charms. :) We went out to dinner as a family on my birthday and my husband is taking just me out to eat tonight; we're sort of stretching out the celebration. I also got a fun surprise package on Saturday from my friend in Kansas; she made me this adorable ruffled tote bag.
I've taken it twice on walks to the library this week; thanks Lorilee!

We've been getting into the swing of things now that the boys have been back in school for 2 weeks. We've had to adjust the routine and rules a little bit, but I think we've got a good system now as long as I can stick with it.

I have been faithfully working on my hand exercises, hoping I'll get most of the mobility back in the finger that I broke. I go to a hand therapist weekly and heat it up and do exercises 4-6 times a day. The bone is healed now and I'm so glad to be past that painful time. I have been given the ok to even use hand weights now and am working on getting the strength back in that hand.


A couple weeks ago I was the lucky winner of a giveaway from Beyond the Reef and wanted to give them a shout-out and thanks! I got this collection of fat quarters... I love the rich colors.
dear stella fqs
I'm not totally sure what I'll make with them yet, but I've had the Curlicue Crush pattern by Bec at Chasing Cottons (scroll down a bit to see it) in mind for a while, and I think it would be a good pattern for some of these larger prints.

Looking forward to the weekend--hope you have a good one!

Tuesday, September 11, 2012

Another way to finish up a quilt binding


binding1.1 
Hello! I've been wanting to do a couple of additions to my original quilt binding tutorial for a while, and I was finally able to take some photos when I bound my last quilt. This is a tutorial for finishing up the ends of a quilt binding with a diagonal seam. Instructions on getting your quilt binding to this point are here, but you will not sew down a "pocket" of binding at the beginning as shown in that post.

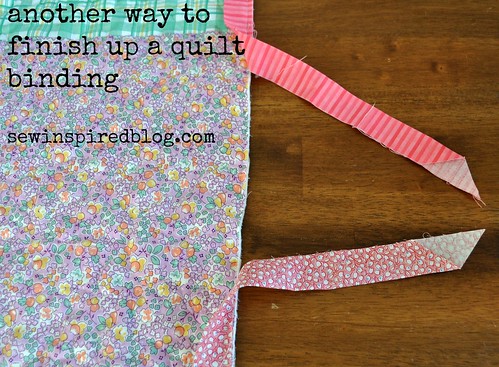
Step 1: Apply your quilt binding to the quilt, leaving about 6-8 inches of binding unsewn at both ends. Make sure the two ends of the binding overlap by at least 3-4 inches. (see photo above)

Step 2: Lay both ends of the binding fabric along the edge of the quilt, overlapping them. Mark the center of the overlap with a pin or a water soluble marker.
binding 2 

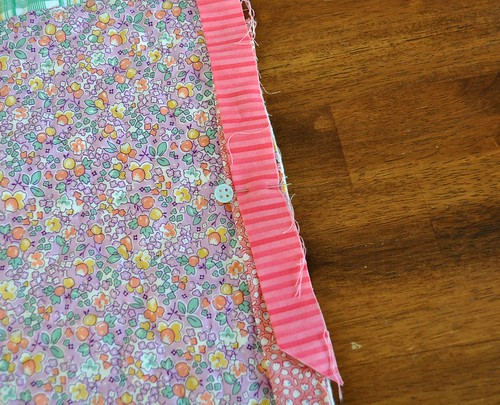
Step 3: Cut off the top binding strip about 1.5 inches from the pin. 
binding 3

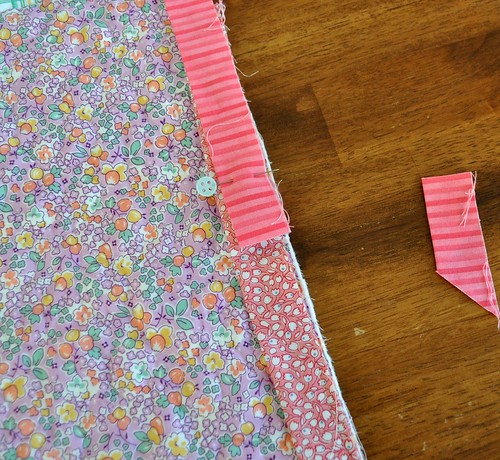
Step 4: Rearrange the binding strips so the one you just cut is on the bottom. Now you will cut the top strip. You'll need to measure the other binding strip before you cut it. The measurement needs to be the same as the width of your binding before you folded it, minus about 1/16". For example, I usually do a 2.25" binding, so I will cut my binding pieces so they overlap just a little bit less than 2.25". I used my trusty seam gauge from 8th grade sewing class to show the measurement here (see photo below). If your quilt binding is 2.5" then cut your strips so they overlap slightly less than 2.5". 

The reason for making the overlap slightly smaller is that the binding strips will probably stretch a little when you sew them down to the quilt, and the sewing machine will also ease the lower quilt layer so it fits the slightly shorter binding section. In the past, when I would sew this last section of quilt binding down without making it slightly shorter I would almost always end up with too much binding and it would either end up puckered or I would have to redo it to make it look right. Making the binding slightly shorter eliminates that problem.
binding 4 

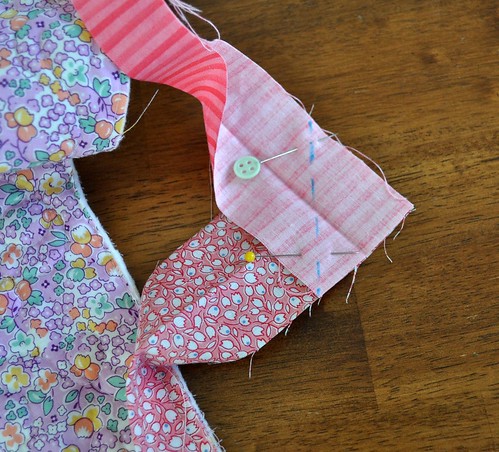
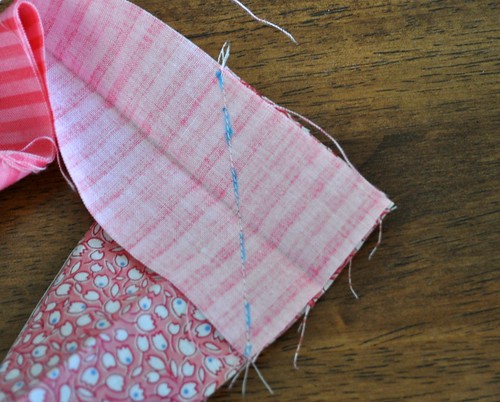
Step 5: Fold the bulk of the quilt out of the way, unfold your binding strips, and arrange them with right sides together and at a right angle, as shown in the photo below. Pin them together and draw a diagonal line from corner to corner. 
binding 5 

Step 6: Sew the binding strips together on the line you just drew. Backstitch at the beginning and end of the seam.
binding 6 

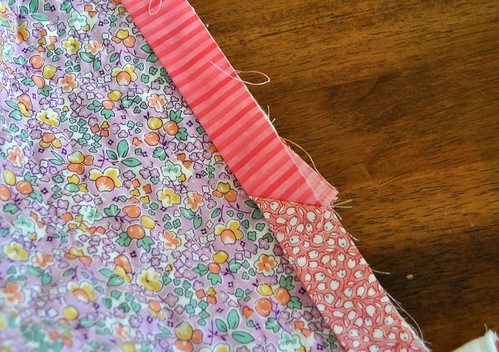
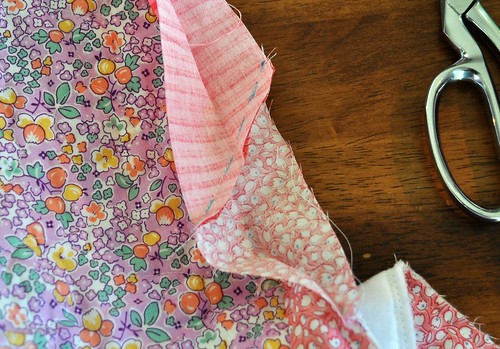
Step 7: Unfold the binding and stretch it out along the edge of the quilt to make sure it will fit. 
binding 7 

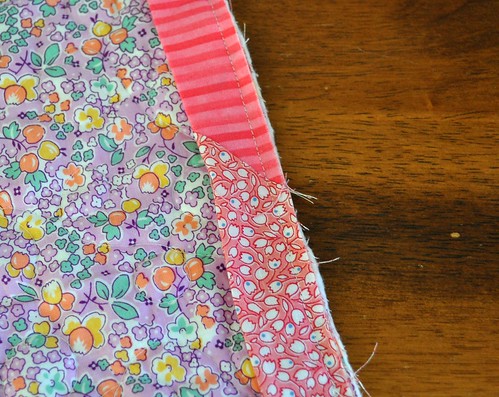
Step 8: If it fits right then trim the seam allowance to 1/4". If it seems too long then you can undo your seam and remeasure your binding pieces. If it is too short then... oh dear. You will probably need to undo your stitching several inches and add another, longer binding strip, and then start over. This shouldn't be a problem though if you measure carefully before you cut!
binding 8 

Step 9: Sew the binding down to the quilt.
binding 9 

Step 10: Finish the binding the way you choose. I machine stitched the binding down this time; sometimes I do it by hand.
binding 10
You're finished! I hope this is helpful. Happy binding!

Friday, September 07, 2012

Finished granny square quilt

I finished this up yesterday.

finished granny quilt 
I machine quilted it with meandering loops and machine bound it. I used binding scraps that I've been saving and only had to add a small piece to make the binding long enough. I still have a bunch of brown binding pieces.

Here it is with the light behind it:
finished granny quilt 2 
My girl was helping pin it to the fence. 

This quilt was a group effort--blocks were made by members of the Believe circle of the do Good Stitches charity bee. I need to get a label from my circle leader and then I will send it to our charity, My Very Own Blanket.

If you want to make a quilt like this, the block tutorial is here. I used the instructions here to make my blocks with setting triangles around the edges.  

I'm glad to finish this up and am 12 blocks into the next project already! 

One more thing. Today's my birthday and I want to do a small-ish giveaway. I'll send a rainbow or your-favorite-color-scheme scrap pack to a reader. Just leave a comment if you're interested (tell me what colors you like!) and I'll pick someone randomly in a few days. Comments closed now, thanks!